


Have you ever tried creating a water marble nail art? .Well, I know like me, many of you must have tried, some might have succeeded and some failed.Today I will be sharing with you the detailed step by step procedure with pictures, secret tips, techniques and finally a water marble nail art video to help you in creating your first successful, perfect water marble nail art.This is a very useful article for all beginners who have failed in getting those beautiful water marble nails.
Step by Step procedure to Create a Perfect Water Marble Nail Art
Things that You Need :
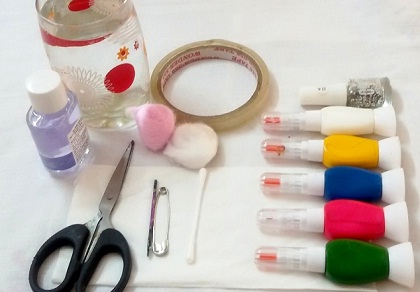
- A Glass or a Cup
- Filtered Room Temperature Water
- Col0red Nail Polish
- Base Coat and Top Coat
- Nail Polish Remover
- Tissue Paper
- Cotton Balls
- Cotton Bud
- Toothpick or Safety Pin
- Scissors
- Cello Tape
Step 1
Make sure your nails are not very oily or greasy.Avoid using any moisturiser on your nails before you start water marble nail art.Keep your nails clean and dry.
Step 2
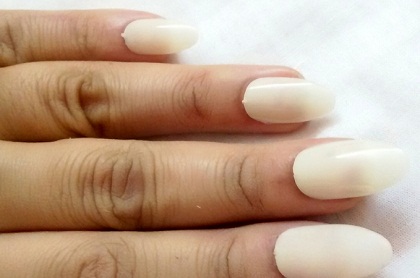
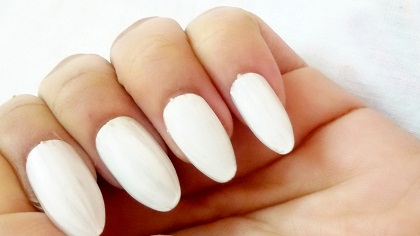
Apply a base coat to your nails to enhance the color intensity and to help the polish colors stick to your nail surface easily.It also gives your nails a clear visible water marble effect and makes your nail colors look more vibrant and brighter.You can use a white base coat or any other color of your choice.
Step 3
Instead of tap water use filter water.Tap water may contains chemicals that can prevent the nail polish from spreading on the surface.
Step 4
Never use cold water because it can cause your polish to dry quicker.Use filtered room temperature water or lukewarm water that works the best.
Step 5
Choose nail colors that have thin consistency and doesn’t dry quickly.If the nail polish is thin it will easily drop within a second.
Step 6
Do not drop the nail polish too high or add too much because it will fall to the bottom of the glass or it will not spread well.

Step 7
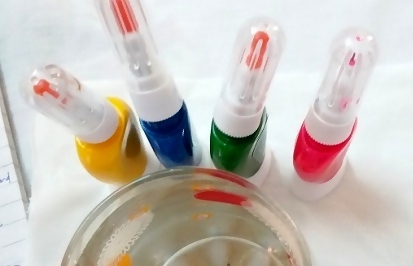
Keep all bottles of your nail polish open and ready.Place them within your reach because you have to work quickly.
Step 8
Before your start water marbling keep your windows closed and turn your AC or fan off.
Step 9
Do not use large cups or glasses this is because it will prevent the formation of a good layer of circle.
Step 10
Apply cello tape around the skin surrounding your nails to prevent nail polish sticking on your fingers.
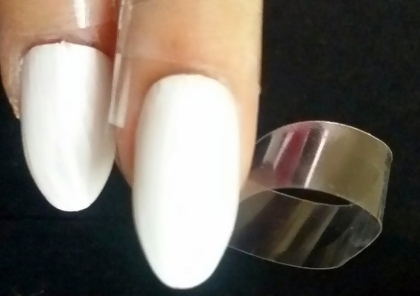
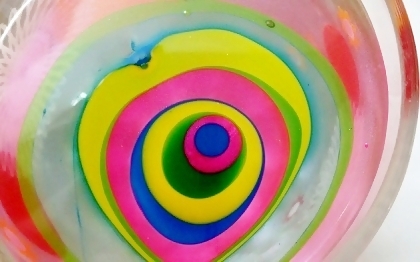
Step 11
Drop one or two drops of your second color nail polish on the top of the your first color(base color).Repeat and continue the process until it form concentric rings with different colors of nail polish.Keep a gap of maximum 3 to 4 seconds between each drops of nail polish.If you take long it may dry out.If the nail colors doesn’t spread easily shake your glass or cup.
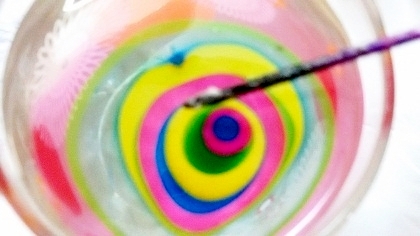
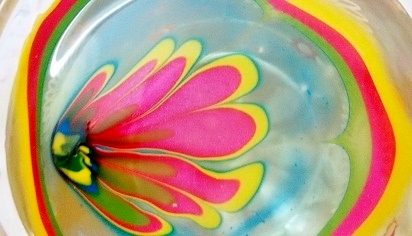
Step 12
Use a toothpick or a safety pin to create the water marble design.You can either start from the outer edge and drag towards the center or vice versa.Normally it is best to start from the second or third last ring because the outermost ring usually gets dried.
Step 13
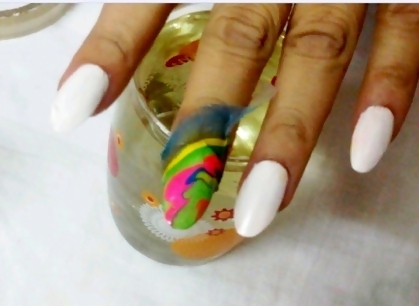
Once you have created your water marble design, try positioning your finger to the best part of the water mark where you want your nails to be colored.
Step 14
Dip your finger nail into the water as shown in the below screenshot.Just blow on the surface of the water to make it dry and then clean out the excess with the help of a cotton bud.

Step 15
Remove your finger nail straight out from the water exactly in the same position to prevent the formation of bubbles.
Step 16
Now gently remove the cello tape with the help of a scissors and wipe the excess on your finger with the help of a nail polish remover.
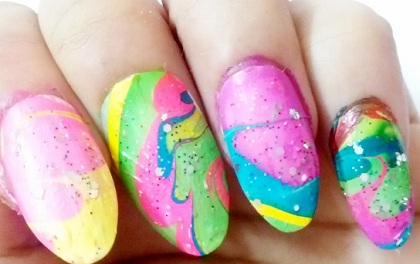
Step 17
For more shine apply a transparent glitter top coat.
Here is a quick video to create a perfect water marble nail art
Step 18
Congrats!! you have succeeded in creating your first ever perfect water marble nail art.


