


Butterflies are the most beautiful little creatures on earth.Just the sight of their brightly colored wings gives us a feeling of joy and cheerfulness.So, why not try these beautiful butterfly wing designs on your nails.Here are the detailed step by step procedure and pictures on how to achieve these 3 unique and colorful butterfly wing nails.
1. Multicolored Butterfly Wings
Things that you need
- Yellow, orange, pink, green, black and white nail colors.
- Micro glitter clear nail polish for top coat.
- Cotton swab or Q-tip.
- Toothpick
- Plastic plate
Steps
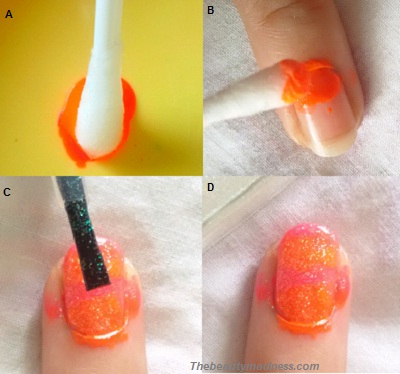
1.Take a cotton swab and moisten it by dipping into water.
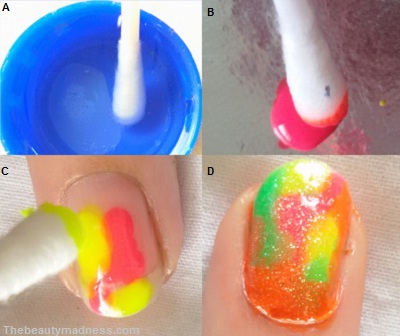
2.Pour few drops of pink color nail polish onto the plate.Now dip the wet cotton swab into the polish and dab it on your nail.Create irregular and messy shape.
3.Similarly repeat using yellow, orange and green nail colors.
4.Once the color dries completely, apply a clear glitter nail polish.
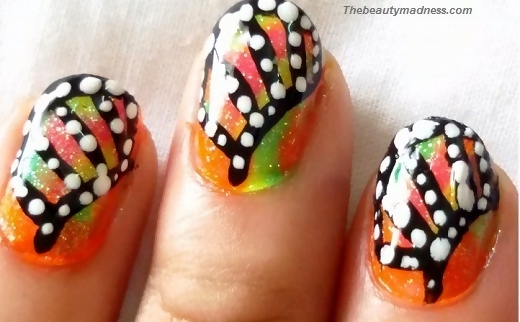
5.To outline the butterfly wings use a black color nail polish.
6.To start, draw a quarter circle at the bottom right corner of your nail.
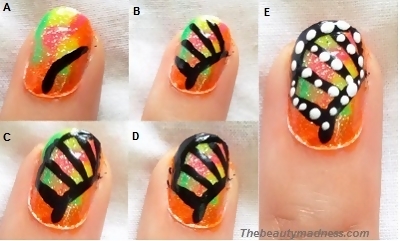
7.Now draw four or five straight lines extending outwards from the quarter-circle.Use the tip of your nail brush to draw the line.Then join the lines at the tip to create small sections.Color the tip of your nail.
8.Now using a toothpick, create tiny white dots on the black border.For a glossy high shine apply a clear top coat.
2.Orange Pink Glitter Butterfly Mesh Wings
Things that you need
- Orange, pink and deep blue or black nail colors.
- Micro glitter clear nail polish for top coat.
- Cotton swab or Q-tip.
- Glass or a bowl.
- Plastic plate
- Salt.
Steps
1.Take a cotton swab and wet it by dipping into water.
2.Pour few drops of orange color nail polish onto the plate.Now dip the moistened cotton swab into the nail polish and make a rough line near the cuticle.
3.Similarly make a line using a pink colored nail polish.When doing this slightly overlap the orange-colored line with the pink one.
4.Keep alternating the colors until the entire nail is covered.
5.Once the nail colors dries completely apply a clear glitter nail polish.
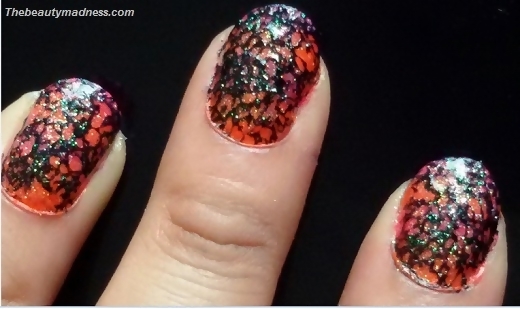
6.To create the mesh wing take a glass of room temperature filtered water.
7.Now pour few drops of deep blue or black colored nail polish into the water.Repeat and continue the process 4 to 5 times until it forms concentric circles.
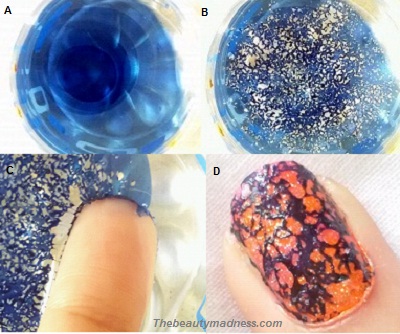
8.Take a pinch of salt and sprinkle on top of the water surface to form a mesh.
9.Dip your finger nails into the water and blow dry.Now clean the excess nail polish using a cotton swab.
10.Once the polish dries, finish off the nail design with a clear glitter nail polish.
3.Green Butterfly Wings Water Marble
Things that you need
- Fluorescent yellow, green and deep blue and white nail colors.
- Micro glitter clear nail polish for top coat.
- Glass
- Cotton swab or Q-tip.
- Safety pin.
Steps
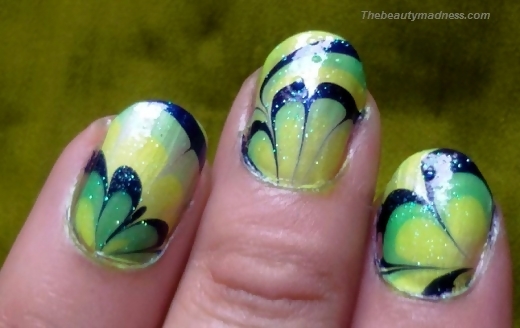
1.Apply a white layer base coat and allow it to dry.
2.Take a glass of room temperature filtered water.
3.Before you start water marbling keep all your bottles open and ready.
4.Now pour few drops of green color nail polish onto the water surface, followed by fluorescent yellow and then blue.

5.Repeat and continue the process with each colors until it forms concentric circles.
6.Now using a safety pin drag the outer edge of the circle towards the center.Repeat steps to create fine design.
7.Position your finger more towards the outer part of the design.
8.Gently dip your finger nail into the water and blow dry.Wipe out the excess using a cotton swab.
9.Once the nail color dries, apply a clear glitter top coat for high shine.


