










Wednesday, August 5, 2026

This 5-Minute Self-Massage Is Like Therapy for the Nervous System

In a world where stress, overstimulation, and constant to-do lists dominate our lives, I discovered something surprisingly simple that changed how I feel every day and that is a 5-minute self-massage routine that soothes my nervous system like nothing else.

Why It Works for the Nervous System

Your nervous system reacts to stress through tension in the muscles, rapid breathing, and an overactive mind. By massaging specific pressure points and slowing your breath, you activate the parasympathetic nervous system and the one responsible for “rest and digest.” This triggers:

  • Lowered heart rate
  • Calmer breathing
  • Reduced anxiety
  • Improved mood

5-Minute Nervous System Self-Massage: Step-by-Step

Do this seated or lying down, in a quiet space.

Step 1: Grounding Touch (30 seconds)

  • Place both hands over your heart and belly.
  • Take 3 deep, slow breaths. Inhale for 4 counts, exhale for 6.
  • Feel the warmth of your hands as it connects you to your body.

Step 2: Scalp & Forehead Release (45 seconds)

  • Use fingertips to gently massage your scalp in small circles.
  • Move down to your forehead: smooth it from the center outward, like ironing out stress.

Step 3: Jaw & Cheek Relaxation (45 seconds)

  • Gently press your index fingers under your cheekbones.
  • Make circular motions toward your ears.
  • Open your mouth slightly and massage along your jawline, a tension hotspot.

Step 4: Neck & Shoulders (1 minute)

  • Use your opposite hand to squeeze and knead your shoulder muscles.
  • Gently massage the sides and back of your neck.
  • Tilt your head from side to side to stretch as you massage.

Step 5: Hands & Wrists (1 minute)

  • Press your thumb into the center of your palm, making small circles.
  • Massage each finger, from base to tip.
  • Roll your wrist gently, then press into the web between your thumb and index finger (a calming acupressure point).

Step 6: Finish With Breath (1 minute)

  • Return your hands to your belly and heart.
  • Take 5 deep, slow breaths.
  • Visualize your body softening and your mind unwinding.

Amazing Benefits I Noticed

After a few days of this practice, I began to feel:

  • Immediate calm after stressful meetings
  • Better sleep I used it before bed
  • Less shoulder and jaw tension
  • A stronger sense of mind-body awareness
  • A healthier response to stress triggers

The Ayurvedic Eating Rule That Changed My Gut Health

For years, I struggled with inconsistent digestion .. bloating, fatigue after meals.I tried probiotics, food eliminations, and even intermittent fasting. Nothing truly worked until I stumbled upon one simple Ayurvedic principle that changed everything:

“Only eat when you’re truly hungry.”

Understanding the Ayurvedic Logic

In Ayurveda, digestion is powered by Agni, or digestive fire. Like any fire, it needs time and space to burn efficiently. Eating when you’re not hungry or constantly snacking, it weakens that fire, leading to sluggish digestion, toxin buildup (ama), and poor nutrient absorption.

Ayurveda doesn’t just look at what you eat, but when and how. And this rule taught me to listen to my body more deeply than ever before.


How I Applied This Rule

  • I stopped eating by the clock and waited for real hunger cues and not boredom or habit.
  • No grazing between meals. If I wasn’t hungry, I didn’t eat.
  • I gave my body time to fully digest, usually leaving 4–5 hours between meals.
  • I paused before snacking, asking: “Am I really hungry or just emotionally reacting?”

The Results?

Within a week, my bloating was noticeably reduced. I felt lighter after meals, and surprisingly, more energized. My sleep improved. I wasn’t obsessing over food anymore, because I had tuned into what my body truly needed.


Final Thoughts

In our fast-paced world, we often override the body’s wisdom. But this one Ayurvedic rule “eat only when hungry” restored a kind of inner balance I didn’t realize I was missing.Sometimes, healing isn’t about doing more. It’s about doing less and doing it with intention.

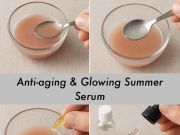
Never forget to make this Anti-aging & Glowing Summer Serum – use it & thank me later

DIY Anti-aging & Glowing Summer Serum

This DIY Anti-Aging & Glowing Summer Serum is a natural skincare solution designed to refresh and rejuvenate your skin during hot months. It helps reduce fine lines while promoting a radiant, sun-kissed glow.

Ingredients:

  • 2 tablespoons fresh grape juice (rich in antioxidants & resveratrol)
  • 1 tablespoon aloe vera gel (soothing, hydrating)
  • 1 capsule or ½ teaspoon Vitamin E oil (nourishing, anti-aging)
  • 3 teaspoons rose water (refreshing, brightening)
  • 1 drop lavender essential oil (calming, anti-inflammatory)

Methods:

  1. Mix the grape juice and aloe vera gel in a small bowl until well combined.
  2. Add the Vitamin E oil and stir gently.
  3. Pour in the rose water and mix again.
  4. Add 2 drops of lavender essential oil (don’t go overboard as essential oils are potent).
  5. Transfer to a small glass dropper bottle or airtight container.
  6. Store in the fridge for up to 5–7 days (due to the fresh juice). Shake before each use.

How to Use:
Apply 2–3 drops on clean skin at night or before makeup during the day. Massage gently until absorbed.

This 2-Ingredient Combo Gives You Magically Clear Skin!

Do you want clear, glowing skin using just two natural ingredients?
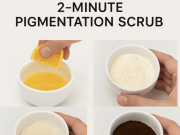
This powerful combo can help fade dark spots, calm inflammation, and boost your skin’s glow naturally!

How to Make It:

  1. Ingredients:
    • 1 tablespoon Pure Sandalwood Powder
    • 2–3 teaspoons fresh Amla Juice (or enough to make a smooth paste)
  2. Method:
    • Mix the sandalwood powder with amla juice to form a smooth, spreadable paste.
    • Apply it evenly to clean skin and leave on for 15–20 minutes.
    • Rinse with lukewarm water and pat dry. Use 2–3 times a week for best results.

Benefits:

  • Brightens Skin: Amla is rich in Vitamin C, which helps lighten pigmentation.
  • Fades Dark Spots: Sandalwood gently exfoliates and targets discoloration.
  • Calms Inflammation: Both ingredients are soothing and anti-inflammatory.
  • Boosts Collagen: Amla promotes collagen production for firmer, clearer skin.

DIY Healthy & Yummy Mango Oat Ice Cream: Your Summer Energy Fix

Beat the heat with this creamy, dreamy Mango Oats Ice Cream, a tropical treat packed with energy and health!

Ingredients:

  • 1 ripe mango (peeled and chopped)
  • 1/2 cup rolled oats
  • 1 1/2 cups milk
  • 1/2 cup chopped dates (soaked in warm water for 10 mins if hard)
  • 1/4 cup almonds (chopped or slivered)
  • 1/4 cup honey or maple syrup (optional, depending on sweetness)
  • A pinch of cardamom (optional)

Methods:

  1. Cook the oats: In a saucepan, cook oats with the milk until soft and thickened. Let it cool.
  2. Blend the base: In a blender, combine the cooked oats, chopped mango, dates and sweetener (if using). Blend until smooth and creamy.
  3. Fold in almonds: Stir in chopped almonds (reserve some for garnish).
  4. Freeze: Pour the mixture into a container, cover, and freeze for 4–6 hours, stirring every 2 hours for a creamier texture (or use an ice cream maker)
  5. Serve: Let it sit for a few minutes at room temperature before scooping. Garnish with more almonds or chopped dates if desired.

You Must Try these Healthy Delicious no-bake Summer Chocolate Energy Bites

Beat the summer slump with these no-bake Chocolate Energy Bites! Packed with natural fuel and rich flavor, they’re the perfect cool-down snack.

Ingredients:

  • 1 ripe banana (mashed)
  • 1/2 ripe mango (chopped finely or blended)
  • 1/2 cup dates (pitted and chopped or soaked if hard)
  • 1/4 cup walnuts (chopped)
  • 2 tbsp unsweetened cocoa or cacao powder
  • 2 tbsp coconut powder (or shredded coconut)
  • 1/4 cup oats (optional, to bind)
  • Pinch of salt

Methods:

  1. Prepare the mix: In a bowl, mash the banana and mango together. Add the chopped dates and stir until well combined.
  2. Add dry ingredients: Mix in cocoa powder, coconut powder, walnuts, and oats/flour. Stir until it forms a sticky dough.
  3. Chill: Refrigerate the mixture for 20–30 minutes to firm up.
  4. Shape: Roll into small bite-sized balls.
  5. Optional coating: Roll in extra coconut, cocoa, or crushed nuts.
  6. Store: Keep refrigerated in an airtight container for up to a week or freeze for longer.

These bites are naturally sweet, energizing, and full of fiber, healthy fats, and antioxidants and perfect for a post-workout snack or hot day pick-me-up!

Frizz, Split Ends, Dullness — All Gone in 10 Mins After This DIY Treatment”

Dreaming of soft, frizz-free, and lustrous hair? You don’t need a salon visit, just a few kitchen staples and a little love.
This nourishing homemade treatment brings life back to dull strands, naturally and affordably.

Frizz-Free Shine: DIY Deep Conditioning Hair Mask

Ingredients:

  • 3 tablespoons moisturizing conditioner
  • 1 tablespoon extra virgin olive oil
  • 2 tablespoons coconut milk (full-fat, unsweetened)
  • 1 egg yolk (optional boosts strength and shine)

Mathod:

  1. Combine all the ingredients in a bowl and whisk until creamy.
  2. Apply the mixture to dry or damp hair, focusing on mid-lengths to ends.
  3. Cover with a shower cap or wrap; leave on for 10 minutes.
  4. Rinse with lukewarm water, followed by a gentle shampoo.
  5. Finish with a cold water rinse to seal in moisture and enhance shine.

Magical Benefits:

Say goodbye to frizz, split ends, and dullness in just one use.
Hair feels instantly softer, looks shinier, and becomes easier to manage.
With regular use, enjoy salon-like results right from your home!

Why Grandma Was Right About Using Curd and a Pinch of Turmeric on Your Skin — But You Must Use It the Right Way

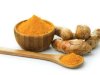
Before modern skincare had labels like “brightening” and “anti-inflammatory,” our grandmothers were already using simple kitchen ingredients to achieve glowing skin. One such timeless remedy? Curd mixed with a pinch of turmeric.

It might seem old-fashioned, but this humble mixture has stood the test of time.

The Ritual: A 2-Minute Skin Treat

To try it at home, mix 1 tablespoon of fresh curd with just a pinch of pure turmeric not more, or it might stain your skin yellow. Gently massage it onto your clean face in upward circular motions for about 2 minutes, then leave it on for an additional 5–10 minutes. Rinse with lukewarm water and pat dry.

This simple 2-in-1 routine acts as a cleanser and a mask, leaving your skin feeling soft, fresh, and nourished.


Why It Works: The Benefits of Curd + Turmeric

1. Brightens Dull Skin

Curd contains lactic acid, which gently exfoliates dead skin and reveals a brighter, smoother surface. Turmeric, a known natural brightener, evens out the skin tone and reduces pigmentation.

2. Reduces Acne and Blemishes

Turmeric is packed with curcumin, a powerful anti-inflammatory and antibacterial compound. It helps calm acne-prone skin, reduces redness, and prevents future breakouts.

3. Hydration Without Clogging

Curd deeply hydrates the skin thanks to its healthy fats and proteins. Unlike heavy creams, it moisturizes without making the skin greasy or clogging pores.

4. Natural Glow, No Filters Needed

The upward massage boosts blood circulation, promoting a healthy, natural glow. The probiotics in curd also support skin barrier health, while turmeric leaves a golden, radiant finish.


🧡 Grandma Knew Best

This age-old combination of curd and turmeric isn’t just a skincare trick, it’s a nourishing ritual that your skin will thank you for. No harsh chemicals. No expensive products. Just simple, natural goodness.

10 Vegan Proteins That’ll Make You Forget About Meat

1. Horse Gram (Kulthi Dal)

Protein: ~22g per 100g (dry)
Overview: A protein-dense lentil with an earthy flavor, considered a superfood in Ayurveda.
How to Use: Great for kulthi dal, soups, rasam, or sprouts.
Health Benefits: Aids in fat loss, diabetes management, and kidney detox.
Replaces: Red meat (like mutton) – offers similar protein density and iron benefits without the saturated fat.


2. Sattu (Roasted Gram Flour)

Protein: ~20g per 100g
Overview: A nutrient-packed flour made by roasting black chana; naturally high in fiber and protein.
How to Use: Mixed with water, lemon, and spices as a drink, or used in parathas and litti.
Health Benefits: Cooling in nature, helps digestion, boosts energy.
Replaces: Protein shakes or eggs – easy to digest, portable, and no cooking required.


3. Soy Nuggets (Nutrela)

Protein: ~15g per ½ cup (cooked)
Overview: Meat-like texture makes these a staple in vegan protein meals.
How to Use: Add to curries, biryani, cutlets, or stir-fries.
Health Benefits: High in protein and fiber, low in fat.
Replaces: Chicken or mutton – perfect for curries and cutlets with the same meaty bite.


4. Chana (Kabuli Chickpeas)

Protein: ~15g per cup (cooked)
Overview: Mild-flavored legume that’s rich in protein, iron, and fiber.
How to Use: Perfect in chole, salads, chaats, or roasted as a snack.
Health Benefits: Good for heart health, satiety, and blood sugar regulation.
Replaces: Chicken in salads or kebabs – offers a satisfying, meaty texture and plant-based protein.


5. Rajma (Kidney Beans)

Protein: ~15g per cup (cooked)
Overview: Hearty, protein-rich legume popular in North Indian dishes.
How to Use: Best with rajma chawal, or in wraps and stews.
Health Benefits: Rich in iron, fiber, and antioxidants.
Replaces: lamb in stews – gives a meaty mouthfeel and slow-cooked depth.


6. Moong Dal (Split Green/Yellow Moong)

Protein: ~14g per cup (cooked)
Overview: Light and easy on digestion, yet protein-packed.
How to Use: Great for dal, chilla, sprouts, or halwa.
Health Benefits: Detoxifying, gut-friendly, and versatile.
Replaces: Eggs in breakfast – makes protein-rich pancakes or dosas.


7. Kala Chana (Black Chickpeas)

Protein: ~13g per cup (cooked)
Overview: More fibrous and dense than white chana; excellent for sustained energy.
How to Use: Dry roasted, in sabzi, chaat, or sundal.
Health Benefits: Diabetic-friendly, high in iron.
Replaces: Boiled eggs – for high-protein salads or dry meals.


8. Urad Dal (Black Gram)

Protein: ~12g per cup (cooked)
Overview: Rich and heavy lentil, often combined with rice or used in thick gravies.
How to Use: Essential in idli/dosa batters, dal makhani, medu vada.
Health Benefits: Good for bone strength, iron absorption, and stamina.
Replaces: Paneer or dairy proteins – especially when fermented or cooked in creamy dishes.


9. Toor Dal (Arhar / Pigeon Pea)

Protein: ~11g per cup (cooked)
Overview: A staple in Indian homes, this dal has a soft texture and slightly nutty taste.
How to Use: Great for sambar, dal fry, and varan.
Health Benefits: Easy to digest, high in folate and protein.
Replaces: Egg curry – mild flavor and rich in amino acids.


10. Hemp Seeds

Protein: ~10g per 3 tbsp
Overview: Superfood seeds packed with protein, omega-3s, and magnesium.
How to Use: Sprinkle over oats, blend in smoothies, or mix into roti dough.
Health Benefits: Supports muscle growth, heart health, and brain function.
Replaces: Fish (for omega-3s and protein) – without the mercury risk or animal source.

This Quick Scalp Massage Routine Literally Wakes Up My Follicles and Stimulates Hair Growth

Scalp massage improve blood circulation to your hair follicles, which may help deliver more nutrients and oxygen, both important for healthy and strong hair growth. It can also reduce stress, which is a big factor in hair loss.Here is a simple yet effective quick scalp massage routine that awakens hair follicles and promotes hair growth.

Quick Scalp Massage Routine to Stimulate Hair Growth

  1. Warm up :
    • Rub a few drops of oil between your palms (like rosemary oil, peppermint oil, or just coconut oil).
    • Oils aren’t necessary, but they add slip and extra nourishment.
  2. Basic fingertip massage (3–5 minutes):
    • Use your fingertips (not nails) and apply gentle pressure in small circular motions across your scalp.
    • Focus on one area at a time ( top, sides, back).
  3. Kneading motion (2–3 minutes):
    • Press and gently “lift” sections of your scalp, almost like you’re kneading dough.
    • This motion helps stimulate blood flow even more.
  4. Tapping (1 minute):
    • Lightly tap your fingers all over your scalp like you’re playing a piano.
  5. Inversion method (optional for a boost):
    • Tilt your head upside down while massaging (like over a sink or lying on your bed with your head hanging off slightly).
    • This is supposed to further increase blood flow.

Tips:

  • Consistency matters: 5–10 minutes a day is ideal.
  • Be gentle: Too much pressure can cause damage instead of help.
  • Use stimulating oils: Rosemary oil, in particular, has some research behind it for hair regrowth.

Results:
You will notice reduced hair shedding and fuller-looking hair within a month.It’s definitely not a miracle cure but it can really help with overall scalp and hair health.

MUST READ

12 Miracle Remedies For Weight Loss

4
Not able to shed those extra kilos easily? Tired of the so-called weight loss pills, diet supplements and slimming machines but still not able to...

10 Quick Budget Beauty Tips