










Wednesday, August 5, 2026

10 Little-Known Makeup Hacks for Mesmerizing Results!

These little-known makeup hacks can elevate your beauty game and help you achieve mesmerizing results with ease.These are designed to enhance your features, make your makeup application easier, and leave you with a radiant and captivating appearance.

1.No-Smudge Lower Lash Mascara: To avoid smudging on your lower lashes, apply a clear mascara or coat them with a clear brow gel instead of regular mascara.

2.Eye Makeup Sealant: Spritz a bit of makeup setting spray on an angled eyeliner brush before applying your eyeliner. It will help the liner stay in place and intensify the color.

3.Inner Corner Highlight: For an eye-opening effect, use a light eyeshadow or highlighter on the inner corners of your eyes and the center of your eyelids.

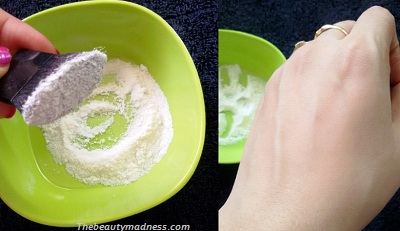
4.DIY Cream Highlighter: Mix a small amount of your favorite loose highlighter powder with a drop of facial oil to create a creamy, customized highlighter.

5.Makeup-Free Face Mist: After removing makeup, spray rose water or aloe vera juice on your face to refresh and soothe your skin.

6.Customized Lip Color: Create a unique lip color by mixing a cream or liquid blush with your lip balm or clear gloss. This way, you can have a lip shade that complements your blush perfectly.

7.Lip Plumping Trick: Apply a tiny amount of peppermint essential oil to your lips before applying lip gloss or lipstick. The cooling sensation can create a subtle plumping effect.

8.Double-duty Bronzer: Use a matte bronzer as an eyeshadow in your crease to add warmth and depth to your eyes.

9.Dry Shampoo as Eyebrow Volumizer: Sprinkle a little dry shampoo on a spoolie brush and comb it through your eyebrows to add volume and hold.

10.Color-Correcting Lipstick: If you have severe dark under-eye circles, try using a peach toned lipstick as a color corrector before concealer to neutralize the darkness.

Olive Oil Hair Pack to Repair Dry, Damaged hair| Get Glossy Hair

Olive oil is a wonderful natural remedy for repairing dry and damaged hair. Here’s a homemade olive oil hair pack specifically designed to nourish, moisturize, soften and revive your hair.It leaves your hair glossy and healthy.

Ingredients:

  1. Extra virgin olive oil
  2. Coconut oil (optional)
  3. Aloe vera gel or fresh aloe vera extract
  4. Essential oil (such as lavender or rosemary) – optional for added fragrance and benefits
  5. Shower cap or plastic wrap
  6. Towel
  7. Mild shampoo

Method:

  1. In a mixing bowl, take 3-4 tablespoons of extra virgin olive oil. You can adjust the quantity based on your hair length and thickness.
  2. Optionally, you can add 1-2 tablespoons of coconut oil to the mixture. Coconut oil provides additional moisture and can help strengthen your hair.
  3. Add 1-2 tablespoons of aloe vera gel or the fresh extract to the bowl. Aloe vera is well-known for its soothing and hydrating properties, which can be highly beneficial for damaged hair.
  4. If you wish, you can add a few drops of your favorite essential oil for a pleasant fragrance and added benefits. Lavender and rosemary essential oils are good choices as they can also promote hair health.
  5. Mix all the ingredients thoroughly until you get a smooth and consistent paste.
  6. Before applying the pack, make sure your hair is dry and detangled.
  7. Divide your hair into sections and start applying the olive oil hair pack from the roots to the tips. Massage your scalp gently to promote blood circulation.
  8. Once your hair is entirely covered with the hair pack, put on a shower cap or wrap your hair with plastic wrap to trap the heat and enhance the effectiveness of the treatment.
  9. Wrap a warm towel around your head to create some heat. This helps the hair pack penetrate better into the hair shaft.
  10. Leave the pack on for at least 1-2 hours. For even better results, you can keep it overnight.
  11. After the desired time has passed, rinse your hair thoroughly with lukewarm water. Avoid using hot water, as it can strip away the natural oils from your hair.
  12. Shampoo your hair as usual to remove any leftover residue from the pack.👇

Tips:

  • This olive oil hair pack can be applied once a week or every two weeks, depending on the level of damage to your hair.
  • Be patient, as it may take a few applications to see significant improvements in the condition of your hair.

5 Lip-Smacking, 3-ingredients Instant Protein Ladoo Recipes for the Health-Conscious!”

These protein ladoo recipes are quick to make, rich in essential nutrients, and perfect for satisfying your sweet cravings while providing a healthy dose of protein. Enjoy these wholesome and delicious treats as part of a balanced diet!

Protein Ladoo Recipe#1

Ingredients:

  • 1 cup roasted peanuts, coarsely ground
  • 1/2 cup dates, pitted and chopped
  • 1 tablespoon honey (optional, for added sweetness)

Method:

  • In a mixing bowl, combine coarsely ground peanuts and chopped dates
  • If desired, add honey or maple syrup for extra sweetness and to bind the mixture.
  • Mix everything well until the ingredients come together to form a dough-like consistency.
  • Take small portions of the mixture and shape them into protein-rich Peanut Ladoos.
  • Store in an airtight container and enjoy these quick and nutritious treats.

Protein Ladoo Recipe#2

Ingredients:

  • 1 cup dates, pitted and chopped
  • 1/2 cup chia seeds
  • 1/4 cup unsweetened nut butter (almond, peanut, or any of your choice)

Method:

  • In a food processor, blend chopped dates, chia seeds and nut butter until a sticky mixture forms.
  • If the mixture is too dry, add a little water to help bind it.
  • Take small portions of the mixture and shape them into protein-rich Dates and Chia Seeds Ladoos.
  • Keep the ladoos in the refrigerator to firm up before serving.
  • Enjoy these easy and quick protein-packed snacks whenever you crave a healthy treat.

Protein Ladoo Recipe#3

Ingredients:

  • 1 cup almonds, finely ground
  • 1/2 cup desiccated coconut
  • 1/4 cup honey or agave syrup

Method:

  • In a bowl, mix finely ground almonds, desiccated coconut and honey or agave syrup.
  • Knead the mixture until it forms a sticky dough.
  • Take small portions of the mixture and shape them into protein-rich Almond Coconut Ladoos.
  • Refrigerate the ladoos for about 15-20 minutes to set.
  • Savor these delicious and protein-packed treats anytime you need a quick energy boost.

Protein Ladoo Recipe#4

Ingredients:

  • 1 cup roasted sesame seeds
  • 1/2 cup jaggery or dates (if using dates, make sure they are pitted and chopped)
  • 1/4 teaspoon cardamom powder (optional, for flavor)

Method:

  • In a food processor, blend roasted sesame seeds, jaggery or chopped dates, protein powder, and cardamom powder (if using) until well combined.
  • The mixture should be sticky enough to shape into ladoos. If needed, you can add a little ghee or nut butter to bind the mixture.
  • Take small portions of the mixture and roll them into protein-rich Sesame Ladoos.
  • Allow the ladoos to set in the refrigerator for about 15 minutes before serving.
  • Enjoy these nutty and protein-packed Sesame Protein Ladoos as a nutritious snack.

Protein Ladoo Recipe#5

Ingredients:

  • 1 cup desiccated coconut
  • 1/2 cup cashews, finely chopped
  • 1/4 cup honey or maple syrup
  • 1/4 teaspoon vanilla extract (optional)

Method:

  • In a mixing bowl, combine desiccated coconut, finely chopped cashews, honey or maple syrup, and vanilla extract (if using).
  • Mix everything well until the ingredients stick together to form a dough-like consistency.
  • Take small portions of the mixture and shape them into protein-rich Coconut and Cashew Ladoos.
  • Allow the ladoos to set in the refrigerator for about 20-30 minutes.
  • Relish these delightful and protein-packed Coconut and Cashew Protein Ladoos as a guilt-free treat.

5 Quick, Delicious Potato Snack Recipes to Try Right Now! Low-Calorie

These five unique and low-calorie snacks using potatoes offer a variety of flavors and textures to enjoy while keeping your calorie intake in check.Enjoy these nutritious and satisfying snacks guilt-free!

1.Potato Protein Tikkis

Ingredients:

  • 1 cup yellow moong dal, soaked for 2-3 hours
  • 2 medium-sized potatoes, boiled and mashed
  • 1 green chilli, finely chopped (adjust to spice preference)
  • 1/2 teaspoon ginger paste
  • 1/2 teaspoon cumin seeds
  • 1/2 teaspoon turmeric powder
  • 1/2 teaspoon red chilli powder (adjust to spice preference)
  • Salt to taste
  • Cooking spray or a little oil for shallow frying

Method:

  1. Grind the soaked moong dal into a coarse paste without adding water.
  2. In a mixing bowl, combine the moong dal paste, mashed potatoes, chopped green chili, ginger paste, cumin seeds, turmeric powder, red chili powder, and salt. Mix well to form a thick mixture.
  3. Shape the mixture into small tikkis or patties.
  4. Heat a non-stick pan and spray cooking spray or use a little oil for shallow frying.
  5. Cook the tikkis on medium heat until both sides are crispy and golden brown.
  6. Remove the tikkis from the pan and place them on a paper towel to absorb excess oil.
  7. Serve the delicious and low-calorie potato and moong dal tikkis with tamarind chutney or green chutney.

2.Potato Refreshing Salad

Ingredients:

  • 2 medium-sized boiled potatoes, diced
  • 1 cucumber, diced
  • 1/4 cup finely chopped onions
  • 1/4 cup chopped tomatoes
  • 1 green chili, finely chopped (adjust to spice preference)
  • 1/4 cup chopped coriander leaves
  • 1 tablespoon freshly squeezed lemon juice
  • 1/2 teaspoon chaat masala
  • 1/2 teaspoon roasted cumin powder
  • Salt to taste

Method:

  1. In a mixing bowl, combine the diced boiled potatoes, diced cucumber, chopped onions, chopped tomatoes, green chili, and chopped coriander leaves.
  2. Sprinkle chaat masala, roasted cumin powder, and salt over the mixture.
  3. Add freshly squeezed lemon juice and gently toss all the ingredients together to ensure they are well combined.
  4. Taste the salad and adjust the seasonings if needed.
  5. Refrigerate the salad for about 15-20 minutes to allow the flavors to meld together.
  6. Serve the refreshing and low-calorie Boiled Potato and Cucumber Salad as a light and nutritious snack or side dish.

3.Power-Packed Potato Green Cutlets

Ingredients:

  • 2 medium-sized boiled potatoes, mashed
  • 1 cup finely chopped spinach leaves (blanched and drained)
  • 1/4 cup finely chopped onions
  • 1 green chili, finely chopped (adjust to spice preference)
  • 1/2 teaspoon ginger paste
  • 1/2 teaspoon garam masala
  • 1/2 teaspoon cumin powder
  • 1/2 teaspoon red chili powder (adjust to spice preference)
  • Salt to taste
  • 1 tablespoon cornflour or besan (gram flour) for binding
  • Cooking spray or a little oil for shallow frying

Method:

  1. In a mixing bowl, combine mashed potatoes, chopped spinach, chopped onions, green chili, ginger paste, garam masala, cumin powder, red chili powder, and salt.
  2. Add cornflour or besan (gram flour) to bind the mixture and mix well.
  3. Shape the mixture into small cutlets.
  4. Heat a non-stick pan and spray cooking spray or use a little oil for shallow frying.
  5. Place the cutlets on the pan and cook until both sides are golden brown and crispy.
  6. Serve hot with green chutney or mint yogurt dip.

4.Spicy Potato Snack

Ingredients:

  • 2 medium-sized boiled potatoes, diced
  • 1/4 cup finely chopped onions
  • 1/4 cup finely chopped tomatoes
  • 1 green chili, finely chopped (adjust to spice preference)
  • 1/2 teaspoon chaat masala
  • 1/2 teaspoon roasted cumin powder
  • 1/2 teaspoon red chili powder (adjust to spice preference)
  • Salt to taste
  • Chopped coriander leaves for garnish
  • Tamarind chutney and green chutney for drizzling

Method:

  1. In a mixing bowl, combine diced boiled potatoes, chopped onions, chopped tomatoes, green chili, chaat masala, roasted cumin powder, red chili powder, and salt.
  2. Toss the mixture well to coat the potatoes with the spices.
  3. Drizzle tamarind chutney and green chutney over the potato mixture.
  4. Garnish with chopped coriander leaves.
  5. Serve the spicy and tangy aloo chaat as a flavorful and low-calorie snack.

5.Potato Cups

Ingredients:

  • 2 large boiled potatoes, mashed
  • 1/4 cup boiled green peas
  • 1/4 cup finely chopped onions
  • 1 green chili, finely chopped (adjust to spice preference)
  • 1/2 teaspoon ginger paste
  • 1/2 teaspoon garam masala
  • 1/2 teaspoon cumin powder
  • 1/2 teaspoon red chilli powder
  • Salt to taste
  • Phyllo or wonton wrappers (readily available in stores)
  • Cooking spray or a little oil for brushing

Method:

  1. In a mixing bowl, combine mashed potatoes, boiled green peas, chopped onions, green chili, ginger paste, garam masala, cumin powder, red chili powder, and salt. Mix well to form a flavorful potato filling.
  2. Preheat your oven to 375°F (190°C).
  3. Take a phyllo or wonton wrapper and place it in a muffin tin or cupcake mold. Press the wrapper gently to form a cup shape.
  4. Fill each wrapper cup with the prepared potato filling, ensuring not to overfill them.
  5. Take another phyllo or wonton wrapper and place it on top of the potato filling, pressing it gently to cover the filling.
  6. Lightly brush the top of each wrapper with cooking spray or a little oil to help them turn crispy and golden brown when baked.
  7. Repeat the process with the remaining wrappers and filling to make more samosa cups.
  8. Bake the samosa cups in the preheated oven for about 15-20 minutes or until the wrappers are crispy and lightly browned.
  9. Once done, remove the samosa cups from the oven and let them cool slightly.
  10. Serve the delicious and low-calorie Potato Cups as an appetizing snack or party appetizer. They can be enjoyed on their own or served with chutney or dipping sauces of your choice.

12 Bright Skin Hacks for a Lustrous Transformation

  • Say goodbye to dullness and embrace a vibrant, youthful look with these unique and effective skincare practices. Get ready to indulge in a luxurious skincare routine that will bring out the best in your skin and elevate your beauty to new heights.
  • Rice Water Toner: Use rice water as a toner to brighten the skin. Soak rice in water for a few hours, strain, and use the water as a gentle toner.
  • Vitamin C Serum: Incorporate a vitamin C serum into your skincare routine to help even out skin tone, reduce hyperpigmentation, and boost collagen production.
  • Double Cleansing with Oil and Water: Start your skincare routine with an oil-based cleanser to remove makeup, sunscreen, and sebum. Follow it up with a water-based cleanser to remove impurities and ensure a thorough cleanse.
  • Papaya Enzyme Exfoliator: Create a natural exfoliator using mashed ripe papaya mixed with a little honey. The papaya enzymes help remove dead skin cells and reveal a brighter complexion.
  • Hibiscus Flower Infused Oil: Infuse hibiscus flowers in a carrier oil (such as almond or jojoba oil) to create a potent anti-aging facial oil. Hibiscus is rich in antioxidants and can help improve skin elasticity.
  • Facial Steaming with Herbs: Occasionally steam your face with a bowl of hot water infused with herbs like chamomile, lavender, or rosemary. This helps to open up pores, cleanse the skin deeply, and improve circulation.
  • Gua Sha Facial Massage: Use a Gua Sha tool to gently massage your face, improving lymphatic drainage, reducing puffiness, and enhancing the absorption of skincare products.
  • Turmeric Face Mask: Apply a homemade face mask with turmeric, yogurt, and honey to brighten and revitalize the skin. Turmeric has natural anti-inflammatory and brightening properties.
  • Milk Bath Soak: Treat yourself to a milk bath soak by adding a cup of milk and a few drops of your favorite essential oil to warm bathwater. Milk contains lactic acid, which helps exfoliate and brighten the skin.
  • Ice Cube Facial Massage: Massage your face gently with an ice cube wrapped in a soft cloth to reduce inflammation, tighten pores, and promote blood circulation.
  • Sleep on Silk Pillowcases: Sleeping on silk pillowcases can reduce friction, prevent wrinkles, and keep the skin hydrated.
  • Green Tea Face Mist: Prepare a green tea face mist by steeping green tea bags in hot water, letting it cool, and transferring it to a spray bottle. Spritz your face throughout the day for a refreshing boost and antioxidant protection.

Remove Pigmentation patches easily At Home

Pigmentation patches, such as dark spots or uneven skin tone, can be a common concern for many individuals. These patches can occur due to various factors, including sun exposure, hormonal changes, acne scars, or aging. While there are several costly professional treatments available but you can try out this cost-effective remedy that will help remove those existing pigmentation patches easily at home to a great extent.

Ingredients:

  1. Banana: 1 ripe banana
  2. Curd (Yogurt): 2 tablespoons
  3. Masoor Dal (Red Lentil) Paste: 2 tablespoons
  4. Milk: 1-2 tablespoons
  5. Turmeric Powder: 1/2 teaspoon (optional)

Method:

  1. Mash the ripe banana in a bowl until it forms a smooth paste.
  2. Add curd, masoor dal paste, milk, and turmeric powder (if desired) to the banana paste.
  3. Mix all the ingredients together until well combined.
  4. Cleanse your face and pat it dry.
  5. Apply the paste to the areas with pigmentation patches, ensuring even coverage.
  6. Leave the paste on for about 20-30 minutes to allow the ingredients to work on your skin.
  7. Rinse off with lukewarm water and gently pat your skin dry.
  8. Follow up with your regular moisturizer.
  9. Use it 3 thrice in a week for upto a month to see visible results.

How it works

  • Banana contains natural enzymes and vitamins that may help brighten and nourish the skin.
  • Curd (yogurt) contains lactic acid, which may aid in exfoliation and promote a more even skin tone.
  • Masoor dal paste is known for its skin brightening properties and may help reduce pigmentation patches.
  • Milk helps moisturize the skin and adds a nourishing element to the paste.
  • Turmeric powder (optional) has antioxidant and anti-inflammatory properties that may contribute to reducing pigmentation.

Apply Rice Water this Way & Turn Thin Hair to Thick Long Hair in 45 Days!

Follow this step-by-step guide to transform your Thin Hair to Thick Long Hair in 45 Days!

  • Prepare the rice water: Take 1/2 cup of uncooked rice (any type) and rinse it thoroughly to remove any impurities. Then, place the rinsed rice in a bowl and add 2-3 cups of water. Let the rice soak for about 30 minutes, gently stirring occasionally. Afterward, strain the rice and collect the water in a clean container. This water is your rice water solution.
  • Wash your hair: Before applying the rice water, make sure your hair is clean. You can shampoo your hair as usual and rinse it thoroughly.
  • Apply the rice water: Slowly pour the rice water onto your scalp and hair. Use your fingertips to massage the rice water into your scalp, ensuring it reaches the roots of your hair. Continue massaging for a few minutes to promote blood circulation.
  • Distribute the rice water: After massaging, pour the remaining rice water over the length of your hair. Gently comb your hair with your fingers or a wide-toothed comb to ensure the rice water is evenly distributed.
  • Leave it on: Let the rice water sit on your hair for about 15-20 minutes. You can choose to cover your hair with a shower cap or towel during this time to prevent dripping.
  • Rinse your hair: After the recommended time, thoroughly rinse your hair with plain water. Ensure that all the rice water is completely washed out.
  • Condition your hair (optional): You can follow up with your regular conditioner if desired. Apply the conditioner from mid-length to the ends of your hair, avoiding the scalp.
  • Repeat the process: For best results, apply rice water to your hair 2-3 times a week. Consistency and regularity are key to potentially seeing improvements in hair thickness over time.

9 healthy, Weight Watchers-friendly Indian snacks you can enjoy on the go!

Looking for healthy, Weight Watchers-friendly Indian snacks to keep you satisfied on the go? Look no further! These tasty options are perfect for those following a Weight Watchers plan.

1.Roasted Chana (Chickpeas) – Roast a handful of chana (chickpeas) in the oven or on a stovetop with a sprinkle of chaat masala, salt, and a touch of olive oil or mustard oil. They are a good source of protein and fiber.A handful of roasted chana contains around 100-150 calories.

2.Almond Energy Bars – Make your own energy bars by combining dates, almonds, and a spoonful of almond butter in a food processor. Process until well blended, press the mixture into a baking dish, refrigerate until firm, and cut into bars. These bars are rich in nutrients and provide a quick energy boost on the go.On average, a homemade almond energy bar can contain around 150-200 calories per bar.

3.Roasted Makhana (Fox Nuts) – Roast makhana with a drizzle of ghee or dry roast them until crispy. Sprinkle them with a pinch of salt, black pepper, and chaat masala for a satisfying and low-calorie snack.A serving of roasted makhana around 28 grams typically contains approximately 100-120 calories.

4.Sattu Drink – Sattu is a nutritious flour made from roasted chickpeas. Mix a few tablespoons of sattu with water, a pinch of black salt, roasted cumin powder, and lemon juice. Shake well and carry it in a bottle for a refreshing and protein-packed drink.A glass of sattu drink is about to 100-150 calories.

5.Coconut Energy Balls – Make a mixture of desiccated coconut, roasted chana dal (split Bengal gram), dates, and a pinch of cardamom powder. Roll them into small energy balls and carry them for a sweet and energizing snack.One medium-sized coconut energy ball contains approximately 60-80 calories.

6.Dates and Nuts – Prepare a small container with a mix of chopped dates, almonds, cashews, and pistachios. It’s a convenient and energy-boosting snack that provides a good balance of natural sweetness and healthy fats.A small container of this can provide around 150-200 calories.

7.Masala Puffed Rice (Murmura) Take some puffed rice and toss it with chopped green chilies, couple drops of mustard oil, peanuts, mint leaves and a sprinkle of chaat masala. It’s a light and flavorful snack that requires no cooking and is perfect for munching on during a journey.A serving of masala puffed rice can contain approximately 100-120 calories.

8.Mini Vegetable Sandwiches– Prepare mini sandwiches with whole wheat bread, sliced cucumbers, tomatoes, and a spread of mint chutney. They are easy to pack, satisfying, and provide a good dose of fiber and nutrients.A mini vegetable sandwich can range from 70 -100 calories.

9.Steamed Moong Dal Dhokla – Make a nutritious dhokla by steaming a batter made from moong dal (yellow lentils) and spices. Cut it into squares and enjoy it on the go. Dhokla is light, low in calories, and packed with protein.A square piece of moong dal dhokla (approximately 1 inch x 1 inch) contains around 30-40 calories.

7 “Ayurvedic” reasons why you should never eat cooked food stored in the refrigerator for more than 24 hours!

Ayurveda emphasizes the energetic qualities, vitality, and impact that food can have on the mind, body, and overall well-being. According to Ayurvedic principles, fresh and timely consumption of food is considered crucial for maintaining balance and optimal health. One aspect of this philosophy is the avoidance of aged cooked food. Ayurveda suggests these seven important reasons for avoiding cooked food that has been stored for over 24 hours.

  • Prana (Life Force) – According to Ayurveda, fresh food contains a higher level of prana, which refers to the vital life force energy present in living beings. Prana is believed to support overall vitality and well-being. After 24 hours of refrigeration, the prana in the food may diminish, affecting its energetic qualities and potentially reducing its beneficial effects on the body.
  • Agni (Digestive Fire) – In Ayurveda, agni refers to the digestive fire responsible for breaking down food and assimilating nutrients. Strong and balanced agni is essential for efficient digestion and optimal nutrient absorption. Aging cooked food may have a weaker effect on agni, making the digestive process less efficient and potentially leading to incomplete digestion and the formation of toxins (ama).
  • Nutrient Loss – Over time, stored cooked food may experience nutrient degradation. Exposure to air, light, and temperature changes can lead to the loss of essential vitamins, minerals, and antioxidants present in the food. Consuming aged food may result in a decreased intake of vital nutrients necessary for maintaining good health.
  • Ama Formation– Ama refers to the toxic byproduct of incomplete digestion in Ayurveda. Consuming old or stale food, including aged cooked food, may contribute to the accumulation of ama in the body. Ama is considered detrimental to overall well-being and is believed to disrupt the normal functioning of the body’s systems.
  • Dosha Imbalance– Ayurveda recognizes three doshas (Vata, Pitta, and Kapha), which are the fundamental energies that influence our physical and mental characteristics. Consuming aged food can potentially aggravate certain doshas and disrupt their balance within the body. This imbalance may lead to various health issues and discomfort.
  • Taste and Digestive Efficiency – Ayurveda recognizes six tastes (sweet, sour, salty, pungent, bitter, and astringent) and their impact on digestion and nutrition. Freshly cooked food usually retains the desirable taste qualities, which support balanced nutrition and efficient digestion. The taste and overall quality of refrigerated cooked food tend to diminish over time, potentially affecting the digestive process and the satisfaction derived from eating.
  • Mind-Body Connection – Ayurveda acknowledges the connection between the mind and body, including the impact of food on mental well-being. Eating fresh and nourishing meals is believed to promote mental clarity, alertness, and a sense of well-being. Consuming old or aged food may have a dulling effect on the mind, potentially affecting mental clarity and overall cognitive function.

7 Must-Have Makeup Products Every Woman Needs to accentuate her beauty!

These seven must-have makeup products will take your beauty game to the next level! These essentials are carefully selected to accentuate your natural features, boost your confidence, and unlock your true radiance.

7 Must-Have Makeup Products Every Woman Needs to accentuate her beauty!

1.Foundation or BB Cream – Using foundation or bb cream helps create an even and flawless complexion.Foundation provides coverage by evening out skin tone, minimizing the appearance of imperfections, and creating a smooth canvas for the rest of your makeup. BB cream, short for “beauty balm” or “blemish balm,” offers lighter coverage with added skincare benefits, such as moisturization and sun protection.

2.Concealer – This product is designed to camouflage specific areas of concern on the skin, such as dark circles, blemishes, redness, or discoloration. It usually comes in a cream or liquid form and is available in different shades to match your skin tone. Concealers provide targeted coverage, helping to create a more even and flawless complexion by hiding imperfections.

3.Mascara – It is used to darken, lengthen, and add volume to the lashes, making them appear fuller and more defined. By enhancing the lashes, mascara helps open up the eyes, making them appear more vibrant and awake.

4.Lipstick or Lip Gloss – Lipstick and lip gloss adds color and enhance the natural beauty of your lips. Lipstick offers a more intense color payoff and comes in a wide range of finishes, including matte, satin, and glossy. Lip gloss provides a shiny, sometimes sheer, finish and adds a touch of luster and moisture to the lip.

5.Eyeshadow Palette – It offers a variety of colors and finishes, including matte, shimmer, and metallic, allowing you to create different eye looks and experiment with various combinations.They add depth, dimension, and color to the eyes, enhancing their natural shape and beauty.

6.Blush or Bronzer -Blush typically comes in powder or cream form and is applied to the apples of the cheeks to provide a healthy flush of color. It helps create a youthful and vibrant appearance. Bronzer, on the other hand, is used to add warmth, contour, and a sun-kissed glow to the face. It is applied to areas where the sun naturally hits, such as the forehead, cheekbones, and jawline.

7.Setting Spray or Powder – Setting spray or powder is used as the final step in a makeup routine to prolong the longevity of your makeup and control shine.It help to set your makeup, prevent it from smudging or fading, and provide a more long-lasting and polished look.It also help control excess oil and give your skin a natural, matte, or dewy finish, depending on the desired effect.

MUST READ

10 best Yoga poses to help you lose weight 5 kgs...

0
Yoga is a great way to lose weight and maintain a healthy lifestyle. It can help you build strength, flexibility, and mindfulness. Here are...