










Wednesday, August 5, 2026

7 Ways to Get Rid of Stinky Feet

Stinky feet are the most common problem that many people face.It causes a lot of embarrassment and discomfort.People with excessive sweaty feet are the main sufferers of bad foot odour.Sweating creates a favorable environment for bacterial growth that causes foot odour.If you are feeling annoyed and want to get rid of stinky feet then follow these homemade remedies and tips.

Here are the 7 home remedies to get rid of stinky feet.

1.Exfoliate your feet with homemade scrub
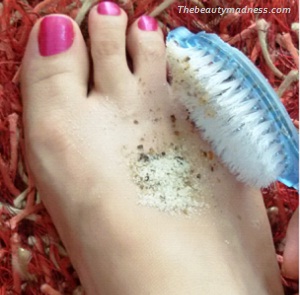
get rid of stinky feet

Scrub your feet to remove dry, dead skin cells and bacteria that are build up on the bottom of your feet.Prepare a homemade foot scrub.Mix equal parts of salt and clove powder.Apply a handful of this scrub to your wet feet, gently scrub the mixture for 3 to 4 minutes using a foot brush or pumice stone.Wash your feet with warm water and pat dry.Clove contains antibacterial and antifungal properties that keeps bad foot odour at bay.


2.Massage your feet with neem leaves

Grind a handful of fresh neem leaves to a fine paste.Take a small amount of this paste on your palms and gently massage to your feet for 5 minutes.Wash your feet with warm water and then dry using a clean towel.Remember to clean between the toes.Neem leaves gently cleanses and inhibits the growth of bacteria that causes odour.


3.Make your own herbal foot soak
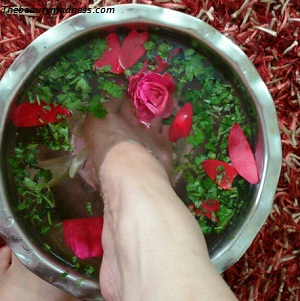
herbal soak

Take a large bowl and fill with warm water, add 1 cup of fresh tulsi, slices of lemon, mint leaves and few rose petals.Soak your feet in this herbal water for 15 minutes.After you have done with your soaking, properly dry your wet feet using a clean towel.Tulsi is known for its miraculous properties, it helps kill germs and removes bad smell.Mint, lemon and rose petals refreshes and deodorizes your feet.


4.Give your feet an antifungal foot bath with turmeric and vinegar solution

Mix 1/4th cup of turmeric and 1/2 cup of vinegar to a large bowl fill with warm water.Rinse your feet with this solution 3 to 4 times and pat dry with a soft, clean towel.Turmeric contains powerful medicinal properties that prevents fungal problems that is caused due to excessive sweating.Vinegar is a disinfectant that kills bacteria that causes stinky feet.Bath your feet with this solution twice a day, once in the morning and before going to bed to keep your feet clean, soft and odourless.


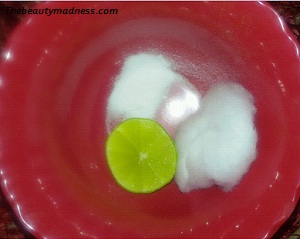
5.Clean your feet with a mixture of baking soda and lime
lemon for stinky feet

Blend 2 tablespoon of baking soda and 1/2 freshly squeezed lemon juice to 1/2 cup of warm water.Dip a cotton ball into this mixture and wipe your feet, toenails and between the toes.It removes dead skin cells, excess oil, refreshes and kills odour causing bacteria.


6.Wrap your feet with a damp steaming towel

Add 2 drops of Dettol antiseptic disinfectant liquid to a large bowl filled with hot water.Dip a soft towel into this water and wrap around the feet and let sit for 5 mins.Repeat this for 2 times per day.It relives tired achy feet.Dettol contains chloroxylenol that cleanses and provides protection against bacteria and germs that causes stinky feet.


7.Expose your feet to direct sunlight

rid of stinky feet

Expose your feet to the sunlight for 5 to 10 minutes when possible.Do not expose for too long as it can cause skin cancer.Choose the morning sun hours 7 to 9.Sunlight reduces perspiration, kills bacteria and germs on your feet that causes odour.


Tips to get rid of foot odour

1.Avoid wearing polyester or nylon socks as they increase the amount of sweating and don’t let your feet to breathe thus causing smelly feet.Prefer cotton and wool socks as they cause less perspiration.

2.Wear clean and dry socks everyday to prevent fungal growth that causes foot odour.

3.Trim your toenails once every 2 weeks and regularly clean your nails using a nail brush.

4.Remove your shoes very often to keep your feet dry and to let it breathe.

5.Dust your feet and between the toes with an antibacterial powder.

6.Drink lots of water and eat plenty of green leafy vegetables and citrus fruits.

How to Make and Use Hair Removal Wax at Home

Are you looking for easy, cost-effective and natural way to remove unwanted hair from your body?.Then learn how to make your own hair removal wax at home using just few natural items from your kitchen.Say goodbye to those long queues of wait at beauty parlours and hair removal creams that contains harsh chemicals, simply prepare your own wax and pamper your skin at home.Here are the detailed step by step procedures with pictures and tricks on how to make and use hair removal wax.


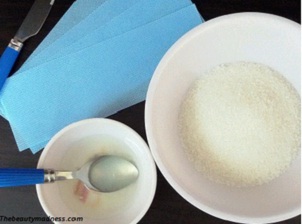
Things that you need to prepare this hair removal wax

hair removal wax need

Sugar – 2 cups
Lemon juice – 1/4th cup
Water – 1/2 cup
Waxing strips

This measurement is for waxing underarm area, hands and below the knees.


Steps on how to make hair removal wax at home

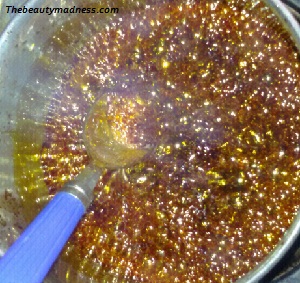
1.Put sugar and water in a small pan and heat over medium flame for 5 minutes or until sugar dissolves.

hair removal waxing sugar

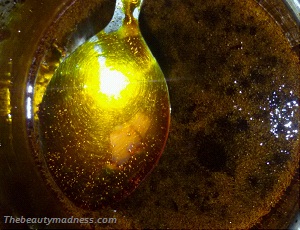
2.Now add lemon juice and continue stirring until the liquid is sticky and has coated the back of a spoon.The process would take a maximum of 10 minutes.

hair removal waxing

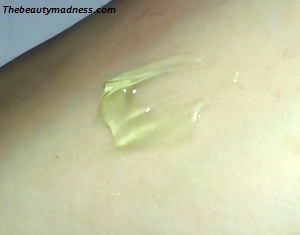
3.Once you have achieved in getting the desired consistency, remove the pan from the flame and pour the contents into a heatproof bowl.Before you use allow the wax to slightly cool.

sugar wax


Directions on how to use this homemade hair removal wax

sugar removal wax

1.Before you start waxing check the length of your hair, it shouldn’t be too short or too long.To get a better grip on your hair and to easily pull the hair out from the roots, the length of the hair should not be less than 1/8 inch.

2.Exfoliate the area you want to wax using a mild scrub and then wash with warm water.It opens the pores and allows easy removal of hair.

3.For quick and painless hair removal, dust some powder to absorb grease, moisture and help the wax to adhere to the skin hair properly.

4.Before you apply the wax onto the skin, test the temperature of the wax by applying a very small amount on the inside of your wrist.

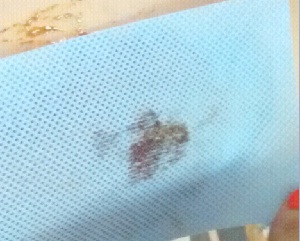
5.Using a blunt knife or a wooden spatula apply a thin layer of the wax on the same direction of the hair growth.Immediately place a wax strip over the area where you have applied the wax and press firmly to ensure that the wax strip has stick well enough to your hair.

wax hair removal

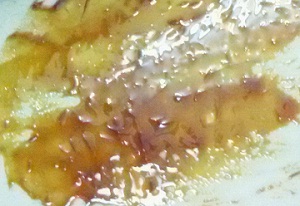
6.Hold the end part of the wax strip and rip against the direction of your hair growth.You should be fast enough to pull the strip.

wax strip

7.Repeat the process until you have removed all the hair.Do not apply the wax more than twice on the same area.It can cause skin redness or irritation.

8.Once you have finished removing hair, wash your skin with cool water and massage some soothing aloe vera gel or lotion.

aloevera_gel_waxing


Points to remember

1.Do not apply wax on sun burn areas, pimples, warts, cuts, moles and infections.

2.If you get rashes then rub some ice cubes followed by soothing antiseptic lotion.

3.When applying if the wax hardens then heat the wax on a low flame until it melts.
4.Do not use soap to remove the excess wax on your skin.Just use a damp cloth.

5.Avoid waxing over the same area more than twice or you may end up with dark patches and damaged skin.

5 Chocolate Face Packs that you Must Try

Want irresistibly smooth, fair and glowing complexion? Then dive into this luxurious smelling chocolate face packs to see how your dull, sagging and lifeless skin turns into a beautiful and glowing complexion.

Chocolates are packed with flavonoids, powerful antioxidants and omega-6 fatty acids that fight free radicals, tones and firms wrinkled skin and reduces the appearance of large pores.They are also good source of minerals such as magnesium, copper, calcium, zinc and vitamins A, C, E ,B1, B2 and B5 that helps protect the skin against sun damage, boost collagen production, revive sluggish skin and restores skin radiance leaving your skin young and beautiful.

chocolate face packs

These deliciously rich chocolate face packs are enriched with nourishing ingredients to give your skin a youthful and radiant glow.To prepare these chocolate face packs you can use ready-made chocolate or chocolate powder.


Here are the 5 Chocolate Face Packs that you must try

1.Chocolate Face Mask for Fair and Glowing skin

chocolatefacepacksorange

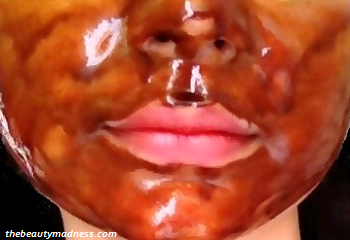
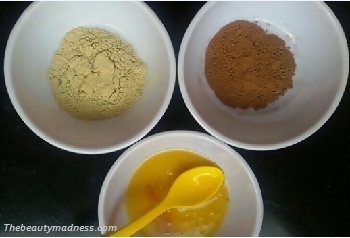
To prepare, mix equal quantities of chocolate powder and multani powder using 4 tablespoon of orange juice.Wipe your face with cotton dipped in rose water and then apply the face mask.Leave it for 20 minutes and then wash your face with cool water.This face pack adds radiance and glow to your skin, refine skin texture and help lightens skin complexion. Multani present in this face pack absorbs excess oil and instantly cleanse your face.Vitamin C and antioxidants present in orange juice gives your skin a brighter and a fairer complexion.This is a best face pack for oily and normal skin types.People who have a dry skin can use milk instead of orange juice.


2.Chocolate Face Pack for Dry, Rough and Dull skin

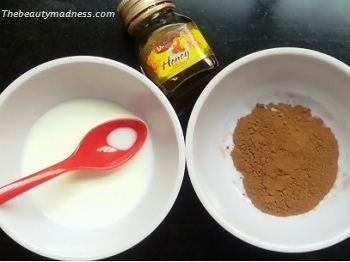
milk chocolate face masks1

Take 2 tbsp of chocolate powder in a bowl, add 1 tbsp of honey and 4 tbsp of milk.Mix it to form a smooth paste.Before you apply this mask, steam your face to open the pores.Now apply two layer of this pack on your face and neck.Allow the face pack to dry for 30 minutes and then wash your face with cold water.This is an excellent chocolate face pack for dry and rough skin.Enriched with the goodness of milk, honey and chocolate this face pack rejuvenate and smoothes your facial skin, provides intense nourishment and enhances your skin tone.For best results you can use this pack every alternate days. 
 

3.Chocolate Face pack for Acne Prone or Oily skin

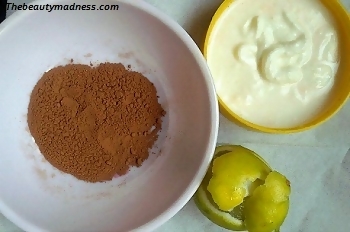
lemon chocolate face_packs

Use any left over lemon peel, bake at a low temperature for 3 minutes and then grind to form powder.Prepare the face mask by mixing this powdered lemon peel with chocolate and yoghurt.First cleanse, steam your face and then apply this face mask.Allow this pack to stay for 30 minutes and then wash your face with lukewarm water.If your skin is oily then it is likely to suffer from acne, pimples, blackheads and whiteheads.This face pack is effective to fight excess oil secretion caused by the sebaceous glands and restrains the growth of bacteria that causes acne and pimples.It leaves the skin fresh, oil-free and radiant.
 

4.Chocolate Face Pack for Flawless or Blemish free skin

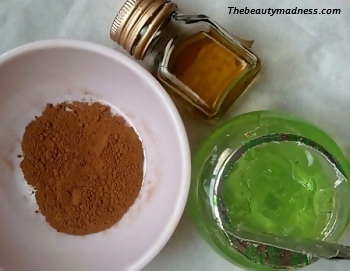
aloevera chocolate facepacks

Mix 1 tbsp of aloe vera gel, 2 tbsp of honey and 1 tbsp of chocolate powder.Apply the paste on your face and gently massage for 2 minutes.Apply some more and leave the pack to dry for 15 minutes.Wash your face with lukewarm water.This face pack reduces the appearance of dark spots, sun spots, acne and pimple scars, improves blood circulation thus making your skin look flawless and smooth.


5.Chocolate Face Mask for Anti Ageing

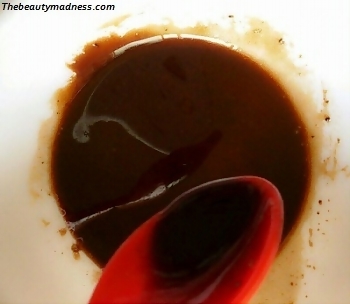
chocolate face packs 1

Break an egg and separate the egg yolk and egg white into two different bowls.Take the bowl that contains the egg white, add 2 tbsp of chocolate powder and mix it well.Steam your face to allow the pores to get opened.Now apply the face mask and leave it for 20 minutes.Wash your face with warm water and then apply some moisturizer.This anti ageing face mask tightens your skin and shrink the size of the pores, reduces the appearance of fine lines and wrinkles and pull out pollutants from your skin pores.Egg white present in this mask firms your skin and repairs skin cells.

Quick Tip to Lose Weight in a Week

Want to lose weight fast? Here is a simple trick that can help you to shed few pounds in just 1 week.Don’t worry, it’s not about following a strict diet or exercising, it’s just a weight loss drink that you have to incorporate into your daily diet to lose weight.It’s healthy, tasty and can be easily prepared at home.

weight loss machine
“Image courtesy by stockimages / FreeDigitalPhotos.net”.

The ingredients present in this drink boost your immune system, detoxify and energize your body, increases your metabolism to help burn more calories and hence results in weight loss.Believe me this really works!!.This is one of the best and quick tip to lose weight in a week.Try for 1 week to see a noticeable difference in your body.

Have a look at the numerous health benefits that each ingredient have in this weight loss drink.

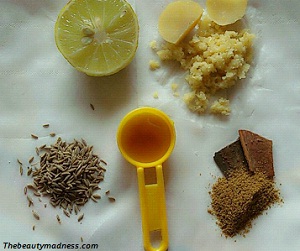
Ingredients Cumin, amla powder, lemon juice, cinnamon powder and honey

weight loss drink ingredients

Health Benefits of the ingredients present in this weight loss drink

1.Cumin

Cumin improves immunity and aids in digestion.It contains iron that reduces the symptoms of anemia such as dizziness, fatigue, loss of energy and headache.It has anti-carcinogenic properties that prevents cancer and tumors.Being a rich source of dietary fibre it reduces appetite and supports weight loss.Cumin increases body heat and results in fat burning.


2.Amla

Amla contains powerful antioxidants and anti-inflammatory properties that neutralises free radicals, prevents oxidative damage and provides protection against cancer.The high concentration of vitamin C present in amla boost the immune system, cures constipation and digestion problem.Amla is also said to be good for your skin, eyes and hair.Amla aids in weight loss, it increases the metabolic rate of the body and helps the body to burn calories faster.


3.Lemon

Lemon posses numerous health benefiting compounds such as citric acid, vitamin C, vitamin A and antioxidants that provides resistance against disease, protects the body cells against free radical damage and reduce cholesterol.The healthy minerals such as iron, potassium and calcium helps control blood pressure, boost energy levels and prevents fatigue and weakness.The dietary fibre content in lemon helps build stamina, control food cravings and induces weight loss.


4.Honey

Honey contains antibacterial and antiseptic properties that defends body against diseases and promotes longetivity.It also helps to solve mental illness, insomnia and reduces the risk of cancer.It’s natural sugars recharges your body, boost your immune system and helps in the reduction of weight loss.


5.Cinnamon

Cinnamon contains antiviral, antifungal and antibacterial properties that fights viral and bacterial infections.Studies have found cinnamon extract help controls blood sugar levels.Cinnamon is an excellent source of antioxidants that prevents and repair cell damage caused by free radicals, provides protection against heart diseases and stroke, slows down the process of premature ageing and promotes overall health.Cinnamon reduces gastric problems, reduces fat storage and results in weight loss.


Steps on how to prepare this energizing weight loss drink

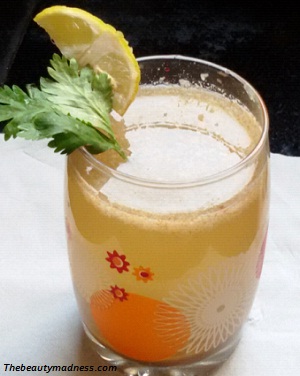
quick tip to lose weight in a week

1.Soak 3 tablespoon of cumin seeds overnight in 2 glass of warm water.

2.In the morning boiled these soaked seeds for 1-2 minutes.

3.Filter the water into a glass.

4.To this cumin water add 1 teaspoon of amla powder, 1/2 freshly squeezed lemon juice, 1 teaspoon of cinnamon powder and 1 tablespoon of honey.

5.Mix it properly and drink this water.Before drinking make sure the water is warm, not hot.

Follow this every morning before having your breakfast and in the evening to lose weight fast.

How to Apply Makeup Flawlessly

Do you want beautiful flawless looking skin?.Follow this 8 simple makeup tricks that will help you to cover your dark circles, blemishes, age spots and wrinkles and reveal smooth, flawless skin.Here are the step by step procedure to guide you on how to apply makeup flawlessly.


1.Exfoliate using a mild facial scrub

skin exfoliator

Wash your face using a gentle mild scrub.Gently massage to the oily areas, that is the T-zone area for 2 minutes and then wash your face with cool water.It cleans and exfoliates your skin, removes blackheads, dead skin cells and impurities from the pores.


2.Massage ice cubes

Before you start applying makeup, massage ice cubes on your face for 2 minutes.Ice cubes reduce the size of the pores and gives an instant cooling effect.It gives your skin a fresh and vibrant look.


3.Choose skin hydrating light moisturizer

hydrating moisturizer

Moisturize your face well before applying makeup.Choose a light, non sticky moisturizer that spreads easily and absorbs quickly.To prevent sun damage go for moisturizer that contains UVA and UVB sun protection.Adding few drops of rose water to moisturizer makes your skin soft and supple.Moisturizing your face helps makeup to spread smoothly and evenly without leaving any streaks.


4.Use a good gel face primer

gel based primer

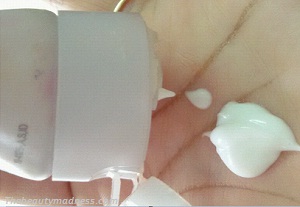
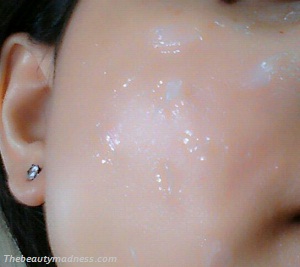
Once you have moisturized your skin keep a gap of 5 minutes and then apply a light primer to minimize large pores and fine lines.Primer helps foundations adhere to the skin smoothly and evenly, gives you a velvety and long-lasting finish.Squeeze a pea size amount of primer and apply to the skin, blend it using your fingertips.Do not forget to apply under the eyes, it helps concealer blend seamlessly into the skin.Before applying foundation allow the primer to set for few minutes.


5.Apply concealer to hide skin irregularities

concealer

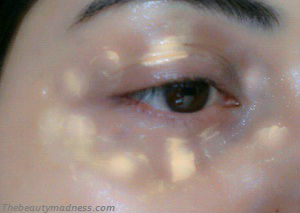
Dab concealer to the under eye area and to hide any skin imperfections on your face.Use a soft brush to blend the concealer.For a natural look choose a concealer one shade lighter than your skin tone.To prevent looking cakey, apply a thin layer of concealer.


6.Choose your right foundation shade

foundation

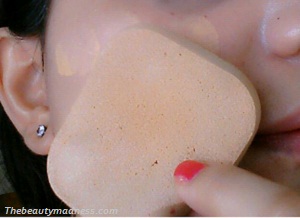
Apply dots of foundation using your fingertip on your forehead, nose, chin and cheeks.Using a slightly damp sponge blend the foundation into your skin, it gives you a smooth finish and a fuller coverage.


7.Use a loose translucent powder for setting

translucent powder

Dust your face with loose translucent powder for a soft, velvety natural look.Just give a light stroke using a fluffy makeup brush.Start from the forehead, down the bridge of the nose, under the eyes, cheekbones and on the chin.


8.Find your perfect blush shade

apply blush

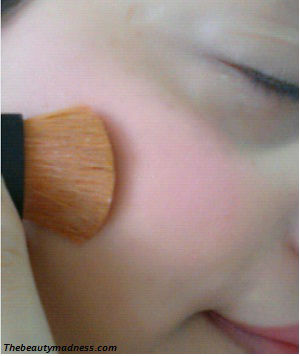
Now the final step is to apply blush.Look for shades that compliments your skin tone.Do a fish face and gently apply to the apple of your cheeks and then extend towards the temples.For a natural look you can lightly sweep across the chin, forehead and nose.

apply makeup flawlessly

Look!!  you are successful in applying makeup flawlessly with just 8 easy steps.

10 Best Tips To Relax your Eyes and Improve your Vision

Eyes are the most beautiful and delicate part of our body.But often people neglect the importance of their eyes.They constantly spend long hours watching television and computer without giving rest to their eyes and suffer from intense eye strain, headaches and blurred vision.Today I will share with you 10 easy tips that will help you to overcome eye strain, poor eye vision and dry eye syndrome.Try these tips to soothe, relax your eyes and improve your vision.

eyes_beautiful

Tip 1

As soon as you wake up in the morning splash your eyes with cold water.Repeat this for 6 to 7 times and while you do this keep your eyes open.Doing so, would clean and relieves tired eyes and also reduces dark eye circles.

Tip 2

To reduce eye strain caused due to excessive computer use or watching television follow the 20-20-20 rule.Between the 20 minutes of your work, take a small break for 20 seconds and then look at the objects that are in the distance of 20 feet away from you.

Tip 3

Hold a pencil or a pen at arm’s length in front of you.Keep your eyes focused on the tip of a pencil or pen and slowly bring it closer to your nose.Repeat for 10 times.This prevents blurred vision and improves focus ability.

Tip 4

Check out these acupressure points and yoga asanas to relax your eyes and improve your vision.

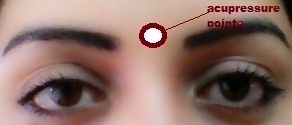
1.Place your middle finger in between your eyebrows and gently press the point for 1 to 2 minutes.It eases eyestrain, headaches and improves eyesight.

relax your eyes and improve your vision

2.Find the pressure point near to the bridge of your nose and the outer part of your eyesocket.Now place your thumbs on both the sides and lightly press it for 2 minutes.It relieves eye fatigue and eyestrain.

relax_eyes

3.Close your ears with your thumbs, the index fingers should rest on our forehead and the rest of the three fingers should be together and rest on the eyes.Now slightly press the fingers that is placed on your eyes and take a deep breathe.Repeat this for 10 times.It eases eye strain, improves eye focus and relieves headache.

accupressure_to_relax_your_eyes

Tip 5

Do some eye stretching exercise.

– Take your eyeballs to the extreme left and right to exercise.Repeat for 5 times.It improves focus and relaxes eye muscles.

– Rotate your eyeballs clockwise and anticlockwise direction.Repeat for 5 times in both the direction.It relieves eye fatigue and improves blood flow to the eye.

Tip 6

Take a big container full water and dip your face into it.Gently open your eyes inside the water and rotate your eyeballs.It cleans the surface of your eyes and improves your eye vision.

Tip 7

Pour little oil on your palm and rub the palms together to generate heat, and then place your palms on your eyes for 5 seconds.Repeat this for 5 times.It relaxes and reduces eye stress.

Tip 8

Take some aloe vera gel or herbal cream and gently massage on to your closed eyes for 2 minutes in clockwise and anticlockwise direction.It helps relax muscles, soothes puffy eyes and improves blood flow to the surrounding areas of your eyes.

Tip 9

Looking at the computer for a prolonged period of time can cause eyestrain, headache and blurred vision.The reason is dryness of your eyes that is caused when you forget to blink your eyes often while using computer.Make a habit to blink your eyes frequently for 2 minutes every 30 minutes.


Basic Tips that you must follow to relax your eyes and improve your vision

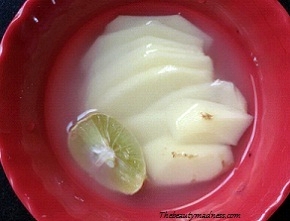
1.To relieve swollen, tired eyes and to remove dark circles, soak 2 slices of cucumber or potato in cold water and place them on your eyes.

2.To improve your vision naturally, increase the intake of foods that are rich in vitamin A such as papaya, carrot, milk, fish and egg.Also include lot of dark leafy vegetables such as spinach, drumstick leaves and fenugreek leaves that are good sources of iron.

3.Drink at least 15 -16 glasses of water to keep your eyes hydrated and fresh.

4.Wear sunglasses when you go out in the sun to protect your eyes from the harmful sun rays.

5.Use eye drops to keep your eyes lubricated and moist.

6.Wear anti-glare glasses to protect your eyes from the harmful rays of your computer.

7.Have a proper sleep of 7-8 hours daily.

Home Remedies to Remove Dark Spots Completely

Are you worried of those horrible dark spots on your beautiful face?.Do you want to disappear them completely from your skin?. Well, not to worry anymore.Here are the 10 amazing home remedies to remove dark spots (sun spots, age spots, brown spots, acne spots) from your skin.These dark spots are caused by overexposure to sun, pimple or acne scarring, aging and medications.

These remedies, that are listed below are not only effective in removing all kinds of spots but also helps in reducing swelling and redness of pimples, acne, dark patches, improves skin complexion and boost facial glow.

Here are the 10 home remedies to remove dark spots completely

1.Cold Potato and Lemon Juice

potato_and_lemon_juice_mask

Take few slices of potato and soak in 1 cup of hot water for 20 minutes.Drain the potato juice into the bowl.Add 1/2 freshly squeezed lemon juice to it.Place the bowl in the refrigerator for about 1 hr.Dip a cotton into this cold juice and wipe your face.Do it twice in a day.An excellent remedy for removal of dark spots and blemishes.Potato and lemon both has natural bleaching properties that lightens the skin tone and fades away dark spots.


2.Toothpaste

toothpaste_dark_spots

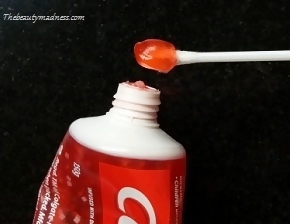
Sounds weird but true, that toothpaste can lighten dark spots and reduce pimples.Toothpaste contains antibacterial and bleaching agents that kills bacteria that causes pimples and make dark spots lighter.Using a q-tip just apply on the areas where you have dark spots.Allow it to stay for 30 minutes and then wash your face with cold water.Do this twice in a week.


3.Cumin Seeds and Rice Water

cumin_seeds_dark_spots

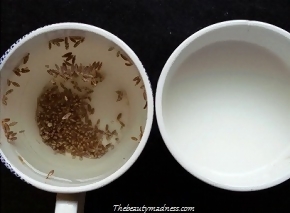
This is an extremely effective remedy to remove dark spots on face.Boil 2 tablespoon of cumin seeds in 2 cups of water and drain the cumin seeds water into a bowl.Now add 1 cup of rice water to it and stir thoroughly.Pour the contents into ice cube trays and allow it to freeze.Rub an ice cube on the affected areas for 3 minutes.Rice water and cumin seeds contain skin lightening and cleansing properties that helps in removing pimples, dark patches, sun tan, dark spots and acne marks.


4.Papaya and Green Tea Face Pack

Mix 1/2 cup of ripe mashed papaya pulp, 1/4 th cup green tea water and mix to form a semi-smooth paste.Apply the pack on your face and allow it to dry for 30 minutes.Before applying the pack steam your face to open the pores.Remove the face pack using cold water.This face pack is very effective in fighting dark spots and pigmentation.The antioxidant properties of papaya and green tea works wonders in removing dark spots, pimple scars and lightening skin complexion.


5.Baking Soda, Lemon and Sugar Face Scrub

baking_soda_dark_spots_removal

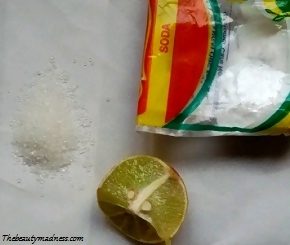
Take 1 tbsp of fine sugar in a bowl, add 2 tablespoon lemon juice and a 1/2 tsp of baking soda.Take some mixture on your palms and gently scrub to the areas where you have those horrible dark spots and skin blemishes.It exfoliates your skin surface, removes bacteria and dust trapped in the pores and lightens dark spots.


6.Tomato and Honey Facial Cleanser

home_remedies to remove dark spots

Grind juicy ripe tomato in a mixer and drain the juice into a bowl, Add 2 tsp of honey and mix it well.Dip a cotton ball into this mixture and wipe your face.Do it three times a day.It clears the skin pores, lightens dark patches, removes pigmentation marks and lightens dark spots.


7.Neem and Rose Water

Grind a handful of neem leaves using rose water and apply a thick layer on your face.Leave it for 30 minutes and then wash your face with lukewarm water.Neem contain antibacterial and healing properties that removes bacteria from skin surface that causes pimples and helps in the reduction of spots and blemishes.


8.Sandalwood, Turmeric and Milk Mask

milk_and_sandalwood_mask

Take 2 tbsp of sandalwood powder, add 3 tbsp of fresh thick milk and a pinch of turmeric.Mix the ingredients properly to form a smooth paste.Apply this pack on your face and allow it to dry for 20 minutes.Wash your face with lukewarm water and pat dry.This is one of the effective treatment to remove dark spots and acne scars.Sandalwood contains anti-ageing and anti-blemish properties that reduces the appearance of pimple marks and age spots.


9.Yogurt and Gram Flour(Besan) Face Mask

besan_yoghurt_mask

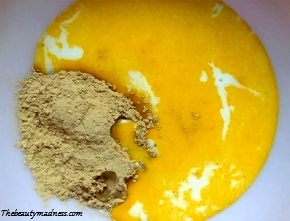
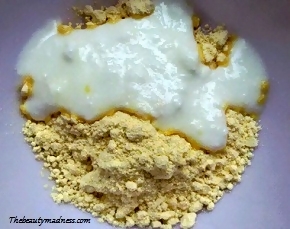
Mix 2 tbsp of gram flour(besan) and 3 tbsp of fresh yogurt.Mix it well and apply the paste on your face, leave it for 30 minutes and then wash your face with cool water.A powerful face pack to remove those scary dark spots caused by sunburns, age spots and acne scarring.


10.Coconut Oil and Olive Oil Massage

Mix together equal parts of coconut oil and olive oil, gently massage onto the areas affected by dark spots for 4 to 5 minutes in circular motion.To remove the excess oil wipe your face with a cotton soak in luke warm water.Both coconut oil and olive oil is rich in vitamin E and K that improves elasticity, skin tone and removes sun spots, age spots and dark patches.

Try these home remedies to remove dark spots and get clear, beautiful skin.

Palmolive Aroma Morning Tonic Shower Gel Review

Palmolive Aroma Morning Tonic Shower Gel

Hello everyone,

Today I will be sharing my review on a refreshing aromatic shower gel from Palmolive that is the “Palmolive Aroma Morning Tonic Shower Gel“.I got this product last weekend from a beauty store.Usually I prefer body wash when compared to shower gels, but because it’s summer time so I thought to go for this lovely aromatic shower gel to keep my skin feel fresh and smell good. Aromatic shower gels keeps your mind and body relaxed, awaken, energetic and refreshing.


Description of the Product Palmolive Aroma Morning Tonic Shower Gel

palmolive aroma morning tonic shower gel1

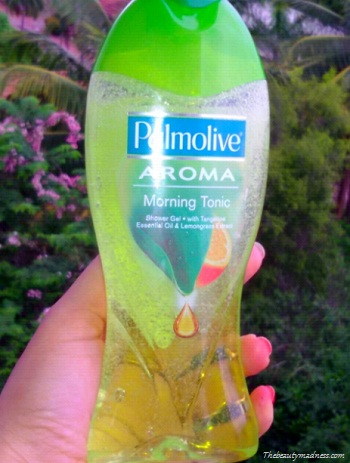
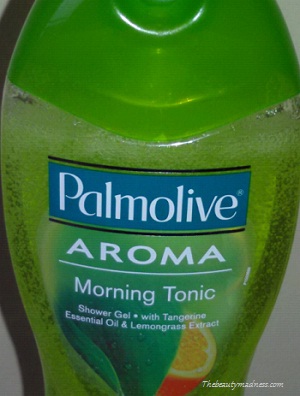
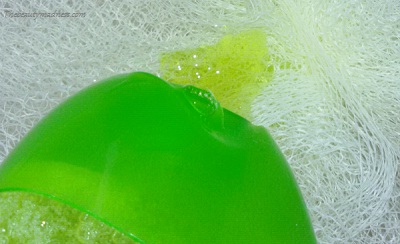
There are a wide range of Palmolive shower gels that are available in the market, but the one that I have brought is “Palmolive aroma morning tonic” shower gel.The gel formula is infused with natural extracts of boosting lemon grass and tangerine essential oil.The color of the bottle looks pleasant and attractive.The gel comes in a light green color, transparent see through bottle with a flip top cap that makes convenient and easy to use.


My Experience with this Product Palmolive Aroma Morning Tonic Shower Gel

It was a quite enticing and refreshing experience.The bathing was luxurious and soothing.My mind and body was recharged by the exotic citrus aroma.The smell was enchanting and pleasurable.It had a fresh blend of lime and orange that lingered for a while.

palmolive morning tonic

The gel is light green in color with semi-running consistency and easily forms rich bubbly lather when mingles in water.After taking bath with this shower gel, I felt a nice energized wake up in the morning.Although the name suggest it’s a “morning tonic” for all those sleepy women, just like me.

morning tonic shower gel

The shower gel is gentle and unlike other shower gels it doesn’t dry out my skin.Packed with natural ingredients and essential oil it left my skin soft and hydrated.The sedative and antibacterial properties present in both the active ingredients; tangerine essential oil and lemon grass releases stress and anxiety, calms the mind, stimulates the senses, lifts your body and controls body odour.After having used this shower gel for nearly 1 week, all I can say this is one of the best stress relieving and invigorating summer shower gel.

Advantages of using Palmolive Aroma Morning Tonic Shower Gel

1.Soothing citrus fragrance.

2.Lathers quickly.

3.Naturally derived ingredients tangerine and lemongrass.

4.Its true to its name “morning tonic”, refreshes and re-energizes your day.

5.Gentle on skin.

6.Best for summer, eliminates body odour and prevents sweating.

7.Suitable for all skin types.

8.Releases stress, anxiety and calms your mind.

9.Leaves your body hydrated and refreshed.

10.Comes in a flip top cap that is convenient to carry and easy to use.

11.Attractive packaging.

12.Easily available.

13.Affordable.

Disadvantages of using Palmolive Aroma Morning Tonic Shower Gel

1.It’s not so moisturizing.

2.A seasonal shower gel, best for summer and rainy season.

Net Vol / Price – 250 ml / Rs 145

TBM Rating – 4.5/5

How to Make your Flat Nose Look Taller Using MakeUp

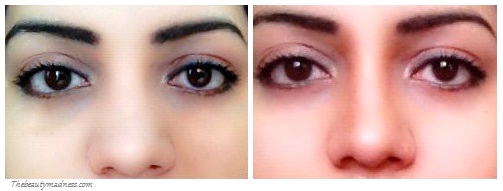
Want to make your flat nose look taller and sharper without undergoing any cosmetic surgery?..Corrective makeup is a technique in which you can hide imperfections and irregularities in the appearance of your nose and make them look thinner and attractive. Here are the step by step procedure and pictures on how to make your flat nose look taller and perfect.

nose taller and sharper

Things that you need

  • Brown lip liner pencil
  • Light brown or Bronze color eyeshadow.
  • Angular flat brush
  • Loose translucent powder


Steps 

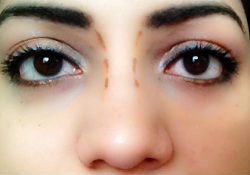
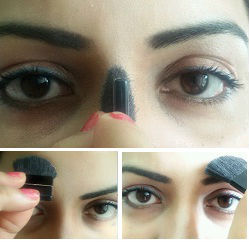
1.Draw two soft dotted lines down the sides of your nose using the lip liner pencil.Start at the brow bone, then work towards the end of your nose.Make sure the dotted lines are parallel to the middle of your nose.

dotted  lines nose1

2.Now join the dotted lines to create more defined and straight parallel lines.Both the lines must meet on the curve between your nostrils.

dotted lines 3

3.Blend the harsh lines using your finger or a makeup sponge.

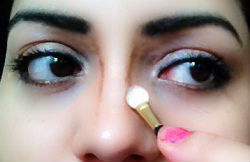
4.Now to make your nose look sharper and prominent apply a little darker shade using the tip of an eyeshadow brush to the curve of your brow bone and then go halfway down your nose.Refer to the below image.

nose job123

5.Using a angular brush blend both the contour lines, down the sides of your nose.

6.To make your nose look more straight and to achieve a subtle look, apply 2 shades lighter loose translucent powder to the bridge of your nose and then extend towards the forehead and above the eyebrows.Yipee!! finally you have completed in getting that sharper and taller nose look.

nose taller and sharper1

30 Minutes Skin Renewal Pumpkin Face Mask

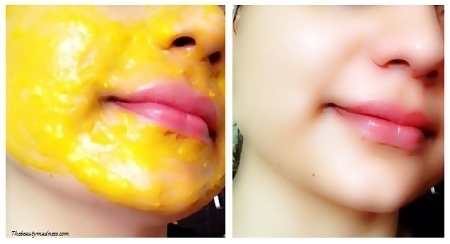
Boost your facial radiance and discover a deliciously soft youthful skin with this most amazing skin renewal and skin lifting 30 minutes pumpkin face mask.

Pumpkins are extremely good for your skin.They are loaded with Alpha hydroxy acid and fruit enzymes that smooths fine lines and wrinkles, promotes elasticity and suppleness and brightens skin complexion.They are also good source of healthy antioxidants and vitamins such as beta-carotene, vitamin A, C and E that boost collagen production, reduces pigmentation and skin rashes, moisturizes and thus improves the overall skin appearance.

pumpkin face mask

This pumpkin face mask is one of the beauty secrets to my younger looking skin.I have been using this face mask from last 1 month and my skin texture and glow has drastically improved.Just believe me and give it a try, you will be absolutely amazed by the results.


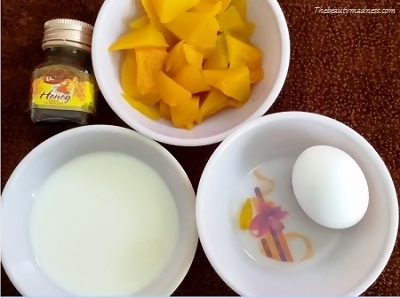
Things you will need

pumpkin face mask ingred

  • 1 Cup diced ripe pumpkin (peeled and seedless)
  • Honey
  • Milk
  • Vitamin E capsule
  • Egg


How to do

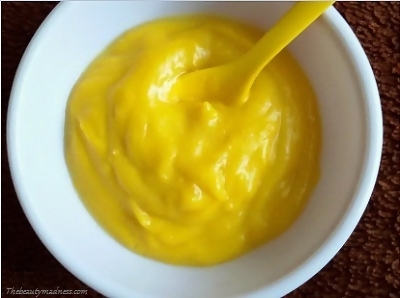
Boil diced pumpkin in water for about 5 minutes or until soft.After the pumpkin has been drained and cooled down, put it into the blender and blend until it turns into a smooth paste.Now add 1 tbsp of honey, 3 tbsp of milk, contents of a vitamin E capsule and 1 egg white.Mix all the ingredients properly to make a smooth, creamy paste.Before you apply, place in the fridge for about 15 minutes.

pumpkin face mask skin
Directions on How to Use

1.Clean your face and neck with a cotton dipped in rose water to remove makeup and other impurities.

2.Steam your face to open the pores so that the goodness of 5 different ingredients present in this pumpkin face pack enters your skin pores.

3.Apply a thick layer of this cold pumpkin face mask using a flat brush on your face and neck.

4.Avoid eyes when applying the pack.Take 2 slices of cold cucumber and place it on your eyes.

5.Slowly remove the mask in upward direction using cold water.

6.Pat dry your face and apply a layer of moisturizer.

MUST READ

How to look beautiful naturally | thebeautymadness

0
To look beautiful naturally, you don't have to splash out on expensive skin care additives, try pampering your skin with beauty potions from nature's...