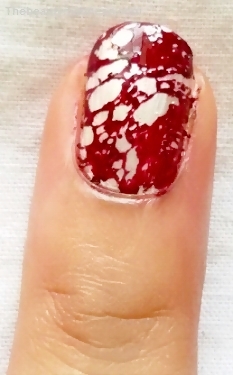
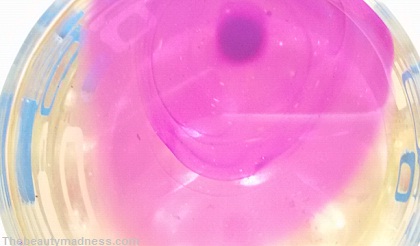
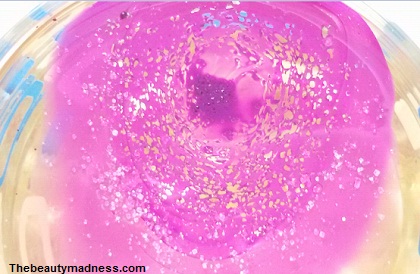
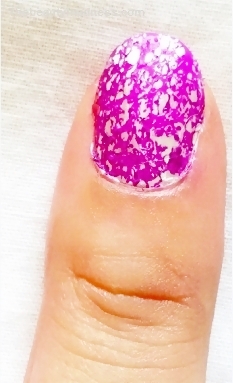
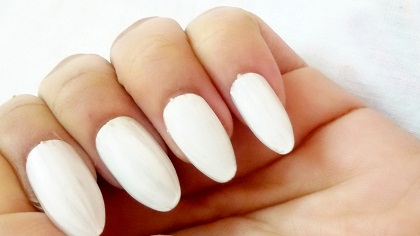
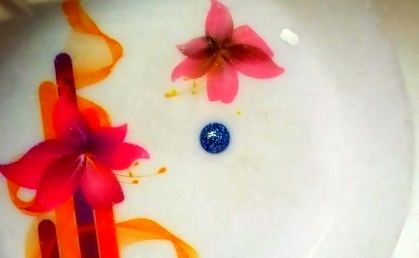
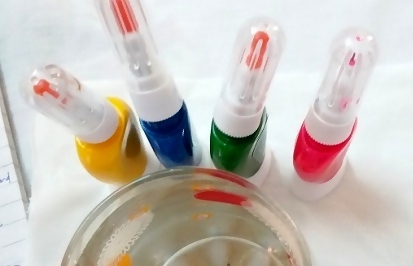
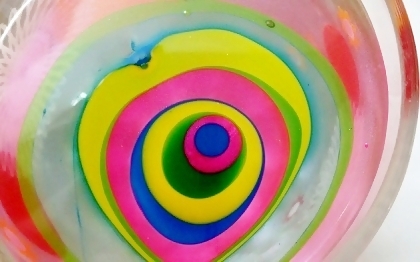
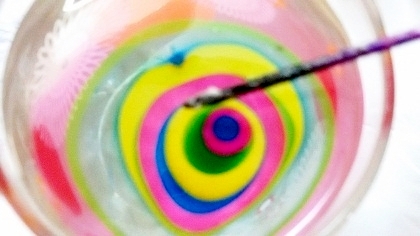
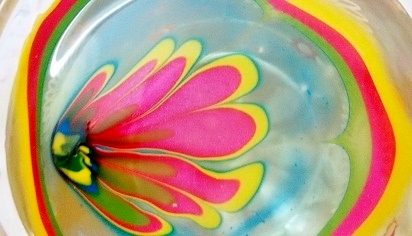
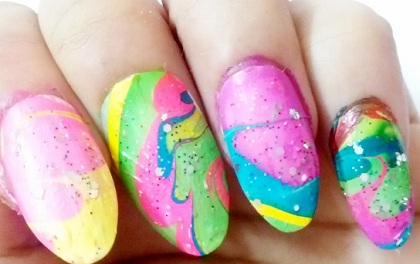
Water marbling is an easy and creative way to color your nails.It gives your nails a unique and fantastic look but to master this nail art technique is a bit tricky.For those who find it difficult, here is an easy way you can achieve those beautiful water marble nails just using some sugar and salt.To get small spotted design water marble nails use salt and for bigger spotted design use sugar.
Here are the steps on how to create sugar salt water marble nail art with detailed steps, pictures and video.
Sugar Water Marble Nail Art
Things that you need – Sugar, dark color nail polish of your choice, silver color nail polish for base coat, glass, cotton swab and clear nail polish for top coat.
Steps
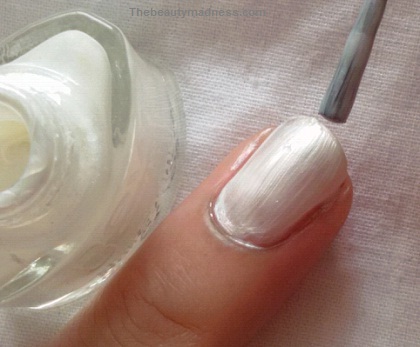
1.Apply a layer of silver color base coat and allow it to dry.
2.Take a glass of filtered room temperature water and do not use tap water they contain chemicals that can prevent the nail polish from spreading on the water surface.
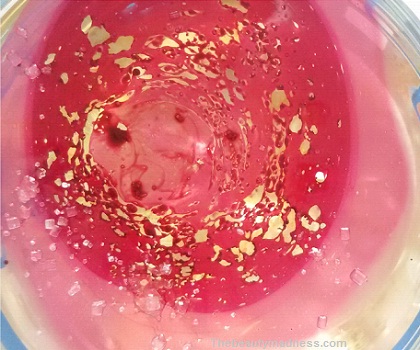
3.Now pour few drop of nail polish onto the water surface.Repeat and continue the process until it forms concentric circles on the surface of water.
4.Take a pinch of sugar and sprinkle on top of the water to make bigger size holes.
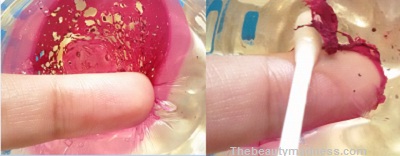
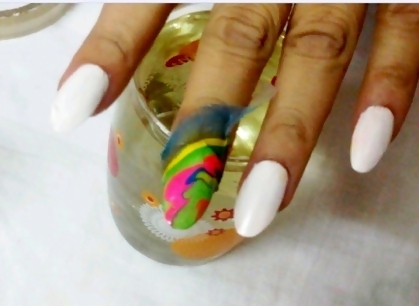
5.Once you have created your water marble design, position your finger to the best part of the water mark to color your nail.
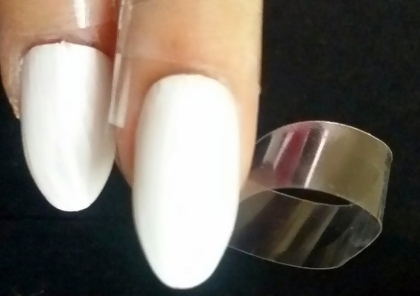
6.Before you start water marbling, apply some cello tape or vaseline to the skin around your nails.
7.Dipped your finger into the water and blow on the surface to make it dry.Clean the excess polish using a cotton swab.
8.Once the polish dries completely, apply a topcoat to prevent chipping and for better shine.
Watch this quick video that shows how to create water marble nail design using both sugar and salt.
Salt Water Marble Nail Art
Things that you need – Salt, dark color nail polish of your choice, white color nail polish for base coat, glass, cotton swab and clear nail polish for top coat.
Steps
1.Apply a layer of white base coat and allow it to dry.
2.Take a glass of filtered room temperature water.Do not use tap water they contain chemicals that can prevent the nail polish from spreading on the water surface.
3.Now pour few drop of nail polish onto the water surface.Repeat and continue the process until it forms concentric circles on the surface of water.
4.Take a pinch of salt and sprinkle on top of the water to make small size holes.
5.Once you have created your water marble design, position your finger to the best part of the water mark to color your nail.
6.Before you start water marbling, apply some vaseline to the skin around your nails.
7.Dipped your finger into the water and blow on the surface to make it dry.Clean the excess polish using a cotton swab.
8.Once the polish dries completely, apply a topcoat to prevent chipping and for better shine.
Flaunt your nails this summer with these irresistibly gorgeous and trendy nail designs.They are fun, creative and compliments your outfit.These crazy bright and bold designs will definitely make a fashion statement wherever you go.The best part is that to achieve these trendy and beautiful nail looks, you don’t need any professional nail brush or tools.
Here are the 7 trendy nail designs with step by step procedure and pictures.
1.Dew Drops Nail Art
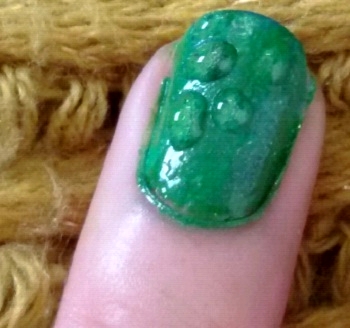
Try this fresh, mesmerizing nail design that gives the impression of water droplets sitting on the top of the leaves.
How to do
Things that you need – Light green, dark green, sponge and clear nail polish.
Steps
A.Pour two drops of light and dark green polish on a plastic plate.Do not mix the colors, keep them side by side.
B.Take a sponge dipped into the nail polish and gently dab it onto your nails.
C.Repeat the same until the entire nail is covered.
D.Now make 5 to 6 dots using clear nail polish on one side of your nails.
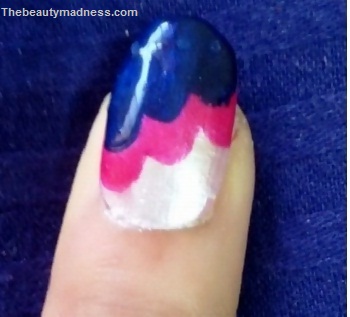
2.Cascade Style Nail Art
Cascade style nail art are the perfect wear for summer beach parties.They make your nails look delightful and attractive.
How to do
Things that you need – White, pink, dark blue and clear nail polish.
Steps
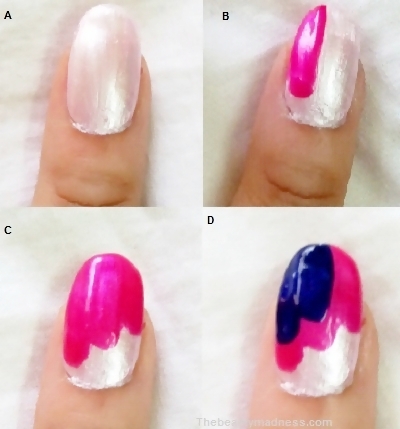
A.Apply a thin layer of white color nail polish as base coat and allow it to dry.
B.Draw three vertical lines using the pink polish.The three line must be in continuous form and each line must be shorter than the preceding one.The ends of the vertical lines must be semicircular and not flat.
C.Similarly, overlap dark blue color polish.Refer to the above image.
D.Once the nails dries completely, apply a topcoat for shine.
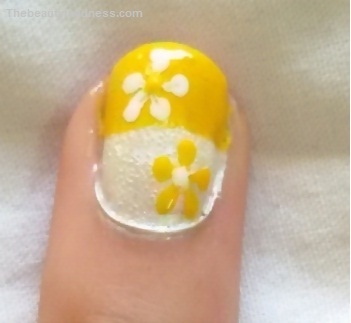
3.Reverse Color Half Nail Floral Design
If you want to make a stylish statement with your nails, then try out this creative nail art that is done by painting your nails half one color and the other half in another color, and then creating flowers with alternating colors.
How to do
Things that you need – Yellow and white color nail polish, toothpick and cellotape.
Steps
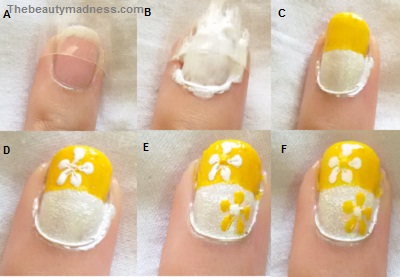
A.Cover half of your nail with a cellotape.
B.Now paint the exposed space on your nail using white color polish.
C.Remove the tape and apply yellow color to the other half of your nail.
D.To make a flower, create 5 white dots in a circle on the yellow colored part.
E.Drag each dot to the center of the circle and dot the center of the flower with a yellow nail color.
F.Repeat the same for the other half of your nails.
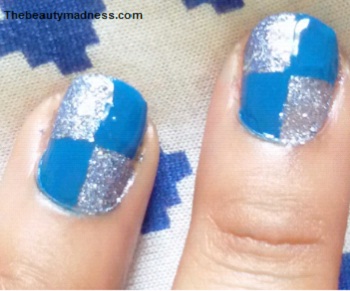
4.Color Block Nail Art Design
Get this super cool trendy nail art look by simply alternating two contrasting colors on each block.
How to do
Things that you need – Blue, silver glitter nail polish and clear nail polish for top coat.
Steps
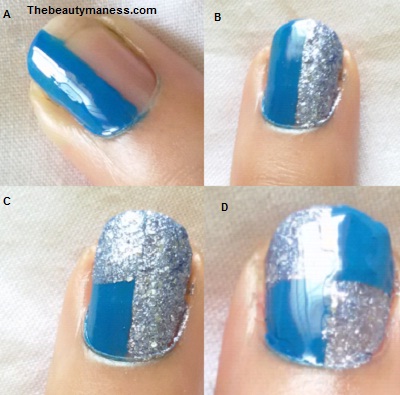
A.Colour half portion of your nails vertically with blue polish and the other half with silver polish.
B.Now apply one half of the nail with silver polish to form two squares similarly fill the other half with blue polish to form two squares.
C.Finally complete the look by applying a topcoat.
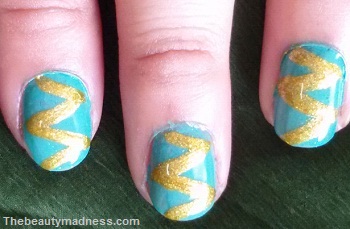
5.M Shape Trendy Nail Design
Here is another trendy nail design that can be achieved by painting horizontal letter M onto the nails.
How to do
Things that you need – Light green, golden and clear nail polish(top coat).
Steps
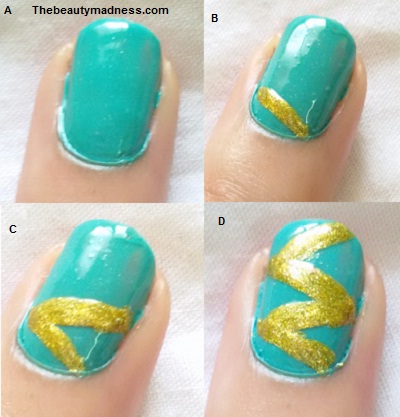
A.Apply two thin layers of green color nail polish and allow it to dry.
B.Draw a horizontal M shaped letter using golden color.
C.Apply a topcoat to protect nails and for shine.
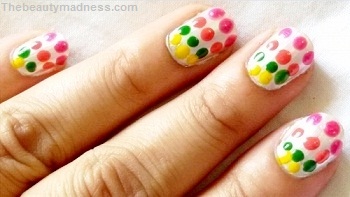
6.Colourful Polka Dot Nail Design
Polka dot nails are the most simple and cute way of designing your nails.It’s all about creating coloured dots circles of same size and equally spaced.
How to do
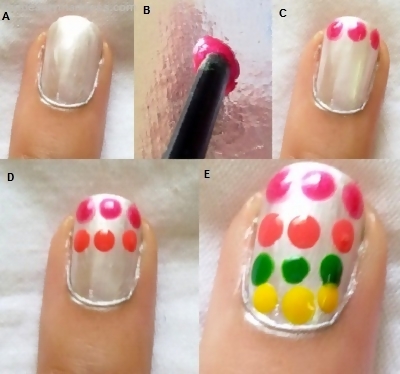
Things that you need – Pink, orange, green and yellow color nail polish, eyeliner brush, plastic plate and clear nail polish for top coat.
Steps
A.Apply two layers of white color nail polish and allow it to dry.
B.Pour few drops of pink color polish onto a plastic plate.
C.Dip the back side of the brush into the color and gently dab it onto your nails to create dots.
D.Create three equally spaced dots of the same color in a horizontal row.
E.Repeat the same for other nail colors.
F.Apply a topcoat to prevent chipping and to give a high-gloss shine.
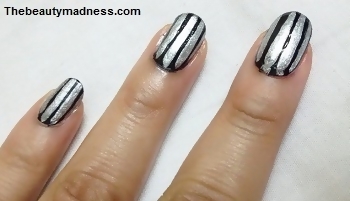
7.Vertical Stripe Nail Design
Stripes are one of the most classic prints that you can try on your nails.If you have short nails go for vertical stripes and long nails choose the horizontal stripes.
How to do
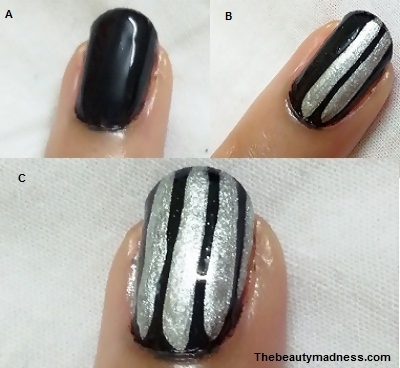
Things that you need – Black and silver color nail polish, nail striper or thin nail brush and clear nail polish for top coat.
Steps
A.Apply two layers of black color nail polish as base coat and allow it to dry.
B.Draw 3 vertical lines using the silver color polish.Make sure you equally spaced these vertical lines on your black color nails.
Make your skin look tempting, fresh and gorgeous this summer with these homemade hydrating face packs.These packs gives your skin an intense hydration boost, enhance firmness and complexion, moisturises and brings dull skin back to life.
Here are the 5 hydrating face packs that you must definitely try in summer.
1.Watermelon and Honey Hydrating Face Pack
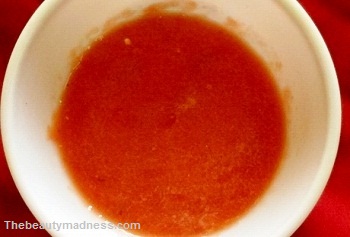
To prepare, blend few watermelon pieces to a smooth juice, Add 2 tablespoon of raw honey and mix it well.Apply the pack on your face and neck.Meanwhile, soak two cotton balls in fresh watermelon juice and place them on your eyes.Remove the pack after 20 minutes and then wash off using cold water.Watermelon is rich in nutrients, antioxidants, lycopene and vitamin C that repairs and protects skin damaged that is caused due to sun exposure.It nourishes and keeps your skin hydrated during summers. Honey moisturises and soften dry and rough skin.
2.Pulpy Mango and Milk Hydrating Face Pack
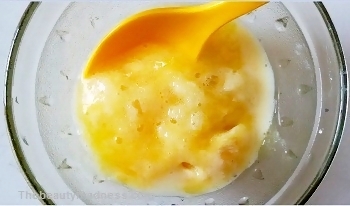
Dive into this luxurious fruity hydrating face pack made of ripe mango and milk.To prepare this face pack add few mango pieces into a mixer, add 3 tablespoon of fresh thick milk and grind until it forms thick smooth paste.Apply this face pack on your face using a thick, flat brush.Allow the pack to stay for 30 minutes and then wash off with cold water.This is an ideal summer face pack for dry and sensitive skin.Mango contains a significant dose of healthy vitamins such as Vitamin A, Vitamin C and Vitamin E that deep moisturises the skin, keeps skin hydrated, prevents wrinkles, removes blemishes and brings an instant glow and fairness to the skin.Milk naturally whitens the skin and provides intense moisturization.
3.Cooling Mint and Rose Water Hydrating Face Pack
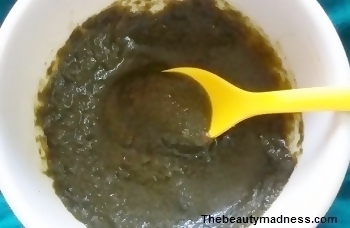
Crushed a handful of fresh mint leaves, add 4 tablespoon of rose water and mix it well.Apply this mixture on your face and neck.Leave the pack to dry for about 30 minutes and then wash your face using cool water.This is one of the best hydrating summer face pack for all skin types.Mint contains menthol that gives an instant cooling sensation when applied to skin.It retains water on the skin and prevents dehydration of skin.Rose water contains antiseptic properties that relieves itching and sun burned skin.
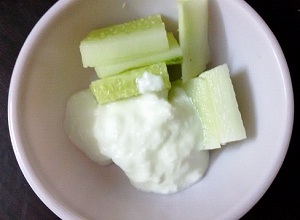
4.Refreshing Cucumber and Yogurt Hydrating Face Pack
This summer give your skin a boost of freshness with this hydrating cucumber and yogurt face pack.To prepare this facial mask, first peel the cucumber and then grate it.Add 2 tablespoon of frozen yoghurt and mix it well.Now apply this mixture evenly on your face and neck.Apply two slices of cucumber on your eyes.Leave the pack for about 20 minutes and then rinse off with cold water.This face pack gently cleanses, replenishes and hydrates your skin.Cucumber contains anti-inflammatory properties that soothes and relieves sunburned skin.Yoghurt gives a natural glow and boost your skin brightness.
5.Orange Juice and Aloe Vera Hydrating Face Pack
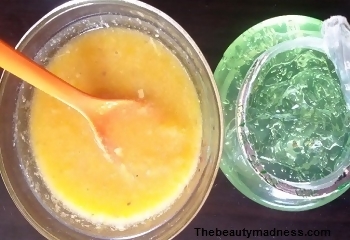
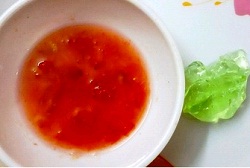
To prepare this face pack take 3 tablespoon of freshly squeezed orange juice, add 1 tablespoon of aloe vera gel and mix it well. Apply this pack on your face and leave it on for 20 minutes.Once the pack dries completely, splash your face with cold water.One of the best summer face pack for oily skin.This face pack reduces enlarged pores and removes excess oil from the pores thus making your skin healthy, hydrated and supple.Vitamin C in orange juice gives your skin a fresh radiant glow and aloe vera gives adequate nourishment and keeps you skin blemish-free.
Nail art designs has become the biggest beauty trend in the fashion world over the past few years.It has become the greatest fashion accessory among women of all ages.Now days every woman wants to decorate their nails in a creative way.Like others, you can also make your nails look gorgeous and stunning with these simple and cute 1 minute nail art designs.These nails designs suits short as well as long nails and can be worn with any outfit.You can achieve these nail art look without using any professional nail art brushes or tools.
Here are the nail designs with detailed picture and steps.
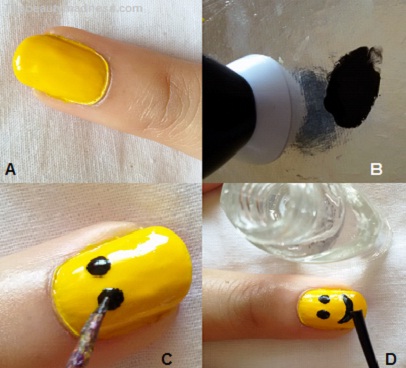
1.Smiley Nail Art
Feeling happy, sad or angry at someone, then express it through nails with this wide range of emoticons and smileys that are designed to express your emotions.
How to do
Things that you need – Yellow nail polish, black nail polish, clear nail polish (top coat), toothpick and plastic plate.
Steps
A.Apply 2 thin layer of yellow nail polish and allow it to dry completely.
B.Pour few drops of black nail polish on the plate.
C.Dip the tip of your toothpick into the color and create your desired emoticon.
D.Apply a topcoat to prevent chipping and to make nail polish last longer.
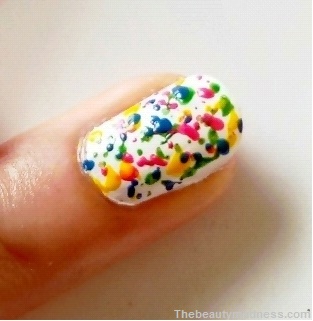
2.Color Splash Nail Art Design
It’s the quick and fun way to color your nails.It’s all about creating uneven dotted color splash on a white background.
How to do
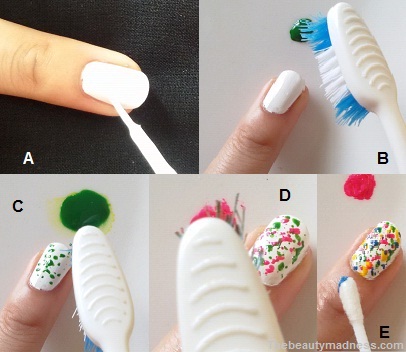
Things that you need – Toothbrush, white nail polish, clear nail polish (top coat), 4 bright nail polish colors of your choice, plastic plate, cotton bud and nail polish remover.
Steps
A.Apply 2 coats of white nail color and allow it to dry completely.
B.Pour few drops of colored nail polish on the plate.
C.Dip your brush into the desired color and gently dab it on your fingers.
D.Repeat the procedure for each color.
E.Clean off the excess using a cotton bud dipped in nail remover.
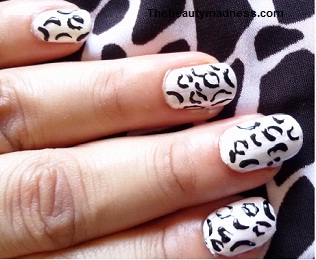
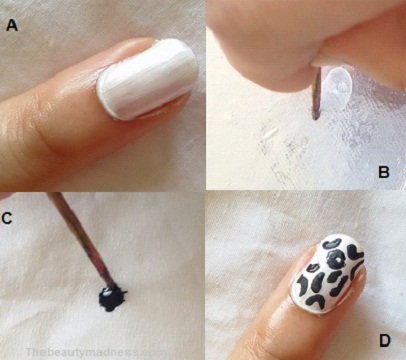
3.Leopard Print Nail Art
Animal prints have always been a popular style element in the fashion industry, especially leopard print that never go out of style.Make a bold fashion statement with this wild and funky leopard nail prints.
Things that you need – white nail polish, clear polish as top coat, black nail polish, toothpick and paper.
Steps
A.Apply 2 layer of white polish and allow the color to dry completely.
B.Make the pointed part of the toothpick blunt by pushing against a hard surface.
C.Pour few drops of black nail polish on the paper.
D.Dip the tip of your toothpick into the color and create irregular and broken circles and semicircles.
C.Apply a topcoat for a glossy shine.
4.Sparkling French Tip Nail Design
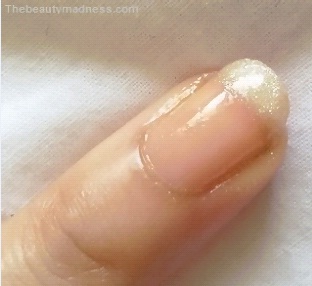
This nail style is inspired by the classic french manicure design where the nails are kept natural and the tips of the nails are painted with a sparkling white nail polish.
How to do
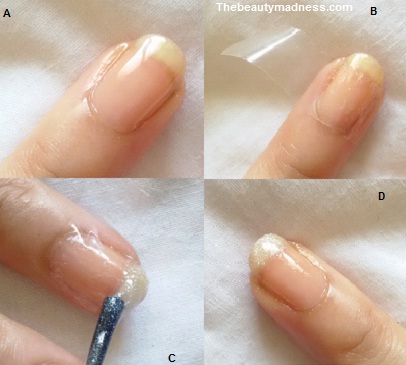
Things that you need – clear nail polish for base coat, white or silver shine nail polish and cello tape.
Steps
A.Apply a thin layer of clear nail polish as base coat.Allow the base coat to dry completely.
B.Cover your nail with a cello tape leaving the tip of your nail.
C.Now paint the tip of your nail with sparkling white nail paint and allow it to dry.
D. Remove the cello tape and you are ready with your classy french manicure design.
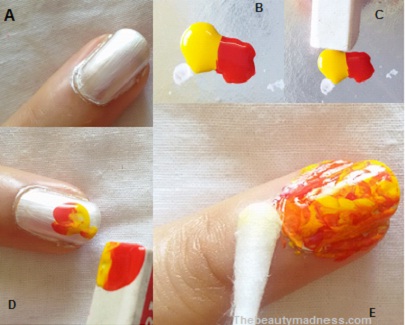
5.Color Blend Nail Design
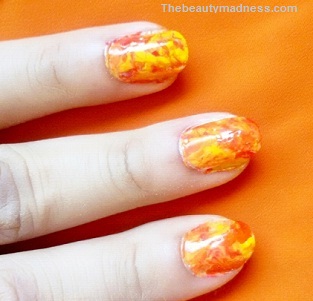
This amazing nail art is created by combining two primary colors to form a secondary color.Like yellow and red combination would give me orange, similarly you can choose any two colors from red, green, blue and yellow that are the primary colors.
How to do
Things that you need – Red and yellow nail polish, white nail polish for base coat, eraser, plastic plate, cotton bud, nail polish remover and clear nail polish for top coat.
Steps
A.Apply a thin layer of white nail polish as base coat and allow it to dry.
B.Pour two drops of red and yellow nail polish on the plate.Try to keep the colors side by side, do not mix together.
C.Now take an eraser and dip it into the nail polish and gently dab it onto your nails.
D.Repeat the procedure until the entire nail is covered.
E.Once the nail polish dries completely, apply a topcoat for better shine.
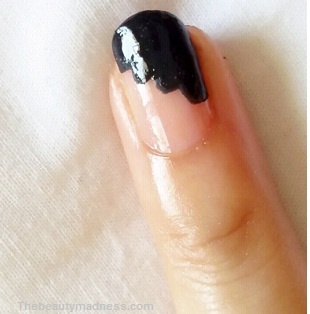
6.Staircase Style Nail Art
Get this trendy and stunning nail art look of a staircase in just 1 minute.
How to do
Things that you need : black and clear colored nail polish.
Steps
A.Apply one layer of clear colour nail polish as base coat.Allow the base coat to dry completely.
B.Now draw four vertical lines using your nail brush.
C.Each line must be shorter than the preceding one and should be in a continuous form with no gaps in between.
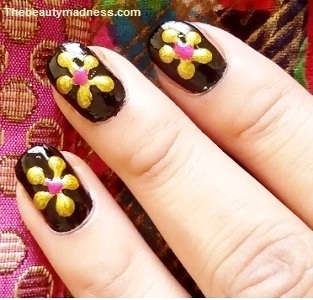
7.Flower Style Nail Art Design
This nail art is created by dragging dots to the center of the circle to form a beautiful flower shape.
How to do
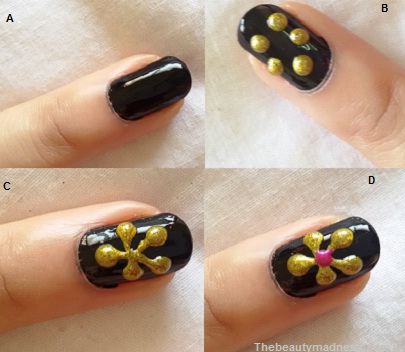
Things that you need – Black, golden and pink nail colors and toothpick.
Steps
A.Apply a layer of black nail polish and allow it to dry completely.
B.To make a flower create 5 golden dots in a circle using nail brush.
C.Now using the tip of the toothpick drag each dot to the center of the circle.
D.Dot the center of each flower with a pink nail color and you are ready with your stunning flower nails.
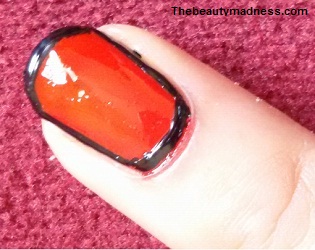
8.Border Nail Art Design
Border nail art is the most easiest way to design your nails.These nail art is created by outlining the edge of your nails with a dark nail color while keeping the base coat light or medium shade.
How to do
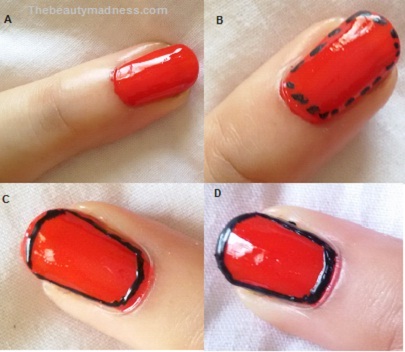
Things that you need – Red color nail polish, black color nail polish to border nails, clear nail polish as topcoat and toothpick.
Steps
A.Apply a thin layer of red color nail polish and allow it to dry completely.
B.Dip your toothpick in black nail polish and draw small dots around the border of your nails.
C.Now join the dots to form clean lines.
D.Fill the border with this color and apply a clear nail polish as top coat for a high shine.
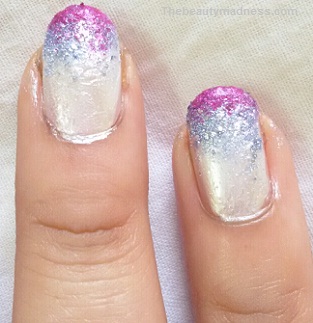
9.Gradient Nail Design
This is an absolutely gorgeous nail art technique that is created by stamping two or more nail polish colors with the help of a cotton ball or a sponge.
How to do
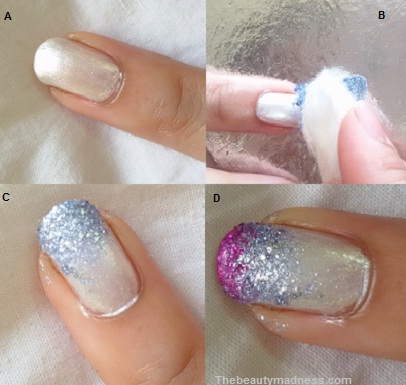
Things that you need – Silver base coat, 2 nail polish colors pink and metallic blue, clear top coat, plastic plate, sponge, cotton swab and nail polish remover.
Steps
A.Paint your nails using the silver color and wait till it dries completely.
B.Drop a generous amount of metallic blue color on the plastic plate.
C.Take a cotton ball, dip it into the color and lightly dab it on the upper half of your nail.Repeat the steps until you have achieved the desired effect.
D.Now again pour 2 to 3 drops of pink nail color and using the cotton ball gently dab it on the tip of your nail.
E.Clean up all the excess using a cotton swab dipped in acetone.
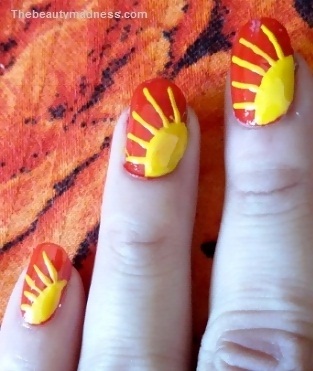
10.Sun Rays Nail Art
As the name suggest this nail art resembles to the rays of the sun.A very unique nail design that looks absolutely perfect to wear in summer.
How to do
Things that you need – Red and yellow color nail polish and clear nail polish for a top coat.
Steps
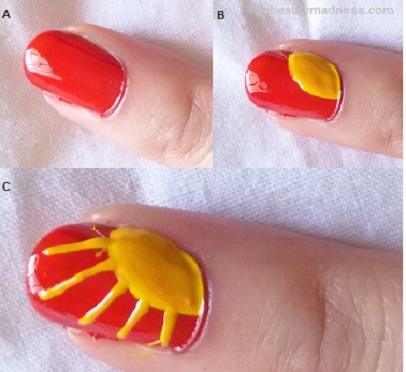
A.Apply two coat of red nail polish and allow it to dry.
B.Using the yellow nail color draw a quarter-circle at the bottom right corner of your nail.
C.Now draw five straight lines extending outward from the quarter-circle like the rays of the sun.You can use the tip of your nail brush or a toothpick to draw the lines.
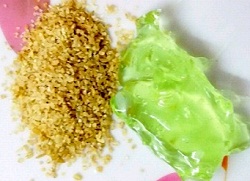
Aloe Vera is also known as the “miracle plant” for its medicinal and skin care properties.This plant contains a magical gel known as Aloe Vera Gel that have been widely used as a natural cosmetic to eliminate different skin problems such as skin pigmentation, discoloration, sun tan, sun rash, premature aging, acne, pimples, dry peeling skin, dark spots, pimple marks, acne scars and other common skin related problems.Aloe Vera Gel blended with other natural ingredients delivers amazingly glowing, fair and radiant skin.
Here are the 10 different homemade aloe vera face packs for Fair, Glowing and Flawless Skin.Choose the one that works best on your skin type and condition.
1.Aloe Vera Face Pack For Fair and Clear Skin Naturally
IngredientsYou Need – Aloe Vera Gel, Milk & Sandalwood Powder.
Make a paste of 1 Tbsp of aloe vera gel, 2 Tbsp of cold milk and a tbsp of sandalwood powder.Apply this pack on your face and neck.Leave for 20 minutes and then wash off with cold water.
Skin Benefits of Aloe Vera Gel Pack
This is a super effective aloe vera pack to lighten skin tone.Aloe vera gel contains a significant amount of Vitamin C that helps in intensifying skin fairness.Milk moisturizes and whitens the skin tone.Sandalwood has been widely used since ancient times to increase fairness and glow.
Best Suitable for Skin Types – Dry, normal and sensitive skin types
2.Aloe Vera Face Pack for Glowing Complexion
IngredientsYou Need – Aloe Vera Gel, Ripe Papaya & Rose Water.
Place a few pieces of ripe papaya, 2 Tbsp of aloe vera gel and 2 Tbsp of rose water in the blender and blend until smooth.Take a small amount of this paste on your palms and gently massage on your face and neck in an upward direction.Apply some more and leave for 15 minutes.Rinse using cold water and pat dry with a soft towel.
Skin Benefits of Aloe Vera Gel Pack
This face pack rejuvenates and boost facial radiance.Aloe vera gel smoothly absorbs into the skin, repairs your skin damage and gives your skin a healthy, natural glowing complexion. Papaya contains papain, an enzyme that makes the skin tone lighter and imparts a youthful glow.
Ingredients you Need – Aloe Vera Gel, Tomato juice & Lemon Juice.
Combine 1 Tbsp of aloe vera gel, 1 Tbsp of lemon juice and 2 Tbsp of tomato juice to a smooth paste.Wash your face with lukewarm water and then apply the pack.Let it sit for 25 minutes before you wash off with cold water.
Skin Benefits of Aloe Vera Gel Pack
This face pack is extremely effective in removing dark spots, acne scars and pimple marks.Tomatoes contain powerful antioxidants Vitamin A and Vitamin C that evens your skin tone and reduce the appearance of acne scars.Lemon eliminates dark spots, marks and lightens the complexion.
Best Suitable for Skin Types – Oily, acne prone and normal skin types
Check Out this Video on How to Use Aloe Vera to Remove Dark Spots, Pimple Marks, and Acne Scars Quickly
4.Aloe Vera Face Pack to Remove Pigmentation & Discoloration
IngredientsYou Need – Aloe Vera Gel, Cucumber & Multani Mitti or Fuller’s Earth.
Blend few peeled cucumber slices into a fine paste, add 2 Tbsp of aloe vera gel and 1 tbsp of multani mitti.Mix properly and apply on face.Let the pack stay for 30 minutes and then wash your face with cool water.
Skin Benefits of Aloe Vera Gel Pack
This pack helps you to get rid of dark skin pigments and restores the natural color of your skin.Aloe Vera and cucumber lightens pigmented area, removes excess oil and gives your skin a clean, fresh look.Multani mitti contains powerful cleansing properties that removes pigmentation and reduces uneven skin tone.
IngredientsYou Need – Aloe Vera Gel, Orange Peel & Lemon juice.
Blend 2 Tbsp of aloe vera gel, fresh orange peels and 2 Tbsp of lemon juice to a fine paste.Apply this pack to the sun affected areas to remove tan.Leave it on for 15 minutes and then rinse with cold water.
Skin Benefits of Aloe Vera Gel Pack
Aloe Vera Gel contains cooling properties that soothes and heals redness, inflammation and rash caused due to sunburn.Orange peel contains Vitamin C that reduces skin tan and brightens the complexion and lemon contains citric acid that lightens dark patches and dark spots that occur due to sun exposure.
Best Suitable for Skin Types – Oily, acne prone, dry and normal skin types
6.Aloe Vera Face Pack to Remove Acne and Pimples Instantly
Ingredients You Need – Aloe Vera Gel, Neem Leaves, Tulsi (Holy Basil) Leaves (Optional) & Honey.
Grind a handful of neem and tulsi leaves into a smooth paste using a little water, add 2 Tsp of aloe vera gel, 1 Tbsp of honey and mix all the ingredients well.Apply the paste onto the affected area and leave until it dries completely. Wash your face with cool water and pat it dry.
Skin Benefits of Aloe Vera Gel Pack
Aloe vera and honey contains antibacterial properties that kill bacteria and germs that cause pimples.Tulsi and neem leaves have anti-fungal, antibacterial and antiseptic properties that help to overcome acne problems.This face pack gives you clean, clear and smooth skin.
Best Suitable for Skin Types – For all skin types
7.Aloe Vera Face Mask for Skin Tightening and Anti Aging
IngredientsYou Need – Aloe Vera Gel & Egg White
Gently crack an egg and pour the egg white into a bowl.Add 2 Tbsp of aloe vera gel and whisk well until you obtain smooth fluffy consistency.Using a flat brush apply this mask on your face and neck.Allow it to dry for 15 minutes or until the face pack tightens.Gently remove the pack in an upward direction with the help of a cotton dipped in cold water.
Skin Benefits of Aloe Vera Gel Pack
Aloe vera keeps your skin hydrated, nourished and improves the level of collagen and elastin fibers thus protecting your skin from developing wrinkles and fine lines.It contains antioxidants that destroy free radical that cause aging.Egg white tightens and improves the elasticity and skin firmness.Rich in vitamins and fat it moisturizes and nourishes dehydrated skin and retains skin youth.
Best Suitable for Skin Types – For all skin types
8.Aloe Vera Face Pack for Dry and Sensitive Skin
Ingredients You Need – Aloe Vera Gel, Banana & Honey.
Mash a small-sized ripe banana, add 2 Tbsp of aloe vera gel and 2 Tsp of honey.Apply the paste on your face and neck and leave it for about 30 minutes.Gently remove the face pack by massaging in small circular motions. Rinse your face and neck thoroughly with lukewarm water.
Skin Benefits of Aloe Vera Gel Pack
This is an excellent face pack to remove dry, flaky cells from the skin surface.Aloe Vera gel contains vitamin E that soothes and moisturizes dry skin.Banana softens and rejuvenates dry skin.Honey smooths dry lines and prevents premature aging and dryness.
9.Aloe Vera Face Pack for Clear Skin
IngredientsYou Need – Aloe Vera Gel, Honey & Baking Soda Powder.
Mix 2 Tbsp of aloe vera gel, 1 Tbsp of baking soda and 1 Tbsp of honey to make a smooth paste.Steam your face to help open clogged pores.Apply the pack and let it sit for 15 minutes and then wash off using cool water.
Skin Benefits of Aloe Vera Gel Pack
Aloe vera contains healing properties that reduce skin blemishes and honey natural antioxidant and anti-inflammatory properties reduce redness and skin inflammation.You can use this face pack daily to get a clean, clear and smooth skin.
Best Suitable for Skin Types – For all, except sensitive skin type.
10.Aloe Vera Face Scrub for Soft Smooth Skin
Ingredients – Aloe Vera Gel, Honey & Brown Sugar
Prepare a scrub by mixing 2 Tbsp of aloe vera gel, 1 tbsp of honey and 1 Tbsp of granulated brown sugar.Wash your face with warm water and then gently scrub for 2 minutes, target mostly your T-zone areas: nose, chin and forehead, because these areas are more prone to blackheads and whiteheads.
Skin Benefits of Aloe Vera Gel Pack
Aloe vera penetrates deep into the skin, softens the dead skin cells and opens the skin pores.Brown sugar removes dirt, dust, dead skin cells and excess oil trapped in the pores thus making your skin look healthy and beautiful naturally.
Best Suitable for Skin Types – All skin types
I have tried all of these packs and believe me these aloe vera packs are truly effective for your skin.If you have any questions or suggestions then you can share with me in the below comment section.
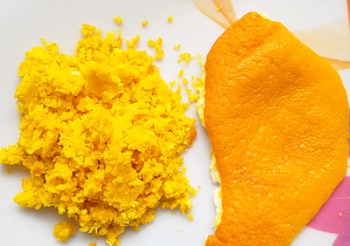
Are you throwing away the peels after eating fruits?.. Fruit Peels contains numerous health and skin benefits.Peels are packed with powerful antioxidants, vitamins, dietary fiber and essential oils that fights acne and skin blemishes, boost collagen, premature ageing, lightens skin tone and makes your skin healthy, fair and glow.Here are the 6 amazing fruits peels that you should never throw away.
1.Orange Peel
Skin Benefits of Orange Peel
Orange peel is an extremely good source of vitamins and minerals.It contains Vitamin C and Vitamin A that is extremely beneficial for skin.Vitamin C acts as a natural skin bleacher, it enhances your complexion and boost your skin natural radiance and glow. Vitamin A helps in reducing wrinkles, dark spots and skin roughness.Orange skin are packed with antioxidants that boost skin elasticity, fight acne and protects the skin from free radical damage.
Orange Peel Face Pack
Take 2 tbsp of orange peel powder, add 1 tbsp of honey and 1 tbsp of thick yogurt.Mix them properly to get a smooth consistency. Apply this pack to your face and neck.Leave it to dry for 20 minutes and then wash your face with lukewarm water.If you have an extremely dry skin then you can add the contents of a Vitamin E capsule to the pack and then apply.This face pack gives your skin a natural glow and enhances your skin complexion.
2.Lemon Peel
Skin Benefits of Lemon Peel
Lemon peel contains bioflavonoids, an antioxidant that reduces oxidative stress and helps in removing toxic elements in our body.Lemon peel contains antibacterial and anti-inflammatory properties that purifies and eliminates skin impurities.It is rich in Vitamin C and citric acid that boost radiance and promotes a healthy skin.
Lemon Peel Face Pack
In a bowl add 2 tbsp of lemon peel powder, add 1 tbsp of brown fine sugar, add 1 tbsp of honey and 1 tbsp of almond oil.Mix all the ingredients properly.Now take some amount of this mixture on your hand and scrub gently on your face and neck for 2 minutes, apply some more and leave this pack to dry for 10 minutes.Wash your face with cool water.This pack exfoliates your skin, removes dead skin cells and makes your skin visibly fair and smooth.
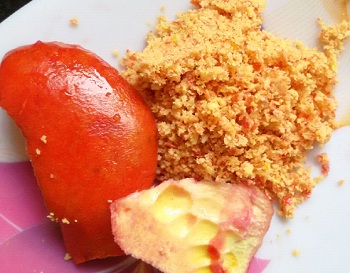
3.Pomegranate Peel
Skin Benefits of Pomegranate Peel
Pomegranate has been named as the “fruit of heaven” because of its vital nutrients and several health benefits.It is considered that skin of pomegranate contains powerful antioxidants then the pulp itself. Pomegranate skin is packed with antioxidants such as flavonoids called proanthocyanidins and non flavonoids such as Vitamin C and Vitamin E that reduces sagging skin and wrinkles.It also purifies blood to prevent the outbreak of wrinkles, improves skin complexion and nourishes the skin.
Pomegranate Peel Face Pack
Take 2 tbsp of pomegranate peel powder, add 1 tbsp of lemon juice and 1 tbsp of honey.Mix all the ingredients properly to form a smooth paste.Apply this pack on your face and neck and leave it to dry for 15 minutes.Wash your face with lukewarm water.This face pack removes dark spots, lightens acne scars, hydrates and brightens the skin naturally.
4.Apple peel
Skin Benefits of Apple Peel
Apple peels are rich in vitamins and minerals.The skin of the apple contain polyphenols, an antioxidant that fight free radicals and protect against ultraviolet radiation to help you in achieving younger looking skin.Polyphenols improves the skin cell growth and overall skin quality.Apple skin is rich in vitamin C that prevents premature aging, promotes even skin tone and enhances skin glow.
Apple Peel Face Pack
Take 2 tbsp of apple peel powder, add 3 tbsp of butter milk and mix it properly to form a smooth paste.Apply on your face and neck and leave it to dry for 25 minutes.Wash your face with cold water.This pack improves the color of your skin, makes your skin soft and radiant.
5.Banana Peel
Skin Benefits of Banana Peel
Banana peel contains antioxidant properties that reduce oxidative stress and protects the skin from harmful ultraviolet sun rays. These antioxidants also helps in reducing acne and pimple redness.Banana skin is rich in potassium that keeps your skin hydrated, supple and moisturised.
Banana Peel Face Pack
Take a ripe banana peel and rub it on your face for 2 to 3 minutes.Leave it to dry for 10 minutes and then wash your face with luke warm water.This pack protects the skin from sun damage, reduces pimples and gives a blemish free glowing skin.
6.Papaya Peel
Skin Benefits of Papaya Peel
Papaya peel contains alpha hydroxy acids(AHAs) that lightens skin tone, moisturizes dry skin and prevents sagging skin.The papain enzyme present in papaya skin soothes sun burned skin, removes dead skin cells and removes skin blemishes.
Papaya Peel face Pack
Take a clean, ripe papaya skin and blend it in a mixer to form a paste.Add 2 tsp of honey and 1 tsp of lemon juice.Mix all the ingredients properly and apply on your face and neck.Leave it for 15 minutes to dry and then rinse using lukewarm water.This face pack moisturises your skin, remove dark spots and scars and gives an irresistibly smooth and glowing skin.
Make sure you wash the fruit peels extremely well before applying it on your skin.
These were some of the amazing fruit peels to make your skin fair and glow.If you know any other fruit peels that has healthy skin benefits then you can share with us your ideas and suggestion in the below comment section.Feel free to ask if you have any concern or queries related to beauty skin problems.
Here are the most effective and simple remedies that can help you to remove sun tan, sunburn and sun rash.These home remedies also helps in removing dark patches, wrinkles and sagging skin that is caused due to sun exposure.You can apply these natural packs to any affected area of your skin to get rid of sun tan and to get the original color and glow back.
1.Cucumber and Yogurt
How to use
Take few peeled pieces of cucumber and grind to make a smooth paste.Add 2 teaspoon of fresh cold yogurt to the cucumber paste and mix it properly with the help of a spoon.Apply the pack gently on your face and neck.Leave it to dry for 15 minutes and then rinse with cold water.
Benefits
Cucumber gives an instant coolness to your skin and lightens the color of your tanned skin.Yoghurt is used as a natural tan remover.It contains lactic acid that is very effective in removing tan and sun rash.It contains powerful nutrients that helps in improving complexion and in reducing wrinkles and dark patches that is caused due to sun exposure.
2.Rose water and Baking soda
How to use
Fill a large bowl with cold water, add 1/4 th cup of rose water and a pinch of baking soda.Dip a soft sponge or cotton bowl into this mixture and gently wipe your face and neck.Repeat 5 to 6 times.To remove sun tan from different parts of your body, filled your bucket with cold water, add 1/2 cup rose water and 3 tablespoon of baking soda.Take a bath with this soothing solution to remove itchiness, redness, skin rash and skin tan.
Benefits
This is one of the best remedy to cool your skin in the hot summer and to remove sun tan and dark patches.Rose water contains astringent and anti-inflammatory properties that reduce skin tan and improves the appearance of sun damaged skin.
3.Cold milk
How to Use
Take 1/4 th cup of cold raw milk.Dip a soft sponge or cotton ball into the milk and wipe it on your face and neck.Repeat it for 5 to 6 times and then rinse with cold water.
Benefits
Milk contains natural soothing and moisturising properties that soothes and heals sun rashes, softens the skin and make your skin more brighter and glowing.One of the effective remedy to get relief from sun tan.
4.Egg white and Orange juice
How to Use
To start, gently crack an egg and separate the egg yolk from the egg white into two different bowls.Take the bowl that contains the egg white and add 2 teaspoon of orange juice( Freshly squeezed).Mix it properly until you get a smooth and fluffy mixture.Using a flat brush apply the mixture on your face and neck.You can use this pack to apply to the sun tan areas of your skin.Leave it to dry for 20 minutes and then rinse with cold water.
Benefits
Egg white contains vitamin A and collagen that helps to lighten sun tan and sun burn skin.The presence of fats and proteins in egg whites mositurises and tightens the skin to give you a youthful radiant glow.Orange juice contains vitamin C and natural skin bleaching properties that helps to remove dark patches and sun tan.It also contains astringent properties that is excellent in treating sun rash.
5.Mint leaves and Rose water
How to Use
Grind a handful of mint leaves to a smooth paste, add 6 to 7 drops of rose water and mix it well.Apply this pack on your face and neck.Keep this pack for about 15 minutes and rinse it off with cold water.You can also use this pack on your hands and legs to get rid of sun tan.
Benefits
Mint leaves soothes the sun burned skin and provides an instant cooling sensation.It reduces inflammation and skin redness and promotes healing.Rose contains astringent and anti-inflammatory properties that reduce skin inflammation and sun burning sensation, protects the skin against harmful ultraviolet sun rays and improves skin glow.
6.Fruits Pack
How to use
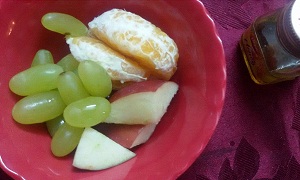
In a bowl add 3 to 4 grapes, 2 pieces of sliced apple, 2 orange slices and 1 tablespoon of honey.Grind all these ingredients to make a fine paste.Apply this creamy fruity pack on your face and neck.Leave it to dry for 20 minutes and then wash off with cold water.
Benefits
An effective pack in removal of sun tan, sunburn and dark patches.Grape is the most detoxifying and skin lightening fruit.Grapes and apple contain malic acid, an antioxidant that acts as natural bleaching agent and fight against harmful free radicals.orange contains vitamin C and alpha hydroxy acid that rejuvenates and lightens dark tanned skin.Honey contains natural healing agent that is used in the treatment of rashes.
7.Tomato and Coconut milk
How to use
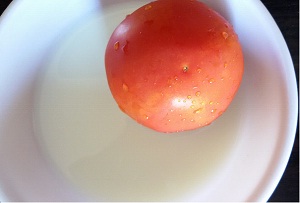
Squeeze a ripe tomato to take the juice out.Add 3 tablespoon of tomato juice and 2 tablespoon of coconut milk.Mix it well and gently apply to the sunburned or sun tanned area.Leave it to dry for 15 minutes and then rinse with cool water.You can use this pack on your hands and legs to get rid of sunburn and sun rash.
Benefits
Tomatoes contain lycopene, an antioxidant that reduce skin redness, removes dead skin cells and wrinkles that are caused due to sun exposure.It also fades dark spots and improves skin complexion.Coconut milk act as a great skin toner it removes tan and soothes the sunburn skin.
Remove Sun Tan Quickly
8.Potato and Lemon juice
How to Use
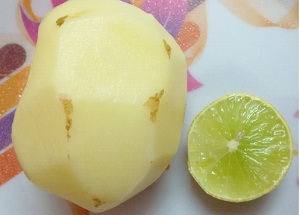
Take a fresh raw, peeled potato and cut into pieces.Add few potato pieces into the mixer jar, add 1/4 th cup water and 3 tablespoon of lemon juice.Grind it to form a fine paste.Apply it on the affected area and massage it gently for 1 to 2 minutes.Apply some more and allow it to dry for 10 minutes.Rinse it off with cool water.
Benefits
Potato and lemon both act as an natural skin bleacher.They help in removing sun tan, dark spots and acne marks and makes your skin naturally fairer and radiant.
9.Sugar and Almond oil
How to Use
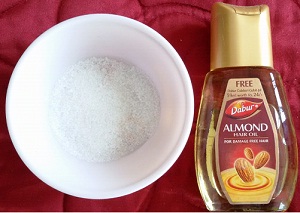
Add 2 teaspoon of granulated brown sugar(you can substitute brown sugar with white sugar) and add 2 tablespoon of almond oil into a bowl.Take some amount of this granulated mixture into your hand and gently rub over the affected area for 2 minutes. Remove the mixture with the help of a towel dipped in cold water.
Benefits
Sugar acts as an exfoliating scrub.It removes dead and dry flaky skin cells, lightens the tan skin and makes the skin feathery silky and smooth.Almond contains vitamin e that moisturizes the skin and helps in repairing damaged skin.
If you have any such home remedies to get rid of sun tan then you can share your ideas in the comment’s section.
Have you ever been in a situation when you are running out of time..and, lo you open the makeup box to find your liquid foundation is over.Isn’t this quite irksome?.Well, I have found a beauty solution that can tackle this kind of problems.
Have you ever wondered how to make your own face foundation?.Now you can also create your own shiny cream based foundation at home in just a few simple steps.You can make this foundation without spending a single penny and all that you need is some common and unused items from you makeup box.
Just follow the below step-by-step procedure to achieve this creamy shiny facefoundation.
Things that you need
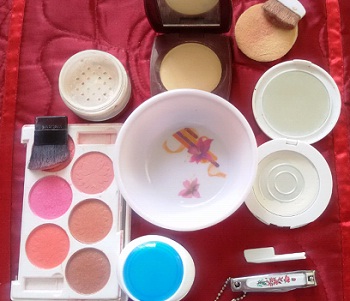
Moisturising Face Cream, Powder blush, Translucent powder, Loose Shimmer powder(optional), Bowl, Spoon or Spatula to mix and Nail cutter blade.
Step 1
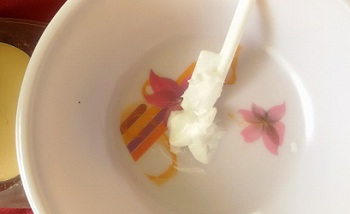
Gently scoop out some amount of moisturising cream with the help of a spatula.You can choose the face moisturising cream based on your skin type.If you have a oily skin then use a non-oil based moisturiser.
Step 2
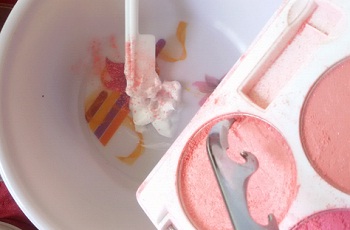
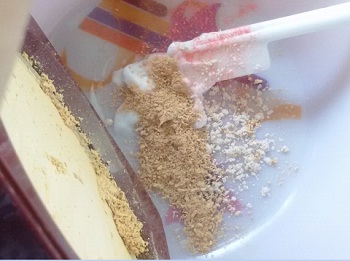
If you have a fairer skin tone then scrape out few amount of bright pink powder blush into the bowl with the help of a nail cutter knife or butter knife.Wheatish and dark skin tone can use orange or coral blush shades.
Step 3
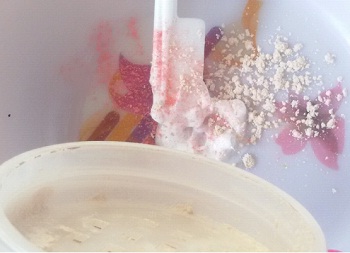
This step is optional but if you want to make a shine based foundation then add some loose translucent shimmer powder into the bowl.Adding translucent powder to your foundation gives your skin perfect coverage and intense shine.
Step 4
Depending on your complexion you can choose a lighter or a darker color translucent powder.The translucent powder should closely match your natural skin tone.Just scrape out decent amount of translucent powder into the bowl.Translucent powder is the one that gives color to your foundation.
Step 5
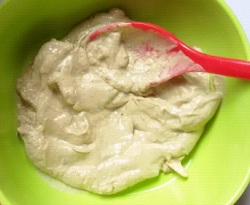
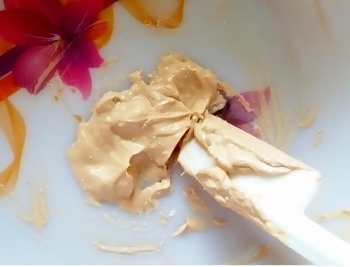
Finally, mix it well to form a glossy creamy paste.The foundation should be soft and smooth so that it gives an excellent coverage and even out your skin tone.
Step 6
Below is the image that shows how this foundation looks on my hand.
Just try it and let me know if you find any difficulty in making this creamy shiny face foundation.If you have any concern or beauty suggestions then feel free to post your comments below.
Have you ever tried creating a water marble nail art? .Well, I know like me, many of you must have tried, some might have succeeded and some failed.Today I will be sharing with you the detailed step by step procedure with pictures, secret tips, techniques and finally a water marble nail art video to help you in creating your first successful, perfect water marble nail art.This is a very useful article for all beginners who have failed in getting those beautiful water marble nails.
Step by Step procedure to Create a Perfect Water Marble Nail Art
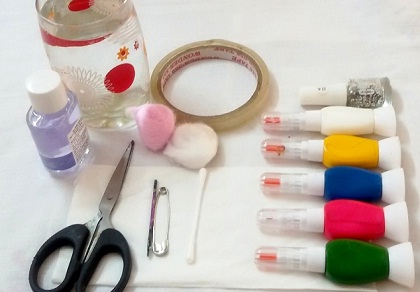
Things that You Need :
A Glass or a Cup
Filtered Room Temperature Water
Col0red Nail Polish
Base Coat and Top Coat
Nail Polish Remover
Tissue Paper
Cotton Balls
Cotton Bud
Toothpick or Safety Pin
Scissors
Cello Tape
Step 1
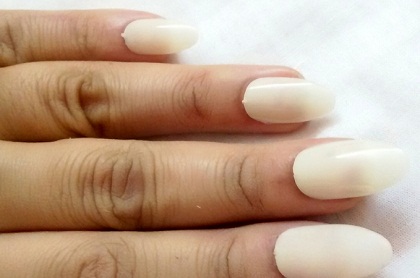
Make sure your nails are not very oily or greasy.Avoid using any moisturiser on your nails before you start water marble nail art.Keep your nails clean and dry.
Step 2
Apply a base coat to your nails to enhance the color intensity and to help the polish colors stick to your nail surface easily.It also gives your nails a clear visible water marble effect and makes your nail colors look more vibrant and brighter.You can use a white base coat or any other color of your choice.
Step 3
Instead of tap water use filter water.Tap water may contains chemicals that can prevent the nail polish from spreading on the surface.
Step 4
Never use cold water because it can cause your polish to dry quicker.Use filtered room temperature water or lukewarm water that works the best.
Step 5
Choose nail colors that have thin consistency and doesn’t dry quickly.If the nail polish is thin it will easily drop within a second.
Step 6
Do not drop the nail polish too high or add too much because it will fall to the bottom of the glass or it will not spread well.
Step 7
Keep all bottles of your nail polish open and ready.Place them within your reach because you have to work quickly.
Step 8
Before your start water marbling keep your windows closed and turn your AC or fan off.
Step 9
Do not use large cups or glasses this is because it will prevent the formation of a good layer of circle.
Step 10
Apply cello tape around the skin surrounding your nails to prevent nail polish sticking on your fingers.
Step 11
Drop one or two drops of your second color nail polish on the top of the your first color(base color).Repeat and continue the process until it form concentric rings with different colors of nail polish.Keep a gap of maximum 3 to 4 seconds between each drops of nail polish.If you take long it may dry out.If the nail colors doesn’t spread easily shake your glass or cup.
Step 12
Use a toothpick or a safety pin to create the water marble design.You can either start from the outer edge and drag towards the center or vice versa.Normally it is best to start from the second or third last ring because the outermost ring usually gets dried.
Step 13
Once you have created your water marble design, try positioning your finger to the best part of the water mark where you want your nails to be colored.
Step 14
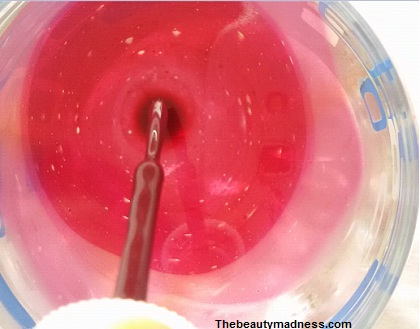
Dip your finger nail into the water as shown in the below screenshot.Just blow on the surface of the water to make it dry and then clean out the excess with the help of a cotton bud.
Step 15
Remove your finger nail straight out from the water exactly in the same position to prevent the formation of bubbles.
Step 16
Now gently remove the cello tape with the help of a scissors and wipe the excess on your finger with the help of a nail polish remover.
Step 17
For more shine apply a transparent glitter top coat.
Here is a quick video to create a perfect water marble nail art
Step 18
Congrats!! you have succeeded in creating your first ever perfect water marble nail art.
Have you ever wondered how to make an eye gloss? Now turn any old powdered eye shadow into expensive, glossy and shimmery eye gloss in few easy and quick steps.
Steps on how to turn any eye shadow into shimmery eye gloss
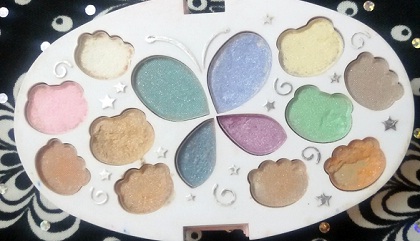
Things that you need : Eye Shadow, Cotton buds, Translucent shimmer loose powder, Vaseline petroleum jelly, Nail cutter knife and Plate or bowl to mix.
Step 1
Select any light color eyeshadow of your choice.Best to go for nude shades such as peach, beige, etc.Shimmer and sparkle looks great and attractive with these eye shadow colors.
Step 2
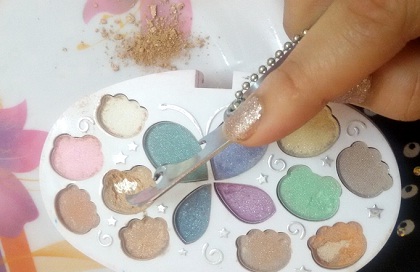
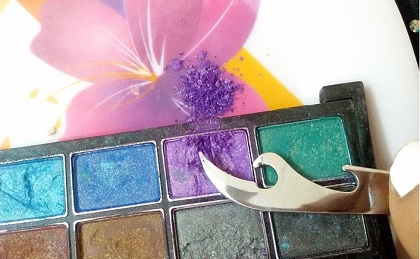
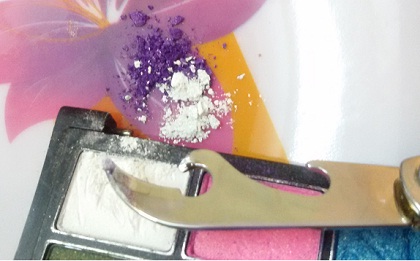
Scrape out small amount of eyeshadow onto a plate or into a bowl with the help of the nail cutter knife.
Step 3
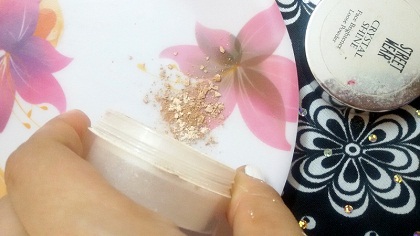
Add few loose translucent shimmer powder or glitter powder and mix it well.
Step 4
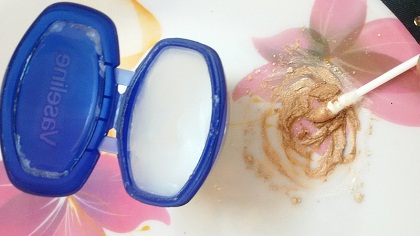
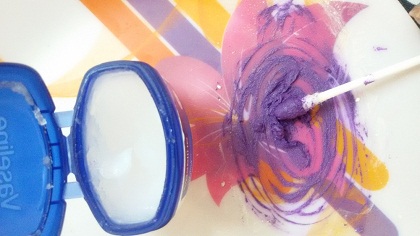
Scoop out a tiny amount of petroleum jelly with the help of a cotton bud.Mix it properly to make a smooth paste.
Step 5
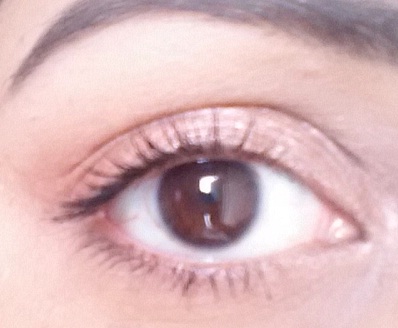
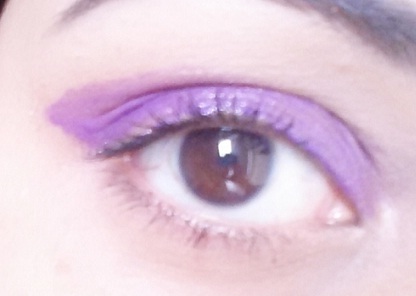
You are ready with your new shimmery, lustrous eye gloss.These glossy eyeshadow enhances your look, makes your eyes look brighter and natural.Looks best in daytime.
Steps how to turn any dark or bright colored eye shadow into a lighter eye gloss
Things that you need : Eye Shadow, Cotton swabs, White color eyeshadow, Vaseline petroleum jelly, Nail cutter knife and Plate to mix.
Step 1
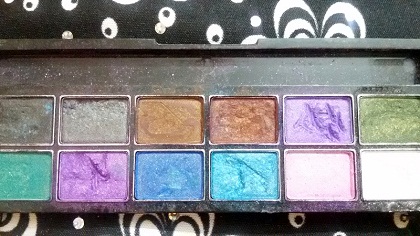
Take any dark or bright color eyeshadow of your choice.
Step 2
Scrape out small amounts of dark eye shadow onto a plate or into a bowl with the help of a nail cutter knife.
Step 3
To turn the dark eye shadow color into a lighter shade, you can add some white face powder or alternatively you can scrape out white colored eye shadow.Mix it properly to achieve a lighter shade.
Step 4
Scoop out small amount of petroleum jelly with the help of a cotton bud.Mix it properly to make a smooth paste.
Step 5
You are finally ready with your much lighter, smoother and glossy eye shadow.