







Wednesday, August 5, 2026

10 Home Remedies to Get Pearl White Teeth in just 2 Weeks

Want to get visible pearl white teeth at home?..Try these remedies that can help you to achieve sparkling white shine to your teeth in just 2 weeks.These home remedies not only makes your teeth whiter, but also alleviates many other dental problems, including gum diseases, yellow and black stains, discoloration, bad breath, tooth decay and cavities.

Try these remedies they really works!!..After using these remedies for about 2 weeks my yellow teeth has become whiter like never before.Now you can also have a beautiful white smile like me.
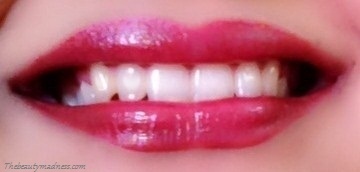
pearl white teeth

Here are the home remedies to get pearl white teeth in just 2 weeks.


1.Clove and Salt
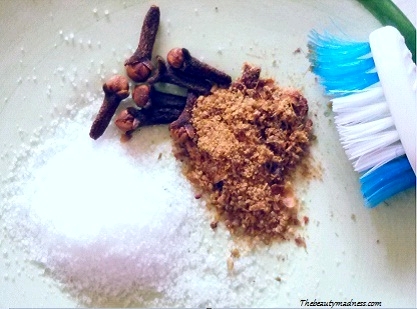
pearl white teeth clovesalt

Take 6 to 7 whole cloves and grind them into fine powder, add a pinch of salt and properly combine the ingredients.Dip a wet toothbrush into this powder and then brush for 1-2 minutes.Rinse using luke warm water.Cloves contains antiseptic and antimicrobial properties that kills bacteria and fungi that causes tooth discoloration.It’s cleansing properties keeps your mouth refresh and clean.Salts destroy germs and keeps your teeth healthy and white.

Recommended – Once in every 2 days and before brushing with toothpaste.


2.Baking Soda and Lime
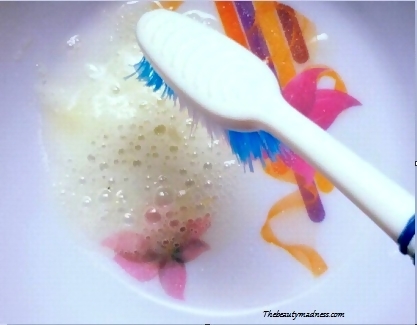
baking soda and lime

To prepare simply mix half a teaspoon of baking soda and 1 teaspoon of freshly squeezed lime.Dip your toothbrush into this mixture and gently brush your teeth.Allow the paste to sit for about 1-2 minutes and then rinse with luke warm water.Don’t brush for longer than 2 minutes.Baking soda is an effective stain remover.It whitens yellow teeth and removes brown stains on the teeth that is caused due to consumption of excess tea, coffee and tobacco.Besides oxidizing the stains, it also prevents bacteria growth and removes plaque.Lime stops bad breadth and its bleaching properties whitens your teeth.

Recommended – 2 times in a week.


3.Neem Bark Powder
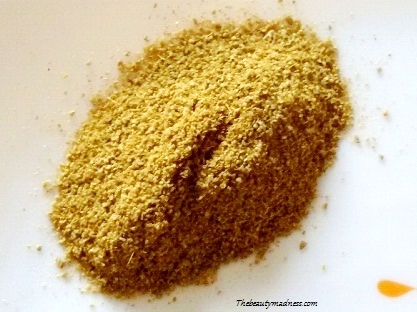
neem bark powder

Take 1 tbsp of neem park powder on a plate.Just Dip a wet toothbrush into this powder and gently brush for 2 minutes.Neem bark posses strong antibacterial properties that fights bacteria that causes gingivitis and bad breath and leave your teeth cleaner and whiter.

Recommended – Three times in a week


4.Strawberry

Crush few ripe strawberries into a paste.Apply this paste on your teeth and leave it for 5 minutes.Now gently brush your teeth to remove this paste.This is an excellent home remedy to get pearly white teeth instantly.Strawberries contains teeth-whitening enzymes, malic acid that removes stain and discolorations on your teeth and helps whiten teeth.

Recommended – Once in every 3 days.


5.Mint and Basil leaves

Crushed few mint and basil leaves to form a paste.Now using your fingers rub your teeth with this mixture gently for 3 to 4 minutes.Rinse off with cool water.Mint leaves contains a compound called menthol that is beneficial in preventing bad breath and also for whitening teeth.Holy Basil has medicinal properties that stops bad breath, tartar and dental plaque that causes yellow teeth.

Recommended – Daily after brushing your teeth in the morning.


6.Banana Peel
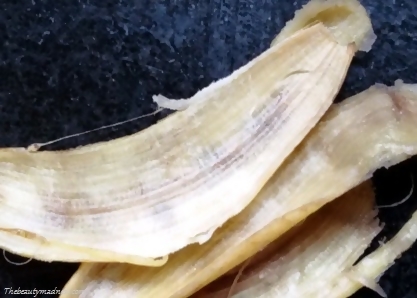
banana_peel

Get a ripe banana peel and gently rub the inside part of the banana peel along your teeth for 2 minutes.Make sure that you are covering all sides of your teeth.Banana peel removes unwanted stains from your teeth, it contains a large amount of minerals such as potassium, calcium and magnesium that absorbs into your teeth, keeps them strong and whitens the teeth.

Recommended – Every alternate day.


7.Vinegar and Honey
vinegar_and_honey

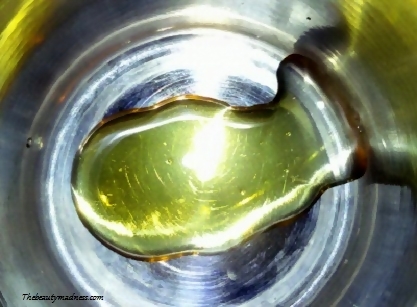
Mix 1 teaspoon of honey and 1/2 teaspoon of vinegar.Dip a cotton swab in this mixture and rub gently across your teeth for 1 minutes.Wash your mouth properly with cool water.Vinegar kills bacteria in your mouth that causes yellow stains and gives you a pearl white teeth.

Recommended – Every alternate day.


8.Orange and Lemon Peel Powder
home remedies to get pearl white teeth

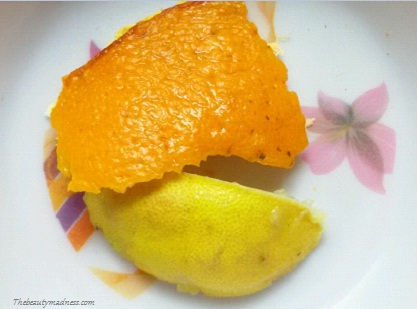
Dry few pieces of lemon and orange peel in the hot sun for 4 hours.Once the moisture is lost grind it to form fine powder.Take some mixture and apply on your teeth.Brush for 1 minute and then rinse off with lukewarm water.Lemon and orange peel have bleaching properties that are effective in removing yellow stains from the teeth and makes your teeth whiter.

Recommended  – Twice in a week


9.Sesame Seeds

Soak some sesame seeds for 1 hour.Blend it to form a semi-smooth paste.Dip your toothbrush into this paste and slowly in circular motion brush your teeth with it.Ensure that you have covered all of your teeth with this paste.Sesame seed is rich in calcium that keeps your gum and teeth healthy.It scrub away the plaque and stubborn stain to make your teeth notably cleaner and appear visibly white.

Recommended  –  Three times in a week


10.Tea Tree Oil

Pour few drops of tea tree oil on tooth paste and then brush your teeth.Tea tree oil stops bad breath and periodontal disease.It improves the health and whiteness of your teeth.

Recommended  – Daily


Rimmel London Moisture Renew Lipstick Berry Queen Review

Rimmel London Moisture Renew Lipstick Berry Queen

Hi Ladies,

Today I will be sharing my review on one of my favourite lip color from Rimmel London which I bought around 4 months ago.I remembered it was festive season and I was searching online for a red color lipstick to match my pretty red dress.Surprisingly! I found this lovely shade of red that I wanted.Read further to know more about “Berry Queen”.

Description of the Product Rimmel London Moisture Renew Lipstick Berry Queen

rimmel london moisture renew lipstick

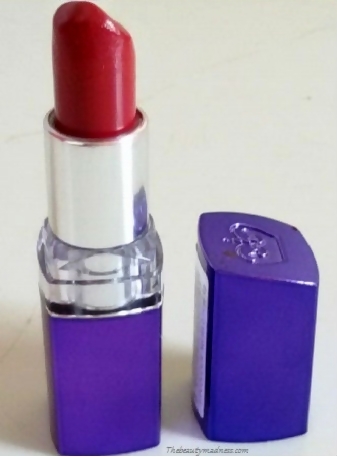
The lipstick is from Rimmel london and the shade color is 940 Berry Queen.The color is not so light or dark, it’s a medium cherry color lipstick with creamy consistency.The lipstick comes in an elegant metallic purple case with flip lock cap.It’s moisture infused formula keep your lips 70% hydrated and 60% smoother.

berry_shade_rimmel

It contains SPF 18 for sun protection and enriching vitamins such as vitamin A, C , E for nourishing lips.It also contains collagen and hyaluronic acid to prevent sun damage and to make your lips more healthy and youthful.

Experience with Rimmel London Moisture Renew Lipstick Berry Queen

Honestly speaking my experience with this product was quite exciting.I had never used Rimmel products earlier, but after trying this one I can definitely say their products are really wonderful.

pink_lips_

The lipstick is irresistibly smooth and is easy to use.It glides on smoothly, stays creamy and imparts a luxurious shine to my lips.Just one swipe is enough to provide full coverage.The color is rich, intense and vibrant.The lipstick had a fresh smell of roses.The moisture locking formula made my lips soft and smooth.What I really loved the pigmentation and lustre.My lips look succulent and plumpy.I feel this red shade truly compliments my skin tone the most.

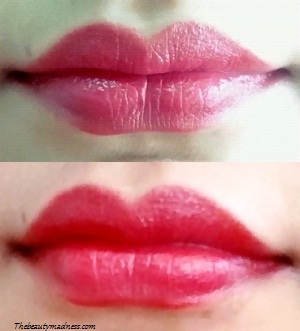
Depending on the light condition, the color may look slightly different.Check out the below picture, the first image was taken with natural light and the second image with artificial light.

shades

The only thing that dissatisfied me the staying power.The color faded after wearing for 4 hours.But I do love the color, so it doesn’t matter if it doesn’t stay long.This is a lovely shade for fair and wheatish skin tone.It’s a perfect match for any red and black outfit.

It’s a party wear color but if you want to wear this in a day time, then just dab some translucent powder for light coverage and staying power.So try out! and lemme know your thoughts in the below comment section regarding this product.

Advantages of Using Rimmel London Moisture Renew Lipstick Berry Queen

1.Richly pigmented.

2.Moisture infused formula to keep your lips 70% hydrated and 60% smoother.

3.SPF 18 for sun protection.

4.Contains lip nourishing vitamins A, C and E.

5.Compliments fair and wheatish skin tone.

6.Smooth and highly creamy consistency.

7.Finish is beautiful and rich.

8.Non drying.

9.Perfect party wear color.

10.Top rated brand.

11.Packaging is fantastic.

12.Affordable.

Disadvantages of Using Rimmel London Moisture Renew Lipstick Berry Queen

1.Doesn’t stay long.

2.Only available in selected countries.

Net Weight / Price – 4g / $7.70

TBM Product Rating – 4/5

Home Remedies to grow Fuller, Longer and Thicker EyeLashes

Have you ever wanted longer and thicker eyelashes naturally? If yes, then you have come to the right place.Ladies, say bye to those creepy oversized eyelashes and artificial lash extension that gives you an unnatural look with those scary side effects.You can make your lashes grow thicker, lustrous and super long by following these simple and super easy homemade remedies.Try using these remedies for 2 weeks and you will noticed a remarkable difference in the length, volume and darkening of your lashes.

Natural Remedies To Grow Longer and Thicker Lashes

1.Egg yolk and Glycerine Nourishing Eyelash Conditioner

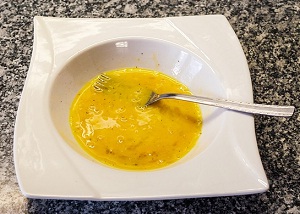
longer eyelashesPrepare a homemade eyelash conditioner by mixing an egg yolk with 2 tsp of glycerin.Take a cotton swab and dip into this mixture and lightly apply on your lashes.Leave them for 15 minutes and then wash off with cool water.For best results do this thrice a week.

Benefits – This is an excellent conditioner for your lashes, it prevents breakage and promotes instant gloss, silkiness and incredible volume to your lashes.Egg yolk is rich in omega-3, Vitamin E, fat, micronutrients that combat dry, brittle lashes and promotes healthy, strong and thick lashes.Glycerin works as an excellent conditioner, it retains moisture and keep your lashes soft and lustrous.


2.Almond Oil, Olive Oil and Coconut Oil 

oiling eyelashes

Dip a mascara brush into the mixture of almond oil, coconut oil and olive oil, slightly warm the oil and then apply the mixture the same way just like you apply a mascara.Start from the root of your lashes, hold for 5 seconds and then proceed towards the tip of your lashes.Repeat this for about 4 to 5 times.Do it every night before going to bed.Oiling is the best way to make your eyelashes grow naturally long and beautiful.

Benefits – Almond oil is rich in Vitamin A, B and E that reduces thinning of eyelashes and makes the lashes healthy and Strong. Coconut oil promotes the growth of lashes and makes them darker and longer.Olive oil is rich in rich in vitamin E and oleic acid that nourishes and adds volume to your eyelashes.


3.Vitamin E Capsule and Aloe Vera Eyelash Serum

aloevera_eyelashes

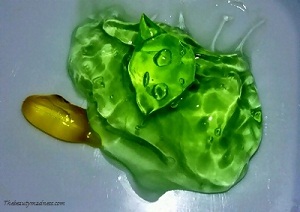
To prepare take a spoon of aloe vera gel and pop out a vitamin E capsule.Mix it well and with the help of a cotton swab rub it on your lashes.

Benefits – Vitamin E capsule helps the growth of lashes and makes them stronger and fuller.Aloe Vera hydrates and nourishes your lashes thus preventing the loss of hair from your eyelids.


4.Petroleum Jelly 

longer and thicker eyelashes vase (2)

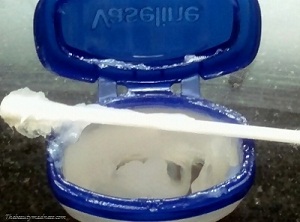
Take some petroleum jelly and massage to your lashes and eyelids gently for 2 to 3 minutes before going to bed.Moisturizing is essential for your eyelashes to prevent the formation of dandruff like scales on eyelids, to nourish and strengthen your eyelashes.

Benefits – It accelerates blood flow and stimulates the growth of hair follicles along the lash line.Petroleum jelly contains emollient properties that helps your eyelashes grow quicker and longer naturally.


5.Shea Butter intensive Lash Moisturizer

shea_butter

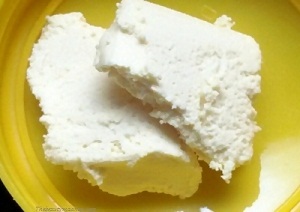
Take some shea butter on your fingertips and gently massage on your lashes.Daily massage your lashes before going to bed.This is one of the easiest home remedy to lengthen lashes naturally.

Benefits – Shea butter contains vitamin B and Vitamin E that hydrates and deep nourishes the hair follicles making the eyelashes stronger, thicker and silky.


6.Cold Coconut Milk


Dip two cotton balls in cold coconut milk and place over your closed eyelid.Allow it to sit for 10 minutes and then wash off with cool water.

Benefits – Coconut milk contains protein and fat that enhance the growth of eyelashes and adds shine and volume to it.

5 Fantastic Ombre Nail Designs that You Must Try

Today I will be sharing with you one of the hottest and most popular nail design technique called as ombre/gradient.This is a special kind of nail art technique in which the color is graduated from light shade to dark shade and vice versa.To achieve this ombre nail look you don’t have to follow the exact technique.You can add your own creativity and instead of using monochromatic shades of a single color you can use contrasting colors to get the desired ombre nail effect.

Here are the 5 fantastic ombre nail design with detailed steps and pictures.

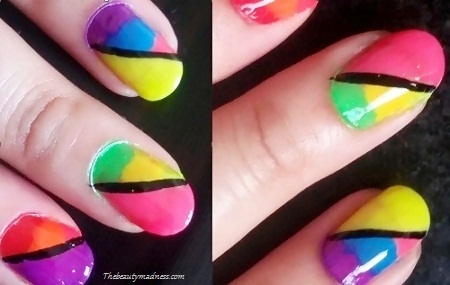
1.Polychromatic Ombre Diagonal Nail Design

Add colors to your summer.Get this colourful and funky ombre design on your nails.This is one of the hottest summer’s nail design and compliments multicolored and bright-colored outfit.

ombre nail design polychromatic (2)


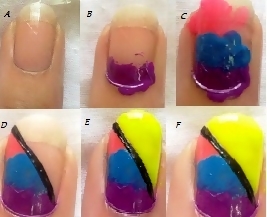
Things that you need – 4 bright color nail polish, black nail color to create the diagonal, clear transparent polish for top coat, sellotape and cotton swab.

Steps

1.Cut a piece of sellotape and place it diagonally on the nail.

2.Wet a cotton swab by dipping in water.Pour few drops of any nail color on a plastic plate.Dip the wet cotton swab onto the colors and dab onto the base area of your nail.

3.Similarly repeat using 2 different nail colors.

NAIL_DESIGN_1

4.Once it has dried, gently remove the sellotape.

5.To color the other diagonal use contrasting colors.

6.Separate the two diagonal by drawing a solid black color line with the help of a nail brush.


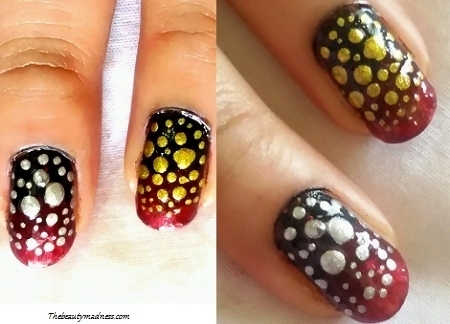
2.Ombre Bridal Design Nail

One of the gorgeous ombre nail design to complement red bridal sarees or lehengas with golden and silver embellishments.This nail design can be achieved by simply creating ombre nails using dark bridal nail colors and then decorating with gold and silver colored dots.

ombre_spotted_nail_design

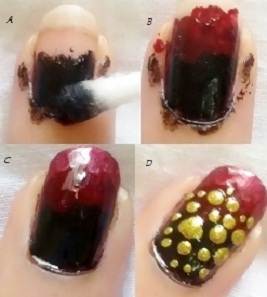
Things that you need – Black, maroon and red nail colors for creating ombre nails, clear transparent polish for top coat, gold and silver nail colors for creating dots, cotton swab, toothpick and safety-pin.

Steps

1.Wet a cotton swab by dipping in water.Pour few drops of black color on a plastic plate.Dip the wet cotton swab onto the colors and dab onto the base area of your nail.

2.Similarly repeat for maroon and red nail colors.Go from dark to light shade.

SPOTTED_NAIL_DESIGN

3.Once the color has dried, apply a layer of clear transparent polish.

4.Using a toothpick and safety-pin create big and small sized golden or silver dots.


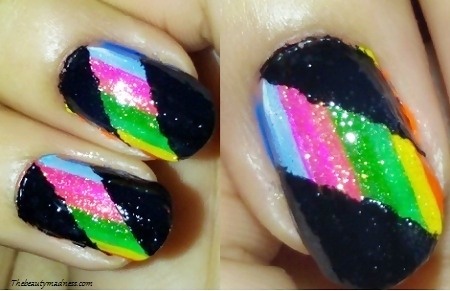
3.Rainbow Diagonal Ombre Stripe Nail Design

Get this bright, eye-catchy and fabulous ombre effect on your nails.This ombre nail art can be achieved by drawing vertical rainbow stripes and then painting the uncovered part with black nail color.

strip_nail_design

Things that you need – 5 dark and light shades of nail colors, nail striper, clear glitter nail polish, clear and black color nail polish and sellotape.

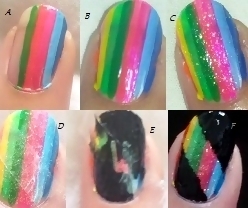
Steps

1.Draw vertical lines across the nails using one light shade and dark shade of same color.Use nail striper to draw the lines.

2.Repeat similarly for 3 different nail colors of light and dark shades.

3.Once it has dried completely, apply a layer of clear glitter nail polish.

diagonal_nail

4.Take a sellotape and cut a thin piece of it.Stick the piece of sellotape diagonally on your nails.

5.Paint your nails with black color nail polish.

6.Once the color has dried, gently remove the tape and apply a clear top coat.


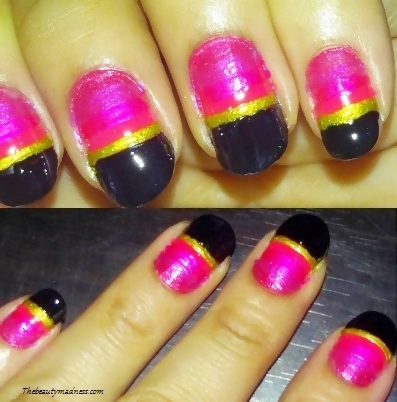
4.Pink Ombre Golden Ring Design

This nail designs gives you a classy and elegant look.You can pair up with pink or black evening dress, party dress or cocktail dress.

ring_nail_art

Things that you need – 4 different shades of pink color nail polish for creating ombre nails, golden and black color nail colors for decorating, clear transparent polish for top coat and nail striper.

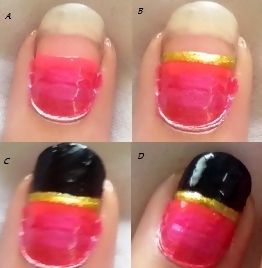
Steps

1.Draw straight lines across the nails using 4 different shades of pink nail colors.Start with the darkest shade color to lighter shade.The colors should cover a bit more than half of your nail.

2.Now draw an intense bold line using a golden nail color.

nail_design_4

3.Color the rest part of your nail with black color polish.

4.Once the color dries completely, apply clear top coat only to the part that is painted black.


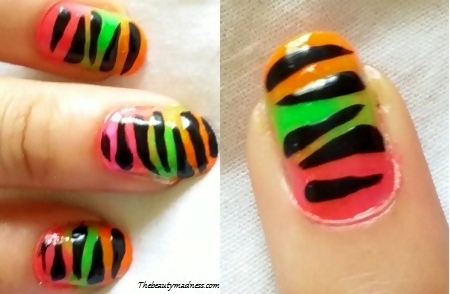
5.Ombre Animal Print Nail Design

This colourful nail design can be achieved by creating ombre nails using contrasting colors and then overlaying with animal print.

animal_print_nails

Things that you need – Pink, green and orange nail colors for creating ombre nails, clear transparent polish for top coat, white color polish for base coat, black nail color for creating animal print and cotton or sponge.

Steps

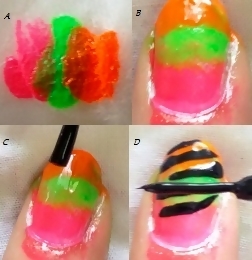
1.Apply 2 layers of white color base coat and allow it to dry completely.

2.Wet a cotton ball by dipping it in water.Now using green, orange and pink nail colors draw line on the wet cotton or in a makeup sponge and dab it on your nails.

3.Repeat the process 3 times to get intense color coat.

nail_polish_design_5

4.Once the color has dried, apply a layer of clear transparent polish.

5.Use the tip of your nail brush to create the animal print.Start from the side of your nail, create horizontal lines from alternate side.

5 Amazing Rose Face Packs for Smooth, Radiant and Rosy White Skin

Rose has always been the symbol of love and beauty since ancient times.Cleopatra, the ancient Egypt queen used rose petals in her face mask and bath to enhance her beauty.Today, rose extract is widely used in the preparation of cosmetics, perfumes, and face masks.Rose contains numerous health and skin care benefits.It helps in the treatment of scars, pimples, dark spots, skin ageing and maintains skin firmness, promotes elasticity and imparts a rosy skin glow.Find out these amazing rose face packs for irresistibly smooth, fair and radiant skin.


1.Yogurt and Rose Face Pack for Skin Whitening

rose face pack

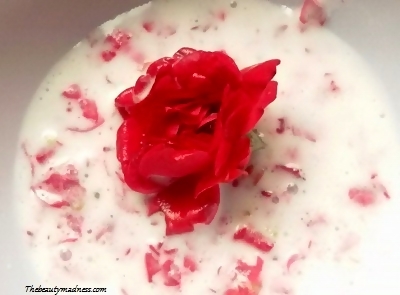
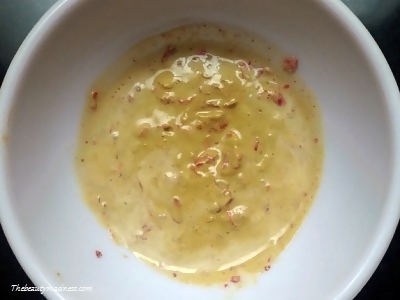
To make this amazing rose face pack you need few rose petals and thick yogurt.Make sure the rose petals you use must be fresh and properly washed.Add few rose petals and 3 tbsp of yogurt into the blender.Blend it to form a semi-smooth paste.Apply this face pack on your face and neck.Leave the pack for about 20 minutes and then wash it off using cold water.

Beauty Benefits

One of the best rose face pack to lighten your skin tone naturally.Yogurt contains lactic acid and enzymes that lighten areas of hyperpigmented skin and delays skin aging.Rose contains high amount of vitamin C, an antioxidant that protects sun damage and brightens skin tone.This pack is best for all types of skin.Use this face pack thrice a week for effective results.


2.Rose, Egg and Honey Skin Anti Aging Face Mask

Pour the contents of an egg white into a bowl, add 1 tsp of honey and few crushed rose petals.Mix it and apply on your face and neck with the help of a flat brush.Allow the pack to dry completely.Wash your face with cold water.

Beauty Benefits

Rose petals contains astringent and soothing properties that tightens skin pores, reduce skin redness and gives your skin a rosy complexion.Egg white lift facial skin, reduces wrinkles and makes your skin firm and smooth.Honey contains antioxidants that boost skin elasticity and revive skin youthfulness.


3.Rose, Sandalwood, Milk Face Mask for Flawless Skin

rose facepack sandalwood

To prepare this face pack you need 2 tbsp of sandalwood powder or paste, 1/4 cup milk and some rose petals.Place all the ingredients in a blender and blend it to form a smooth consistency.Apply this pack on your face and leave it to dry for about 15 minutes.Wash your face with cold water.

Beauty Benefits

This is a very good face pack to lighten blemishes and acne scars.Sandalwood has antibacterial properties that prevents pimples and removes excess oil, dirt and dust from your pores.It also reduces skin tan and makes your skin clear and radiant.Milk removes pigmentation and other skin blemishes to give your skin smooth and flawless complexion.Rose has antiseptic properties that kills bacteria trapped inside pores and soothes irritated skin.


4.Rose and Mango Face Pack for Glowing Skin

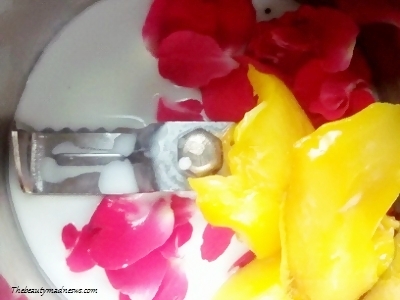
rose mango face pack

Cut 1 small sized ripe mango and scoop out the pulp.Add this mango pulp and few petals of roses into the blender.If you have dry skin add 4 to 5 tbsp of milk and oily skin can use rose water.Blend it until it forms a smooth paste.Apply this pack on your face and leave it to dry for about 15 minutes.Wash your face with cool water and pat dry.

Beauty Benefits

This is one of the rejuvenating and hydrating face packs for both dry and oily skin.Mango is rich in vitamin C and vitamin E that boost collagen production and moisturizes your skin to give your skin a healthy, radiant glow.Rose are excellent source of vitamin A, B3, C and E that keeps your skin silky and soft, brightens your complexion and gives your skin a rehydrating boost.

 
5.Rose, Orange Peel and Honey Scrub for Radiant and Smooth Skin

To prepare this pack, you need 2 tbsp of dried orange peel powder, few crushed rose petals and 2 tbsp honey.Combine these ingredients properly.Now take small amount of the paste on your palms and rub it on your face and neck gently.Apply some more and leave it to dry for about 20 minutes.Wash your face with lukewarm water and apply some moisturizer.

Beauty Benefits

A wonderful exfoliating face pack for oily skin.Orange peel removes dust and pollutants from pores and removes sun tan.Honey deep conditions your skin, fades dark spots and other skin blemishes.Rose help retain skin moisture, deep cleanses and clarifies the skin thus revealing a smooth and vibrant glow.

How to Get the Bold and Beautiful Blue Cat Eye Makeup

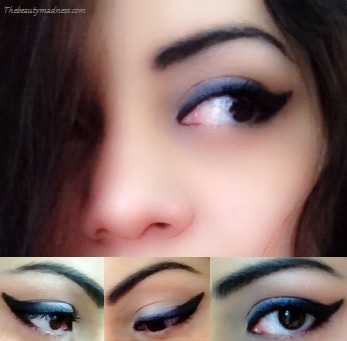
Today I will be sharing with you one of my favourite eyelook, the bold and beautiful blue cat eye look.It not only makes you eyes look cool and funky but also enhances your overall look and make your eyes look more attractive, more open and wider.Here are the detailed steps and pictures on how get this dramatic, mysterious blue cat eye look.

blue cat eyes makeup

Here are the detailed steps with pictures on how to achieve this blue cat eye makeup.

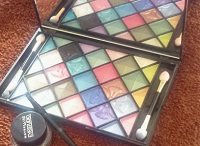
Things that you need:

eyemakeup123


Steps

1.Apply some creamy concealer under your eyes and then dab some sheer translucent powder.

eyemakeup1

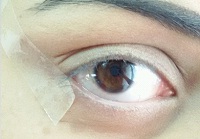
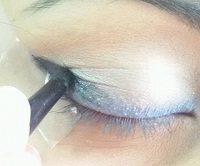
2.Now to create the perfect eyeliner wing without getting messed up, cut a piece of sellotape and stick to your skin starting from the end of your lower lash line towards the end of the brow.

eyemakeup2

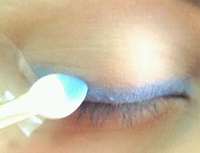
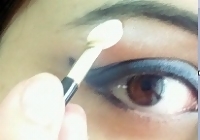
3.Now using the tip of the eyeshadow brush, apply blue eyeshadow directly above your lashes on your upper lash line.

eyemakeup3

4.Extend the blue color eyeshadow to the outer V of your upper lash line, just go along the direction of the sellotape.

eyemakeup4

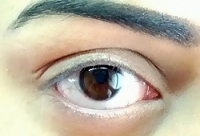
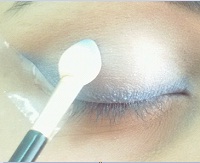
5.Apply a silver eye shadow, across the entire eyelid and then extend it towards the crease line.Blend it for a better finish.

eyemakeup5

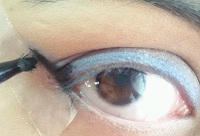
6.Using a liquid eyeliner gel or a liquid kajal draw a continuous line from the outer corner of your lower lash line extending half a way towards the pointed end of the brow.

eyemakeup6

7.To draw that perfect cat eyes, make a simple flick.Refer to the below image.

eyemakeup7

8.Once you have drawn the outline that is the cat-flick, go in and fill in the rest of the triangle.

9.Now pull it from the inner corner of your eye towards the outer V making a neat thin line.

eyemakeup8

10.Apply on the lower lash line, start from the outside corner of your eyes lining it about 1/4 of the way in.

eyemakeup9

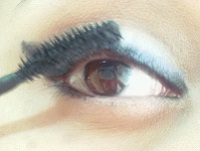
11.Apply black mascara to the upper as well as lower lash line.

eyemakeup10

12.To complete the look apply a little bit of shimmer white on your brow bone.

eyemakeup11 (1)

13.To make your eyes look more like a cat you can wear a blue contact lens.

5 Homemade Hair Conditioners to get Instant Shine, Silky and Bouncy Hair

Repair your dry, damaged and dull hair at home with these simple and effective hair conditioners.These homemade hair conditioners keeps your hair silky and bouncy, protects your hair from sun damage, deep condition your hair to prevent tangles and frizzy hair, reduces hair fall and makes your hair lustrously smooth and shiny.

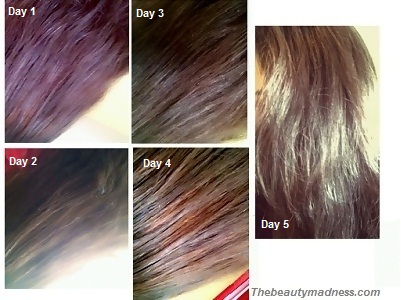
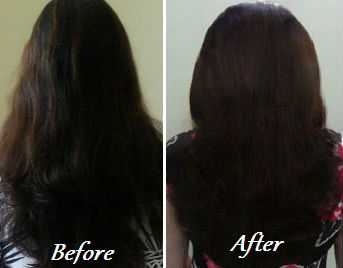
I have tried them all and it really works.Now it’s your turn to give it a try!.I am sure after using these hair conditioners you will be amazingly surprised with the results.I tried these hair conditioners for 5 days and each day my hair became more softer, silkier and bouncy.See the below image starting from day 1 to day 5.

my_hair (1)


1.Egg and Olive Oil Homemade Hair Conditioner

To prepare this hair conditioner you need 2 eggs and olive oil.Break the eggs and separate the egg yolks from the egg whites.Add 3 teaspoon of olive oil to the bowl that contains the egg yolks.Mix it properly and with the help of a flat brush apply it on your hair starting from the roots to the end of your hair.Wear a shower cap and allow it to stay for 30 minutes.Wash your hair with luke warm water.To get rid of the egg smell from your hair, use a mild shampoo and conditioner.

Benefits

This is an excellent deep-conditioning hair mask for dry and damaged hair.It provides complete nourishment to your hair, strengthens your hair roots, prevents hair fall and split ends.The fatty acids present in egg yolk gives a natural shine and bounce to your hair.Olive oil contains vitamin K and E that repairs your hair and gives your hair a healthy shine.


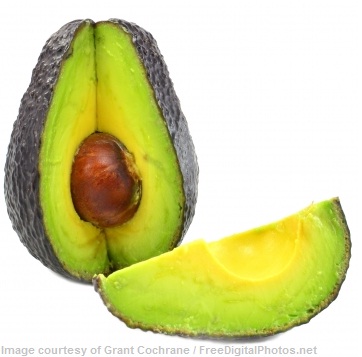
2.Avocado and Coconut Milk Cream Hair Conditioner

homemade hair conditioner avocados

Scoop out one ripe avocado flesh using a spoon and place it in the blender.Add 4 tablespoon of coconut milk cream into the blender and blend it until it forms a creamy smooth paste.Take some mixture in your palms and gently massage to your hair for 3 to 4 minutes.Now apply the rest of the mixture on your hair and leave it for about 20 minutes.Wash your hair using lukewarm water.

Benefits

This is the best homemade hair conditioner for those suffering from intense hair dryness and hairfall.It gives your hair utmost nourishment and provides deep moisture, thus reducing hair-fall and making your hair extra manageable and smooth.Avocado is rich in vitamin B6, vitamin E, vitamin K and magnesium that help prevents hair fall and gives your hair incredible shine.


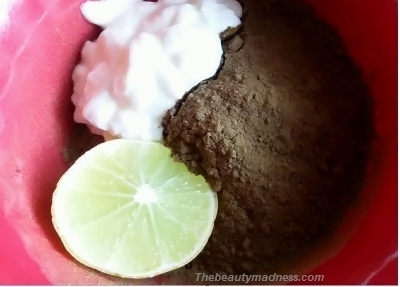
3.Henna, Yogurt and Lemon Hair Conditioner

homemade hair conditioner henna (2)

Soak 1/2 cup of henna powder in 1 cup of warm water overnight using a plastic bowl.Add 2 tbsp of yogurt and 1 tbsp of lime juice.Mix well and apply on your hair with the help of a flat hair color brush.Wear a shower cap and allow it to stay for 45 minutes.Thoroughly wash your hair using a mild shampoo followed by a conditioner.

Benefits

One of the good hair conditioner for oily hair and for those seeking to add more volume to their hair.Henna is a natural hair conditioner that gives fullness and bounce to your hair.Yoghurt and lemon protects your hair from sun damage and gives your hair brilliant shine.


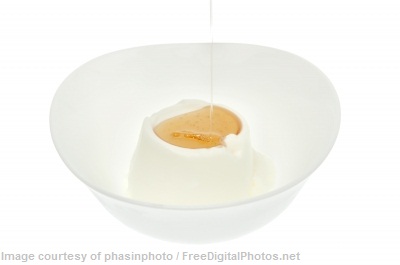
4.Yogurt and Honey Homemade Hair Conditioner

yoghurt honey hair conditioner


To prepare, take 3 tbsp of thick yoghurt and 2 tbsp of honey.Mix the ingredients properly.Now, apply this paste all over your hair and allow it to stay for 20 minutes.Rinse it off with warm water.

Benefits

This is one of the best homemade hair conditioner for greasy and oily hair.Yoghurt contains natural antibacterial and antifungal properties that destroys bacteria trapped inside hair follicles, removes excess oil and sweat.Yogurt contains lactic acid that smooth and softens the hair.Honey makes your hair silky and beautiful.


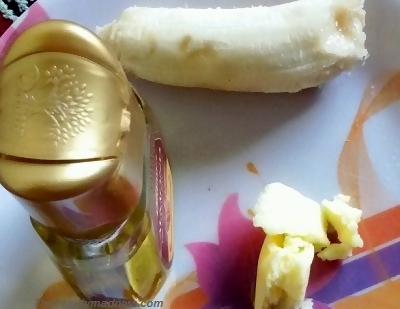
5.Banana, Butter and Almond Oil Hair Conditioner

homemade_hair_conditioner_banana

Mashed one ripe banana in a bowl, add 2 tsp of unsalted butter and 3 tbsp of almond oil.Smash using your hand to make a semi-smooth paste.Now, take some portion of this mixture in your palms and gently rub all over your hair.Apply the rest of the mixture and allow it to sit for 20 minutes.Wash your hair using lukewarm water followed by a mild shampoo.

Benefits

If you are suffering from dry, frizzy and split ends then this conditioner works best for your hair.Butter is rich in unsaturated fatty acids that adds softness and moisture to your hair.Banana is rich in potassium and vitamin B6 that reduce split ends and damage.Almond oil contains vitamin E that strengthens your hair, prevents hair dryness and restores moisture and shine.

3 Amazing Butterfly Wing Nails that You Must Try

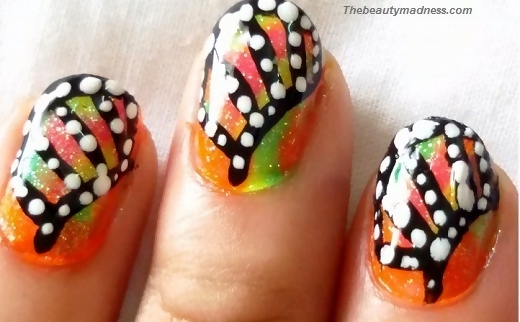
Butterflies are the most beautiful little creatures on earth.Just the sight of their brightly colored wings gives us a feeling of joy and cheerfulness.So, why not try these beautiful butterfly wing designs on your nails.Here are the detailed step by step procedure and pictures on how to achieve these 3 unique and colorful butterfly wing nails.

1. Multicolored Butterfly Wings

butterfly wings nail art1

Things that you need 

  • Yellow, orange, pink, green, black and white nail colors.
  • Micro glitter clear nail polish for top coat.
  • Cotton swab or Q-tip.
  • Toothpick
  • Plastic plate

Steps

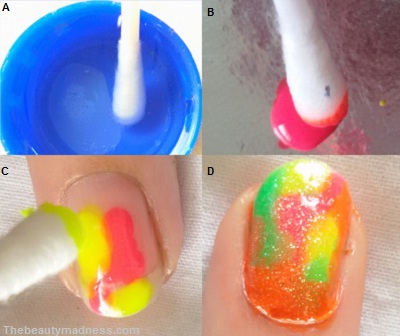
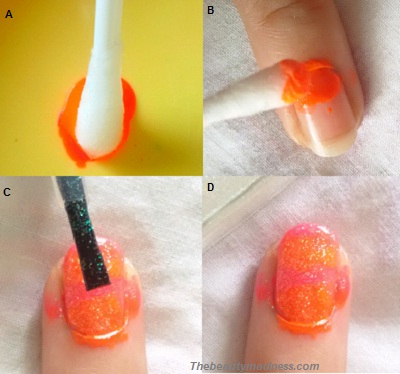
1.Take a cotton swab and moisten it by dipping into water.

butterfly wing nail steps1

2.Pour few drops of pink color nail polish onto the plate.Now dip the wet cotton swab into the polish and dab it on your nail.Create irregular and messy shape.

3.Similarly repeat using yellow, orange and green nail colors.

4.Once the color dries completely, apply a clear glitter nail polish.

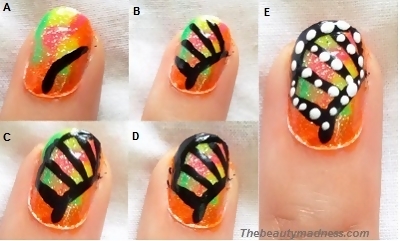
5.To outline the butterfly wings use a black color nail polish.

6.To start, draw a quarter circle at the bottom right corner of your nail.

butterfly wing nail step2 (2)

7.Now draw four or five straight lines extending outwards from the quarter-circle.Use the tip of your nail brush to draw the line.Then join the lines at the tip to create small sections.Color the tip of your nail.

8.Now using a toothpick, create tiny white dots on the black border.For a glossy high shine apply a clear top coat.


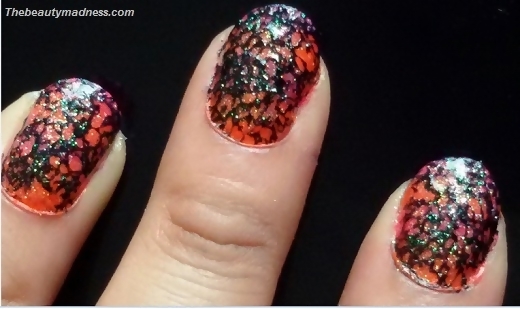
2.Orange Pink Glitter Butterfly Mesh Wings

butterfly_mesh_nail_art

Things that you need 

  • Orange, pink and deep blue or black nail colors.
  • Micro glitter clear nail polish for top coat.
  • Cotton swab or Q-tip.
  • Glass or a bowl.
  • Plastic plate
  • Salt.

Steps

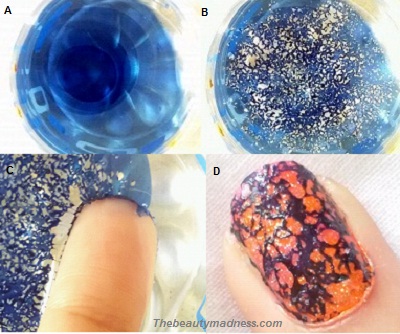
1.Take a cotton swab and wet it by dipping into water.

2.Pour few drops of orange color nail polish onto the plate.Now dip the moistened cotton swab into the nail polish and make a rough line near the cuticle.

meshwing steps

3.Similarly make a line using a pink colored nail polish.When doing this slightly overlap the orange-colored line with the pink one.

4.Keep alternating the colors until the entire nail is covered.

5.Once the nail colors dries completely apply a clear glitter nail polish.

6.To create the mesh wing take a glass of room temperature filtered water.

7.Now pour few drops of deep blue or black colored nail polish into the water.Repeat and continue the process 4 to 5 times until it forms concentric circles.

mesh nail art orange

8.Take a pinch of salt and sprinkle on top of the water surface to form a mesh.

9.Dip your finger nails into the water and blow dry.Now clean the excess nail polish using a cotton swab.

10.Once the polish dries, finish off the nail design with a clear glitter nail polish.


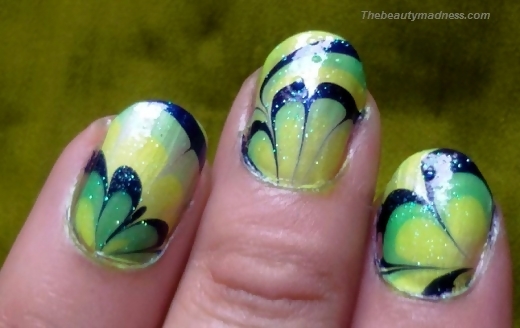
3.Green Butterfly Wings Water Marble

butterfly wings nail water1

 Things that you need 

  • Fluorescent yellow, green and deep blue and white nail colors.
  • Micro glitter clear nail polish for top coat.
  • Glass
  • Cotton swab or Q-tip.
  • Safety pin.

Steps

1.Apply a white layer base coat and allow it to dry.

2.Take a glass of room temperature filtered water.

3.Before you start water marbling keep all your bottles open and ready.

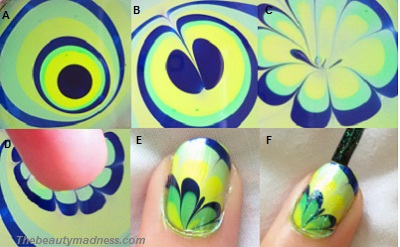
4.Now pour few drops of green color nail polish onto the water surface, followed by fluorescent yellow and then blue.

butterfly green nail art

5.Repeat and continue the process with each colors until it forms concentric circles.

6.Now using a safety pin drag the outer edge of the circle towards the center.Repeat steps to create fine design.

7.Position your finger more towards the outer part of the design.

8.Gently dip your finger nail into the water and blow dry.Wipe out the excess using a cotton swab.

9.Once the nail color dries, apply a clear glitter top coat for high shine. 

10 Tips to Keep your Skin Beautiful this Summer

Summers are undoubtedly the worst season for your skin.The harmful UV rays of sun not only makes your skin dark, dull and lifeless, but also causes other types of skin damage such as dark spots, premature ageing, sun tanning, skin rashes and skin cancer.Here are 10 tips that you must follow in order to keep your skin glowing and beautiful this summer.

Tips to Keep your Skin Beautiful this Summer

1.Replenish Lost Fluids

summer_tips_water

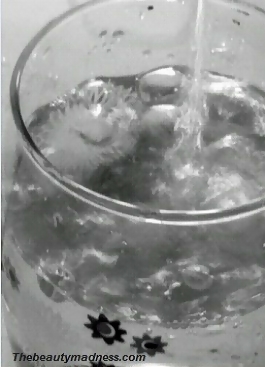
The summer heat causes skin dehydration and also takes away the essential nutrients from your skin thus leaving it dry, dull and lifeless. Lack of water and skin nutrients promotes sagging and wrinkled skin.To prevent dehydration of your skin replenish your body with water, juices, cold milk and electrolytes.Drink at least 15-16 glasses of water.Avoid caffeniated fluids.


2.Exfoliate Daily
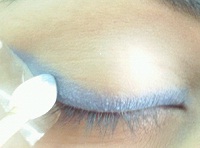
During summer our skin becomes heavy and thick because of excess oil and clogged pores.Exfoliating your skin helps in removing dust and oil trapped in your pores, dead skin cells and blackheads thus leaving your skin fresh and clean.It also removes pigmentation problem that is caused due to sun burn.You can use a natural homemade scrub or ready-made products.A natural home-made scrub can be prepared by mixing 2 teaspoon of granulated sugar with 1 tsp of lime juice and 1 tsp of honey.Apply this mixture on your face and scrub for 2 to 3 minutes especially your T-zone.
 

3.Eat Vitamin-Rich Fruits

summer fruits

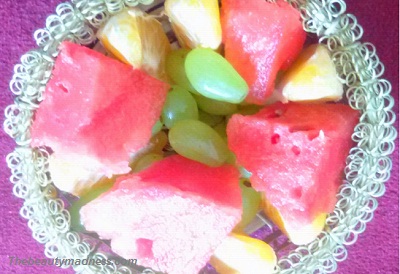
You must include a lot of vitamin rich fruits in your diet especially fruits that are rich in vitamin A and vitamin C such as oranges, grapes, watermelon and strawberries.These fruits boost metabolism, fight harmful free radicals and protects your skin from damaging rays of sun.It gives your skin a natural glowing and radiant complexion.


4.Apply Facial Masks

The best way to treat your skin this summer is to go for homemade face masks.Try this rejuvenating face mask that can be prepared by mixing 2 tbsp of orange peel, 2 tbsp of pomegranate peel, 1 tbsp of honey and 3 tbsp of yogurt.Apply this pack on your face and neck and leave it to dry for 20 minutes and then rinse off using cold water.This face masks reduces skin tan, blemishes, it cleanses dust particles trapped in your pores, removes dead skin cells and increases your skin tone. Also check out these hydrating summer face packs that gives your skin instant cooling and freshness.


5.Wear Sun Protection

tips beautiful summer sunscreen

Never forget to wear sunscreen whenever you step out in the hot sun.Sunscreen protects your skin from the harsh and harmful rays of sun.Always choose sunscreens that are lightweight, non-sticky and have a higher sun protection factor SPF 30+ and in addition it should also provide broad spectrum protection that is both UVA and UVB.To protect your eyes wear sunglasses with UV protection and always carry a umbrella or a wear a hat with a wide brim.


6.Splash Cold Water

Summer harms your skin and your eyes.The hot weather causes skin pigmentation around your eyes and that leads to formation of those ugly dark circkes.To calm your eyes and to get rid of dark circles splash cold water on your face and eyes for 4 to 5 times daily.Cold water also reduces sun tan, soothes skin inflammation and gives you a refreshed and energized skin.


7.Hydrate Your Skin

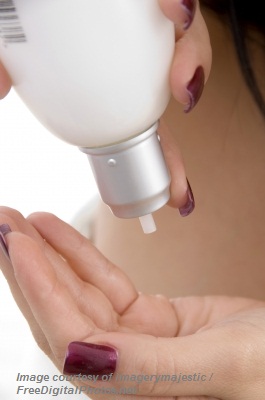
Keep your skin refresh all day long with hydrating body lotions.Choose body lotions that are light in nature and intensely hydrates your skin.Go for products that contains key ingredients such as cucumber, aloe vera or mint that provides instant cooling sensation and soothes scorched skin.


8.Sleep More

Lack of sleep during summers can lead to skin dullness and wrinkles.Give yourself an adequate sleep for about 8 to 9 hours to boost natural glow of your skin and for younger looking skin.


9.Drink Coconut Water

summer tips coconut water

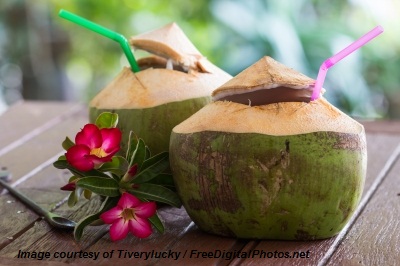
Coconut water is one of the natural and healthy summer drink.They are packed with numerous vitamins and nutrients that recharge the body and prevent dehydration.They contain antioxidants that helps to remove unwanted toxins from your body.It is packed with cytokines an important elements that minimizes skin ageing and restores your body pH levels.


10.Use Water-Based Make up

summer makeup

Avoid using heavy, greasy cream based foundation.Instead go for a liquid water-based foundation that instantly absorbs into your skin, blends flawlessly and prevents white creases or streaks on your skin.Use nude or light shade lipstick with SPF factor and water based formula. 

Water Marble Nail Art: Sparkling Neon Flower Nails

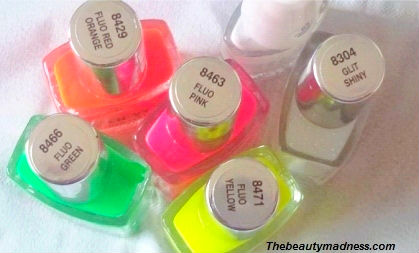
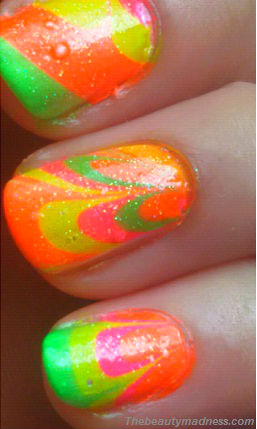
Have u ever tried creating water marble using neon colors? Try it out! Neon polishes are best for summer, they make your nails look funky, bright and fresh.They can be paired with almost any outfit.Try this neon flower water nail art design that I have made using colors like fluorescent green, pink, yellow and orange.Here is a detailed step-by-step procedure, pictures and finally a water nail art video to help you in creating sparkling neon flower nails.

Steps on how to create water marble nail art: sparkling neon flower nails

Things that you need:

sparkling_neon_flower_nails

  • Four bright neon color nail polish for water marbling,
  • White nail polish for base coat
  • Clear glitter nail polish for top coat
  • Glass
  • Cotton swab
  • Safety pin
  • Vaseline

Steps

1.Apply two layers of white base coat and allow it to dry completely.

2.Fill a glass with filtered water.You can use slightly warm or room temperature water.Do not use cold water as it can cause the nail polish to dry quickly thus preventing it from spreading on the water surface.

3.Before you start water marbling, keep all your bottles open and ready.Your windows closed and Ac or fan in off mode.

4.Apply some vaseline to prevent the nail polish from sticking onto your skin around your nails.

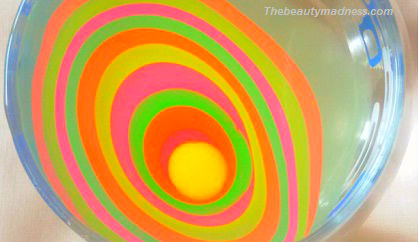
5.Pour few drops of nail polish onto the water surface.Now drop second color nail polish on top of the first color.Repeat and continue the process with different colors until it forms concentric rings.Keep a gap of 2 to 3 seconds between each drops of nail polish.

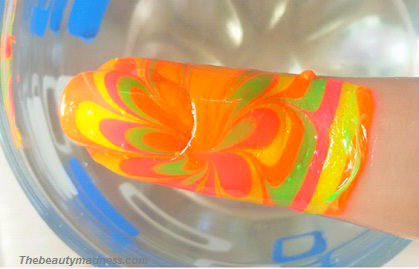
neon water marble nails

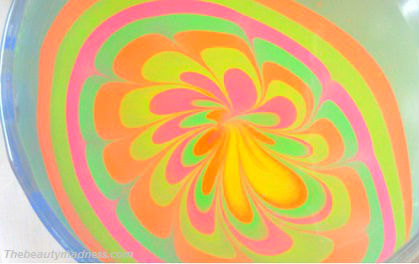
6.Now using a safety-pin create a flower design.Start from the outer edge and drag towards the center, repeat until you get the shape of a flower.

neon flower nails design

7.Once you have completed with your design, position your finger to the best part of the water mark to colour your nail.

8.Dip your finger nail into the water and blow on the surface of the water to make it dry.

neon water nail art

Check out this quick video

9.Clean the excess polish using a cotton swab.

10.Allow your nails to dry completely and then apply glitter nail polish to add sparkle and shine to it.

neon water marble nail art

MUST READ

Protein Hair Packs for Thick, Smooth & Glossy Hair

2
Want to make your hair grow really thicker and stronger? Then here is the fix! Try these homemade protein hair packs.Deficiency of protein can...