










Wednesday, August 5, 2026

5 Day Treatment to Stop Hair Loss

Are you suffering from severe hair loss? Do you feel frustrated to watch those little clumps of hair falling out after a head bath or stuck in your comb brush? Hair loss is a common problem that is seen in both men and women.But nowadays, it’s more common in teenagers.Poor diet, unhealthy habits, busy lifestyle, hormonal disorder and pollution are some of the major factors that contribute hair loss.But don’t worry whatever may be the issue these 5-Day treatment will solve all your hair problems and help fight hair loss.This treatment will also help you achieve super soft, smooth and gorgeous hair.

How to Test that you are Suffering from Hair Loss

Grab hold of a bunch of hair from the base (nearly 70 strands of hair) and then gently pull towards the ceiling.Count the number of hairs that comes out with the pull, if you have more than 3 hairs then you are suffering from hair loss/hair fall.


Day 1  – Give a Hot Oil Treatment
hot_oil_treatment

Start your first day with a nourishing hot oil treatment.You can take the combination of any two hair oils from the following list that includes jojoba oil, olive oil, coconut oil, argan oil and almond oil.All these hair oils contain a high amount of fats and vitamin E that are essential to unveil stronger and healthy hair.Slightly warm the oil and deep massage the oil into your hair and scalp.Take a soft towel, soak in warm water and squeeze the excess water out. Cover your hair with this towel and leave for 5 minutes.Remove the towel and leave the oil in your hair overnight. Hot Oil Treatment encourages hair growth, reduce baldness and stops hair fall.


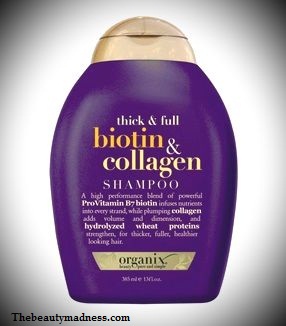
Day 2 – Clean Using Biotin Shampoo and Conditioner (Try Org Thick and Full Biotin and Collagen Shampoo, 385ml and Thick & Full Biotin & Collagen Conditoner 385 ml)

shampoo

Choose mild shampoo and conditioner to wash your hair.Look for shampoos and conditioners that are enriched with biotin, they are remarkably beneficial in reversing hair loss.Follow the right way to wash your hair.First, rinse your hair with warm water to open up the cuticles so it is easier to clean dust, impurities and greasy product build up in your hair follicles.Take a small amount of shampoo and lather your hair from roots to ends.Do not scratch or rub vigorously.Just massage gently for 1 minute and then rinse your hair with lukewarm water.Now take a small amount of conditioner and run your fingers through your hair.Let it sit for 10 minutes.Rinse you hair with cold water to close the pores, and seal in moisture to your scalp.


Day 3 – Try Homemade Deep Conditioning Protein Mask
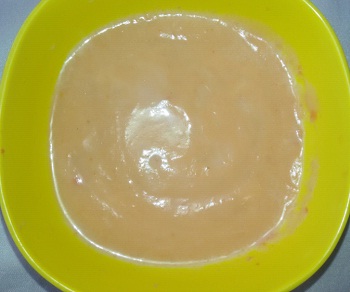
protein_mask

Hair coloring, styling gels, straightening irons or hair drying machines break down the natural hair proteins thus making your hair brittle, weak and rough.A deficiency in protein can contribute to hair loss.Your hair needs proteins to promote healthy hair growth.A deep conditioning protein treatment mask can restore the protein deficiency and repair damaged hair.

Recipe to Prepare Hair Restorative Protein Mask

  • Raw Milk – 1/2 cup
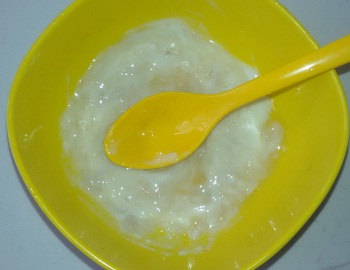
  • Ripe Banana Mashed – 1/2 cup
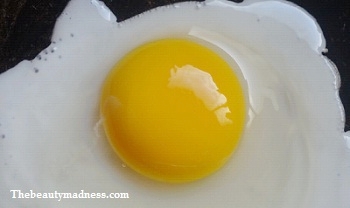
  • Egg Yolks – 2
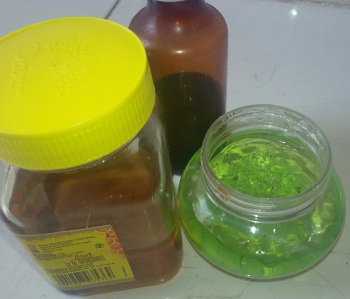
  • Honey – 3 Tbsp
  • Aloe vera gel – 2 Tbsp

Place all the ingredients into the blender and blend until you get smooth creamy consistency.Apply a thick coat of this paste onto your slightly wet hair and cover your hair with a shower cap.Leave for about 30 minutes and then rinse with cold water followed by a mild conditioner.Do not use shampoo.Loaded with proteins and healthy nutrients this hair mask deep penetrates into your hair follicles, intensely moisturizes damaged hair, fight hair loss and leaves your hair softer, smoother and glossy like never before.


Day 4 – Apply Hair Reconstructing Amla pack
amla pack hair loss

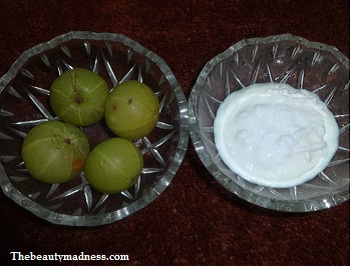
Reconstruct and strengthen your hair with this homemade amla hair pack.To prepare this amla pack, soak half cup of amla powder in a cup of hot water overnight.In the morning, add 3 Tbsp of fresh yogurt and 2 Tsp of hibiscus powder to this amla paste.Wet your hair with lukewarm water and then apply the pack.Leave for 20 minutes and then rinse with cold water.This hair pack keeps dirt, pollutant and oil under control, prevent hair fall and hair graying and promotes shine and volume to your hair.


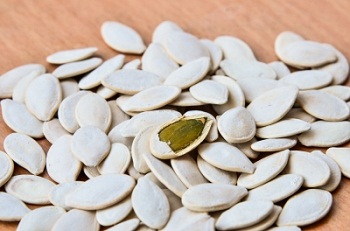
Day 5 – Quench Dryness with Nourishing Pumpkin & Mustard Seed Oil
pumpkin seed
Image courtesy of niamwhan at FreeDigitalPhotos.net

Last day nourish and revitalize your hair with pumpkin and Mustard seed oil (Try Crysalis Pumpkin Seed Oil ).Mix equal amount of pumpkin seed oil and mustard oil and massage onto your hair and scalp.Leave-in for 2 hours before rinsing your hair with conditioner.Pumpkin seeds are notably good source of the mineral zinc, iron and copper which are essential for stimulating hair growth and reverse hair loss.Mustard seed oil is high in selenium, zinc, iron, fatty acids and protein that makes hair stronger, shiny and cure alopecia.


Some Other Highly Beneficial Tips to Stop Hair Loss/ HairFall

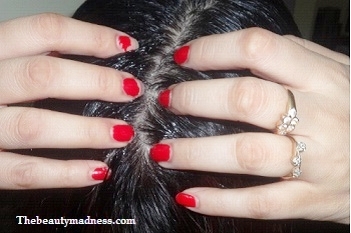
1.Do the nail rubbing exercise for 5 minutes twice a day.It improves blood circulation on the scalp, triggers hair growth and stops hair loss.

3.Drink plenty of water to keep your scalp hydrated and shiny.

4.Add whole roasted, unshelled pumpkin seeds to your regular diet.They are high in zinc and iron that stops hair loss and controls hormonal imbalance which is the main cause of hair fall.

5.Take 1 Ashwagandha capsule every day in the evening.Ashwagandha controls hair fall, prevents balding and premature hair graying.

6.Drink a glass of fresh bottle gourd juice or alternatively you can drink a glass of fresh aloe vera juice with honey every morning on an empty stomach to stop hair fall.

7.Sleep better, avoid stress and stay happy 🙂

Homemade Aloe Vera Foaming Face Wash for Crystal Clear Shining Skin

Learn how to make your own aloe vera face wash at home and discover gorgeous skin without wasting money and time.The homemade aloe vera face wash recipe, that I have shared below is gentle on the skin and fit for all skin types.It deep cleanses the skin without disturbing the moisture balance so that your skin doesn’t feel stretched and dry after every wash.Blended with the goodness of honey, it leaves skin soft and smooth.

If used regularly, it helps fade dark spots and leaves skin fresh, energetic and radiant.Before you move on to the recipe have a look at some of the key ingredients and its benefit on the skin.

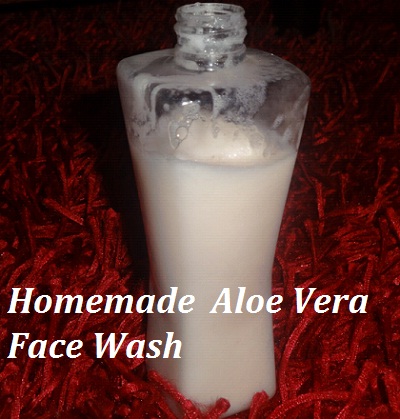
homemade aloevera face wash 

Key Ingredients – Homemade Aloe Vera Face Wash

Aloe Vera 

Aloe Vera gel, also known as “magical gel” is a complete solution to all your skin problems.It is highly packed with nutrients, emollients, vitamins, antioxidants and other skin-benefiting substances that are valuable for the skin.It’s extraordinary properties help eliminate acne, pimple, scars, pigmentation, skin discoloration, suntan, dark spots and other skin problems.

Honey 

Honey is a natural skin moisturizer.It intensely nourishes and revitalize the skin.The anti-inflammatory and antibacterial properties in honey soothes skin inflammation, swelling of pimples, heals and repair skin dryness, fights bacteria causing pimples and acne.


Ingredients You Need

1.Aloe Vera Gel

2.Mild Soap Bar

3.Baking Soda

4.Honey 

5.Cup of Filtered Water


How to Do 

  • Dissolve 1 Tbsp of baking powder to a little amount of water and keep aside.
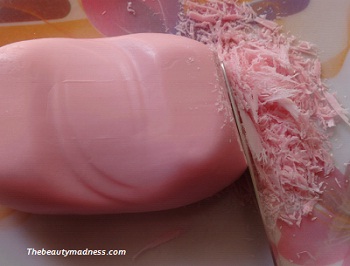
  • Take any mild soap and grate half-inch bar of the soap into powder.Place 2 Tbsp of this grated soap powder into a bowl.The amount of soap powder used in this recipe is more than enough to make 200 ml of foaming aloe vera face wash.

              grate soap

  • Boil a cup of water in a saucepan.Remove from heat and gently add the grated soap powder to the boiling water.Be careful because once the hot water comes in contact with the soap powder it starts to bubble.
  • Stir the mixture thoroughly with the help of a spoon.Make sure no lumps of soap powder are left.
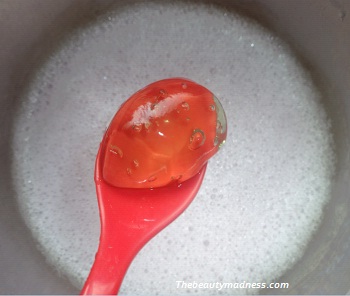
  • Now add the baking soda solution, 3 Tbsp of aloe vera gel and 2 Tbsp of honey.Mix well.

             aloe vera face wash

  • Pour this foaming solution into a clean, empty bottle and shake well.Your “aloe vera face wash” or you can say “aloe vera and honey foaming face wash” is ready to use.

               foaming aloevera face wash         


Direction To Use

  • Wet your face with lukewarm water.
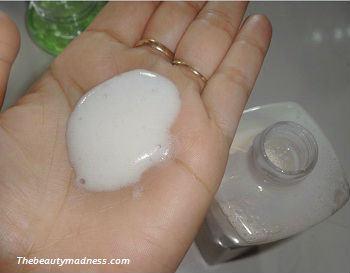
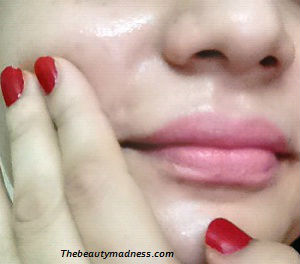
  • Take a small amount of this mixture on your palms and gently massage onto the skin in a circular motion for 1 to 2 minutes.

           face wash

  • Rinse with cool water and pat dry with a soft towel.
  • Put some moisturizing lotion and enjoy your soft, radiant and clear skin.
  • You can store this face wash for a maximum of 15- 20 days.(Do not store in the refrigerator)        

6 Homemade Face Cleansers for Fair and Clear Skin

Cleansing is an extremely important step in any daily skin care routine.It’s a super-easy way to get a healthy, beautiful looking skin.It removes traces of make-up, dirt, excess oil and other impurities from the skin thus leaving the skin feel fresh and invigorated.Commercial cleansers leave your skin feel tight and dry.Homemade facial cleansers deep-cleanses the skin without disturbing the skin’s natural pH balance and are pure and gentle on the skin.These homemade face cleansers leave the skin naturally fair and spotless.Choose the one that are ideal for your skin type.

1.Green Tea and Apple Cider Vinegar Face Cleanser

green tea facial cleanser

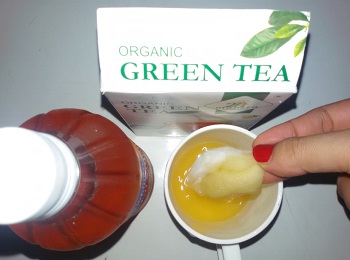
Green tea is an amazing skin cleansing agent.It minimizes pores, fades away dark spots and blemishes and leaves skin feel fresh and super clean.To prepare this homemade cleanser, steep a green tea bag in half cup of hot boiling water for 3 minutes.Remove the bag and leave the water to cool completely.Mix 2 Tbsp of apple cider vinegar and stir well.Store this solution in a bottle and place in the refrigerator.Wet a cotton ball with this solution and apply all over your face.Leave for 5 min’s and then rinse with cool water.You can keep in the refrigerator for a maximum of 7 to 10 days.

Best Suitable for Skin Types – Oily/Acne-prone and Normal Skin Types


2.Tomato and Cucumber Natural Facial Cleanser

tomato cleanser

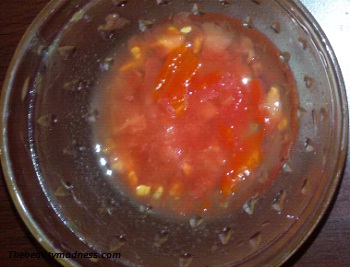
The perfect replenishing homemade face cleanser for all skin types.To make this cleanser, blend a ripe tomato and 1/2 peeled cucumber until smooth.Dip a cotton ball into this mixture and apply all over your face.Leave for 5 minutes and then rinse with cool water.It deep cleanses pores, eliminates pimples and leaves the skin fair and spotless.

Best Suitable for Skin Types – All Skin Types


3.Coconut Water and Aloe Vera Face Cleanser

coconut cleanser

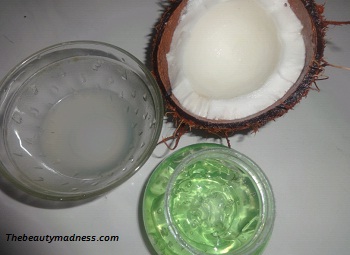
Coconut water contains lauric acid and cytokine two essential nutrients that are used in beauty care products.Take a cup of coconut water, add 3 Tbsp of aloe vera gel and stir well.Pour this solution into a bottle.Soak a cotton ball with this solution and cleanse your face twice a day.This cleanser hydrates and removes impurities from the skin without drying it and lighten skin tone and dark spots.Aloe vera instantly soothes and moisturizes the skin.

Best Suitable for Skin Types – All Skin Types


4.Milk and Honey Natural Face Cleanser

milk and honey cleanser

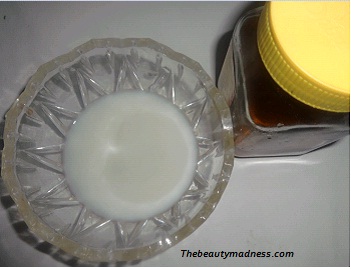
Pamper your face with this milk and honey facial cleanser.Milk and honey both contain skin moisturizing and softening properties that are ideal for dry and sensitive skin.Take 1/4 th cup of raw cold milk and mix 2 Tbsp of Honey.Dip a cotton pad and gently wipe your face with this mixture.Leave for 2 to 3 minutes and then rinse with cool water.It cleans and hydrates your skin, reduces skin blemishes, the essential nutrient in milk makes your skin radiant and velvety smooth.

Best Suitable for Skin Types – Dry, Sensitive and Normal Skin Types.


5.Neem and Rosewater Facial Cleanser

neem face cleanser

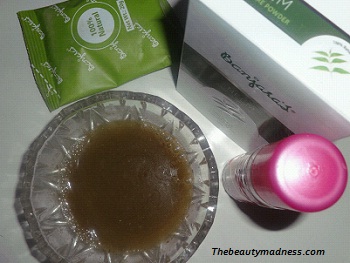
A wonderful face cleanser to remove dark spots and pimple marks.Take half cup of cold lukewarm water, add 4 Tbsp of neem powder and 10 drops of rose water.Stir well.Pour this solution into a plastic bottle and refrigerate.Soak a cotton pad with this solution and apply on your face.Leave for 5 minutes and then simply wash off with cool water.The antibacterial, anti-inflammatory and antiseptic properties in neem fight skin problems, clear off the dead skin cells, eliminates skin discolorations and white patches and controls excess oil thus giving the skin flawless healthy glow.

Best Suitable for Skin Types – For all Skin Types


6.Potato and Lemon Cleanser

potato facial cleanser

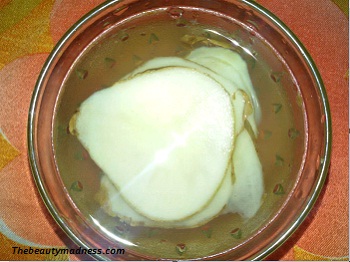
To prepare this face cleanser soak 4 to 5 potato slices in a cup of hot water for 10 minutes.Remove the potato slices from the water and strain the solution into a bottle.Pour the freshly squeezed lemon juice into the bottle and shake well.Wet a cotton with this solution and cleanse your face thoroughly.Repeat for 3 to 4 times.This cleanser refreshes and purifies the skin.Loaded with vitamin C and antioxidants, it leaves the skin naturally bright and radiant.Potato juice bleaching properties eliminates dark spots, pimple marks and pigmentation.You can store this cleanser in the refrigerator for a maximum of 7 to 8 days.

 Best Suitable for Skin Types – Oily/Acne-prone and Normal Skin Types

5 Easy Steps to Get Salon-Like Glow at Home

Environmental pollution, stress and busy lifestyle causes a depletion of natural moisture, oxygen and the accumulation of dead skin cells on the skin surface thus leaving the skin dry, rough, aged and dull.The skin needs a weekly facial to get back the lost glow and shine.Getting a weekly facial done at parlor is expensive and time-consuming.On the other hand, a homemade facial is cost-effective, purely herbal and delivers results similar to that of a facial done at a professional beauty salon.

salon_like_glow_facial

Discover salon-like glow at home with these 5 easy steps: cleanse, exfoliate, massage, face pack and moisturize.Each of the steps has been described depending on your skin-type and availability.

5 Easy Steps to Get Salon-Like Glow at Home

Step 1 – Purifying Facial Cleanser

facial cleanser

Oily & Normal Skin

Take a half cup of cold water, add 1 Tbsp of honey and half squeezed lemon juice.Mix well.Soak a cotton pad into this solution and thoroughly cleanse your face and neck.Repeat for 3 to 4 times.It removes impurities from the skin and leaves the skin clean and fresh.

Dry & Sensitive Skin

Milk is a natural cleanser.Soak a cotton ball in half cup of cold raw milk and gently wipe your face and neck.Repeat for 3 to 4 times and then rinse with water.Milk nourishes and deep cleanses without drying your skin.It keeps your dry skin moist and supple.


Step 2 – Skin Brightening Facial Scrub

oats scrub

Oily & Normal Skin

Soak a Tbsp of oats in warm water for 1 minute.Squeeze the excess water from the oats and place into a separate bowl.Add 1 Tbsp of yogurt and a Tsp of honey.Mash the mixture well with the help of a spoon.Cover your face with warm wet towel for 2 minutes to open up the pores.Take a few amount of this mixture and massage with fingertips. Mostly target the T-zone or oily areas.Do this for 3 min’s and then rinse with lukewarm water.

Dry & Sensitive Skin

Sugar scrub are best for dry and sensitive skin.It exfoliates and moisturizes the skin without disturbing the natural PH balance of the skin.To prepare sugar scrub mix 1 Tbsp of brown sugar or white sugar with 1 Tsp of sweet almond oil and 1 Tsp of honey.Spread a warm wet towel on your face for a minute and then massage this mixture with your fingertips.Massage for 2 min’s and then wash off with lukewarm water.


Step 3 – Rejuvenating Facial Massage Cream

facial_scrub

Oily & Normal Skin

Combine a Tbsp of aloe vera gel with a Tsp of honey and a Tsp of glycerin.Massage this mixture with your wet fingertips in upward direction for 10 minutes to give the muscles of your face a lift.This massage cream deep penetrates into the skin, stimulate circulation and leaves skin feel smooth and soft.

Dry & Sensitive Skin

Mix a Tbsp of whipped butter, a Tbsp of honey and 2 Tsp of milk cream to a smooth consistency.Take a small amount of this cream and massage to the face and neck areas in small circular, upward strokes.Do this for 10 minutes and then wipe with a moist cotton.This facial massage cream erases dry lines, enhance blood circulation and leaves dry skin incredibly soft and silky.


Step 4 – Skin Glowing Fruit Face Pack

apple face pack

Oily & Normal Skin

Blend a handful of black grapes until smooth.Mix 1 egg white egg and a Tbsp of multani mitti to this grape paste. Apply a thick layer of this mixture on your face and leave it to dry completely.Meanwhile, Soak 2 cotton balls in rose water and place over your closed eyes.Rinse your face with cold water and pat dry with a soft towel.Rub an ice cube for an added glow.This face pack immediately brightens and clarifies the skin and leaves the skin radiant and gives a salon-like glow at home.

Dry & Sensitive Skin

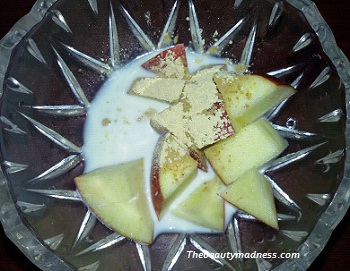
Place few peeled slices of apple into the blender, add enough cold milk to make a smooth consistency and a Tbsp of multani mitti.Blend all the ingredients well.Apply this paste on your face and leave it to dry completely.Soak 2 cotton balls in rose water and place over your closed eyes.Later rinse with cool water.This face pack relieves skin dryness, nourishes the skin and leaves the skin instantly radiant and smooth.

Also ReadSkin Whitening Fruits


Step 5 – Moisturizing Serum

natural facial cleanser

Oily & Normal Skin

Prepare a moisturizing serum by mixing a Tbsp of rose water, 3 drops of lemon juice and 2 Tbsp of vegetable glycerin.Apply this serum on your face and massage gently to get that perfect healthy glow.

Dry & Sensitive Skin

Mix the contents of a vitamin E capsule, a Tbsp of aloe vera gel and a Tsp of rose water to get a consistency like a serum.Apply this serum and gently soak into your skin to get that healthy radiance and glow.

These were the 5 easy steps to get salon-like glow at home.

7 Honey Moisturizing Face Packs for Dry Skin

Dry skin loses moisture fast compared to other skin types and becomes worse during the winter.Dry, dull and dead skin cells accumulate on the skin surface thus making the skin appear rough and damaged.Moisturizing your skin is just not enough, your skin needs some additional pamper and care to restore lost moisture and glow back into the skin.Here are 7 moisturizing honey face packs to smooth and soften your skin, infuse moisture into the skin and reveal healthy, glowing complexion.

7 Homemade Moisturizing Honey Face Packs for Dry Skin

1.Skin Softening Sugar and Honey Moisturizing Face Pack

honey face pack

Dissolve 2 Tbsp of sugar in 4 Tbsp of warm water.Mix 2 Tbsp of honey to this mixture and gently apply a layer of this mask to your clean, dry face.Leave for about 20 minutes and then rinse with lukewarm water.This honey face pack repairs the dry damaged skin tissue, the natural skin softening emollients in sugar and honey moisturizes the skin without making it too oily and leaves skin soft and supple.You can use this face pack everyday to reveal soft, bright and silky skin.Suitable for all skin types.


2.Instant Glow Milk and Honey Moisturizing Face Mask

honey and milk face pack

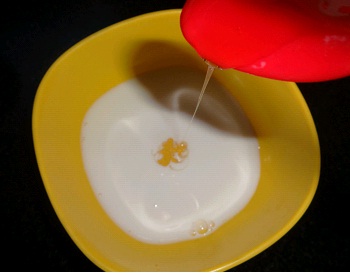
It is the perfect mask for dry skin.To prepare this face mask milk 2 Tbsp of thick milk with 1 Tbsp of honey.Using a brush apply this pack onto your face and neck.Leave for 15 min’s and then rinse with lukewarm water.The vitamins and nutrients in milk banish wrinkles caused due to skin dryness and leaves your skin moist, soft and fairer within minutes.You can use this face pack on a regular basis to get rid of dryness.Best suitable for dry, sensitive and normal skin type.


3.Rejuvenating Honey and Papaya Moisturizing Face Pack

papaya honey moisturizing face pack

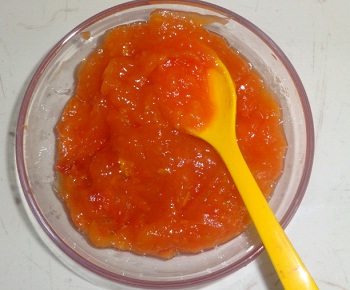
Take a ripe papaya and with a teaspoon scoop out some soft pulp and place into a bowl, add 1 Tbsp of honey and gently mash the papaya pulp with the back of your spoon.Wipe your face with rose water and then apply the pack.Leave for about 15 minutes and then rinse with lukewarm water.Papaya rejuvenates and nourishes the skin, keeping the suppleness and softness of the skin intact and keeps the skin naturally radiant and younger looking.Suitable for all skin types.


4.Almond Honey Skin Smoothing Face Pack for Dry Skin

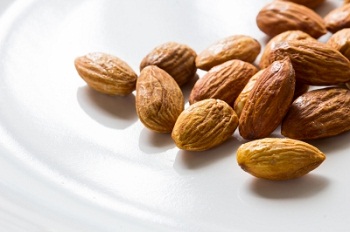
almond face pack
Image courtesy of Aduldej at FreeDigitalPhotos.net

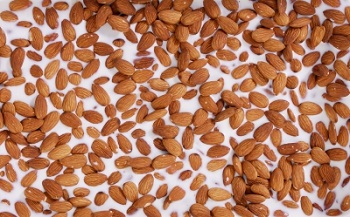
Soak 4 to 5 almonds in 4 Tbsp of hot milk overnight.In the morning gently remove the hard skin and blend these soaked almonds with 2 Tbsp of honey into a fine paste.Clean your face and apply this almond honey pack.Let it sit for 15 minutes and then rinse off with lukewarm water.This is one of the best moisturizing face packs for winter.The blend of almond and honey gently buff away impurities and dry and dead skin cells, smooths and moisturize the skin and brings backs the lost radiance and suppleness to your skin.Suitable for all skin types.


5.Deep Moisturizing Glycerin and Honey Face Pack

An easy face pack to moisturize dry skin.Mix 2 Tsp of honey with 1 Tbsp of glycerin and massage this mixture onto your skin for 2 to 3 minutes.Apply some more and leave for about 20 min’s.Rinse with lukewarm water.It’s a superbly moisturizing and softening face pack for dry skin, it instantly repairs and rebuild dry skin cells and leaves the skin soft and velvety.Suitable for all skin types.


6.Moisture-Rich Banana, Butter and Honey Face Pack for Dry Skin

banana moisturizing face pack

Banana is a great moisturizer for dry skin.To prepare banana face pack, place 1/2 ripe banana, 2 Tsp of butter and 1 Tbsp of honey into the blender and blend until smooth.Apply this pack on your face and then rinse with lukewarm water after 30 minutes.This face pack acts as a moisture blanket for your skin to prevent your skin from harsh winter winds, the vitamins and moisturizing elements present in this pack lock moisture into the skin, smooths away fine lines and keeps your skin radiant and hydrated for long hours.

                                                                                           Read HereBanana Moisturizing Winter Face Pack

7.Skin Whitening Egg Yolk and Honey Moisturizing Face Pack

Egg Yolk Moisturizing face pack
Image courtesy of Nuchylee at FreeDigitalPhotos.net

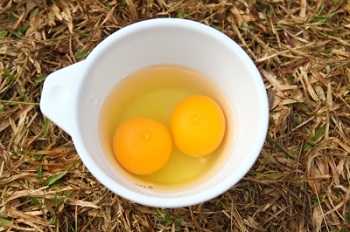
Keep your skin firm, moist and supple with egg & honey moisturizing face pack.Break 2 eggs and separate the egg yolks into a bowl.Add 1 Tbsp of honey and whisk well.Wipe your face with rose water and then using a soft brush gently apply the pack.Apply 2 to 3 layers of this mixture and leave until it dries completely.Rinse with lukewarm water.Suitable for all skin types.

5 Easy Steps To Make Lipstick Stay All Day Long

Lipstick is one of the most important makeup items that every woman carries in her makeup bag.It symbolizes beauty and femininity.A dash of lipstick adds a punch of glamour to your look.Lipsticks are meant to deliver irresistibly attractive and luscious lips.But the problem is it’s hard to keep in place and usually smudge, bleed or comes off even after a few sips of water.Long-lasting rich formula lipsticks which promise to stay in place also smear off after few hours, if not properly applied and maintained.Women who are blessed with naturally pink lips for them it doesn’t matter if lipstick comes off compared to the ones who have darker lips can cause embarrassment.

But don’t worry!! just master these 5 quick easy steps to make your lips look great and last all day long, so you don’t have to reapply throughout the day and worry about it anymore.


Follow these easy steps to make lipstick last all day long

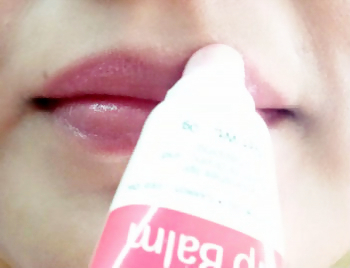
1.Hydrate your Lips

moisturize_lips

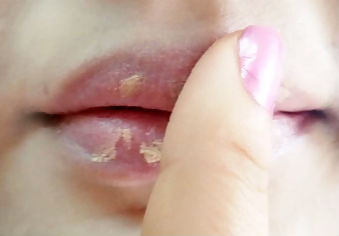
The first essential step to help lipstick stay longer is to get your lips well moisturized and hydrated.Lipstick cannot stick smoothly to lips that are dry, cracked and peeled.Choose an intense nourishing lip balm with a non-drying formula.Lip balms that are rich in carrot seed oil, wheat germ oil, vitamin E oil creates a smooth surface and better application of lipsticks.Let the moisturizer soak a bit before you move on to the next step.


2.Conceal Lips

conceal_lips

Start with a creamy concealer.Take a pea-sized amount of the concealer and lightly smoothed over your lips.It keeps the color in place, provides better coverage and makes the color of your lipstick pop.Don’t use too much otherwise, you may end up with fine lines on your lips and around the mouth.


3.Line your Lips

liplining

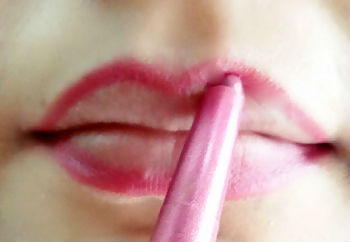
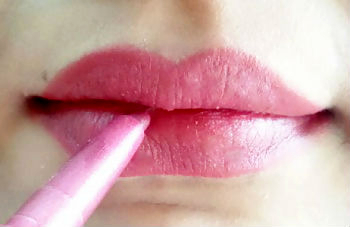
Using a right lip pencil before applying lipstick intensifies the lipstick color, prevent lipstick from bleeding or feathering and gives a well-defined shape to your lips.For a soft, natural look, pick a lip liner that is one shade lighter than your lipstick shade.Go for lipstick that has a combination of both lipstick and lip liner.Choose pigment-rich matte lipsticks that provide a smooth gliding application and even finish without drying your lips.To start, lightly trace the natural lip line to give a definition to the lips.Once you have finished lining the entire lips, go ahead and give a gorgeous fill to the entire surface of your lips.

fill_lips


4.Pick the Right Lipstick

lipstick_stay

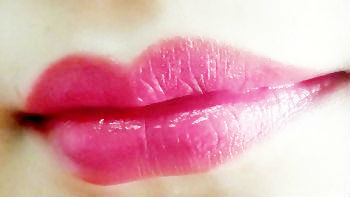
Choose lipsticks that have good staying power.A darker or brighter lip color has better lasting power because they contain more pigments compared to soft, pale or neutral lip shades.Pick a highly pigmented long-lasting formula matte lipstick which contains silicone oil to seal the color to your lips beautifully and to make lipstick stay all day long.Dab a layer of your favorite lipstick shade and then using a lip brush gently blend the color well to help your lipstick last longer.


5.Seal Color with a Tissue

tissue_papaer

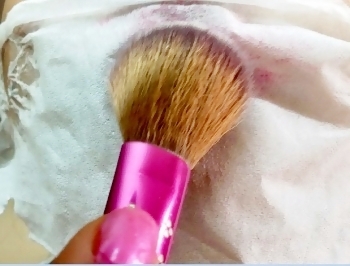
This is the most important step of all.It provides a better finish and makes lipstick last all day long.Take a thin layer of tissue paper and place over your lips.Dip a makeup brush into translucent powder and gently dust over the tissue paper.It removes the excess oil and emollients from the first layer of lipstick thus leaving behind rich color pigments.Finally, finish off by applying a second layer of lipstick.

lipstick last longer

7 Peel off Masks for Instant Glow

A Peel off mask is a type of facial mask that gives the skin an instant glow, radiance and firmness.It gently peels away dead skin cells, impurities, blackheads, whiteheads and stimulates blood circulation and help reveal a fresh, clean and new layer of skin underneath the dull, tired and sagging skin.

Ready made peel off masks that are available in the market are less effective on the skin and contains harsh substances that may not be suitable for your skin type.On the other hand, a homemade peel off face mask is easy to make, cost-effective, time-saving, gentle on the skin and never have to worry about expiration date.

peel off facial mask

Here is the list of the 7 homemade peel off mask, choose the one that best suit your skin condition and type.Using this peel off face mask on a weekly basis, improves the appearance and color of your skin, reduce wrinkles and scars and thus leaves the skin fair, bright and youthful.

7 Homemade Peel off Masks for Instant Glow

1.Enzyme-Rich Pineapple & Honey Peel Off Facial Mask For Fairness

pinapple peel mask

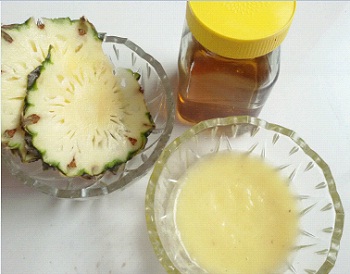
Get instant fairness with this unique peel off face mask which contains the extracts of rich pineapple enzyme called bromelain, vitamin C and nourishing honey.This peel off mask gently sweeps away impurities, firms and brightens the skin tone.

Ingredients – Pineapple, Honey and Gelatin Powder

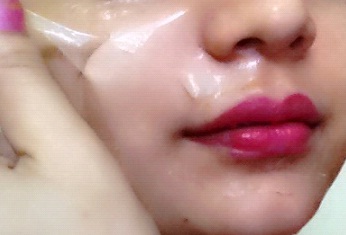
To prepare this peel off face mask mix 1/4th cup of pineapple juice and 1 Tbsp of honey.Heat this mixture on a low flame and add 2 Tbsp of gelatin powder.Stir until gelatin powder is completely dissolved.Remove from heat and allow the mixture to cool for 5 minutes.Wipe your face with rose water and then apply this mask using a makeup brush.Leave for 5 minutes and then apply a second layer.Leave to dry completely.Gently peel the mask in upward direction and then rinse with cool water.


2.Refreshing Cucumber and Lemon Peel off Face Mask for Flawless Skin

cucumber peel off mask

This face peels off mask lets you peel away impurities to help discover fresh, pure and clean skin.The cucumber and lemon extracts leave your skin silky smooth and spotless.

Ingredients – Cucumber, Lemon juice and Gelatin Powder

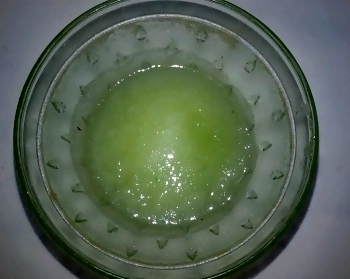
Blend peeled cucumber slices and 2 Tbsp of lemon juice until smooth.Filter and heat this mixture on a low flame.Add 2 Tbsp of gelatin powder and stir well for 1 minute or until the mixture has slightly thicken.Leave it to cool completely.Dip a brush into this mixture and apply.Meanwhile place 2 slices of cucumber over your closed eyes.Once the mask dries completely peel in upward direction.

                                                                                 Read More – Banish Dark Spots Completely


3.Moisturizing Milk & Glycerin Peel Off Face Mask for Dry Skin

milk_facial_peel_off_mask

Dryness can steal away the lustre and moisture from the skin thus leaving it dull and rough.This peel off face mask penetrates deep down the skin, nourishes the skin and heals dryness thus leaving it soft and smooth.

Ingredients – Milk, Gelatin Powder and Glycerin.

Boil 1/4 th cup of milk and dissolve 3 Tbsp of gelatin powder.Remove from heat and mix 2 Tbsp of glycerin.Clean your face and pat dry with a soft towel.Apply a layer of this gel on your face.Leave for 5 minutes and then coat with another layer.Leave until it dries completely.Gently peel off the mask in upward direction and rinse with cool water.


4.Soothing Aloe Vera and Green Tea Peel off Mask to Remove Sun Tanned Skin

aloevera peel off face pack

Want to get rid of those ugly tan and sunburned skin? Then try out this soothing facial peel off mask that gently removes the dead skin cells from the tanned areas, eliminates skin discoloration, lightens sun tanned skin and evens out skin complexion.

Ingredients – Aloe Vera Gel, Gelatin powder and Green tea.

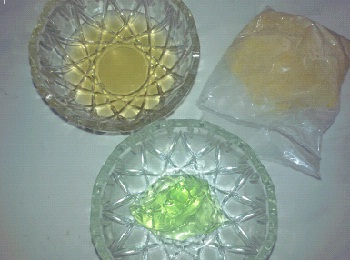
Steep a green tea bag in 1/4th cup of boiling water, mix 3 Tbsp of gelatin powder and 2 Tbsp of Aloe vera gel.Stir well.Leave it cool.Apply this mask and leave to dry completely.Peel in an upward direction and then rinse with cool water.


5.Simply Orange Peel Off Mask for Instant Glow

orange peel off face mask

Give your skin an instant golden glow and radiance with this orange peel off face mask.It peels away dirt and impurities from the skin pores,  generate new cells, revive and rejuvenates the skin.

Ingredients – Orange Juice and Gelatin Powder

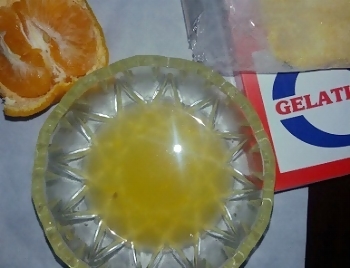
Take 4 Tbsp of fresh orange juice and 2 Tbsp of gelatin powder.Heat this mixture until gelatin powder dissolves completely.Clean your face and pat dry.Apply 2 to 3 coats of this orange gel using a soft brush and leave it to dry.Peel off the mask gently in an upward direction and then rinse with cold water.For an instant glow rub an ice cube.


6.Papaya Peel Off Face Mask for Instant Radiance

papaya peel off mask

This peel off face mask instantly revives and rejuvenates dull skin, improve skin clarity and elasticity, and help the skin recover it’s lost radiance and shine.

Ingredients – Ripe papaya Pulp, Rose water, Sugar and Gelatin

Blend few slices of ripe papaya into a smooth paste.Take 2 Tbsp of this papaya paste, mix 4 Tbsp of rose water, add 1 Tbsp of sugar and 2 Tbsp of gelatin powder.Heat this mixture on a low flame until sugar and gelatin dissolves completely.Remove from heat and leave the mixture to cool.Apply 2 layers of this papaya gel mask and peel off the mask after it dries completely.Rinse with cold water.


7.Egg White Collagen Peel off Face Mask for Youthful Skin

Are you suffering from premature skin ageing? Then try this skin firming and wrinkle smoothing egg white collagen peel off face mask.It instantly lifts sagging skin, buff away dead cells, eliminates fines lines and promotes bright and younger-looking skin.

Ingredients – Egg white, Tissue Paper and Lemon juice

Break 2 eggs and place the egg whites into a bowl.Add a dash of lime juice and whisk well.Using a soft brush apply this mixture and cover that area with a piece of tissue paper.Repeat this process until you’ve covered the entire face.Apply another layer of this egg white mixture and once again cover with tissue paper.Leave the pack to dry completely.Gently peel off the tissue in upward direction.Rinse with cool water.

6 Effective Remedies for Split Ends

Split ends, in scientific term known as “Trichoptilosis”, is a hair condition that occurs when any type of damage happens to your cuticle that leaves your hair’s cortex exposed, which then gradually leads to split ends.The damage to your cuticle is caused by the use of curling or straightening irons, blow drying, shampooing your hair often, use of hair colouring products.Split ends in your hair can come in all shapes and sizes.Apart from trimming your hair there are certain remedies that can reduce and eliminate split ends.Your hair requires that magical formula to repair split ends.

split ends

Here are the 6 effective hair care remedies to treat and prevent split ends.

1.Vitamin E Enriched Hair Cream

split end hair mask

Hair follicles needs special vitamins for stronger roots and to maintain healthy, shiny hair.Lack of Vitamin E is one of the main causes of hair dryness and split ends.Here is an effective vitamin E enriched hair cream that you can try at home to repair hair breakage and prevent split ends.Mix half cup of coconut cream, 2 Tbsp of fresh ripe papaya paste, 2 Tbsp of sweet almond oil and 2 Tbsp of coconut oil.Store this mixture in a container.Massage this cream to your hair and leave for 15 minutes.Rinse with cold water followed by conditioner.It provides shine and softness to dry hair, conditions the hair and treat split ends.


2.Nourishing Honey Split End Repair Serum

split ends hair serum

Honey has been used since ages for the treatment of different hair problems.Honey contains natural vitamins and nourishing substances that renew and reconstruct damaged hair, deep nourishes dry hair and prevents split ends.To prepare this honey serum, combine 2 Tbsp of raw honey with 1 Tbsp of aloe vera gel and 2 Tbsp of glycerin.Massage it into the hair from root to tip.Rinse with cold water after 20 minutes.Applying this hair serum regularly leaves hair shiny, smooth and free from split ends. 


3.Hair Smoothing Protein Conditioner

banana conditioner

Proteins are essential components for your hair.Lack of protein causes hair fall and hair breakage.Having a protein diet is just not enough for your hair.A protein rich hair conditioning is required to keep your hair healthy, strong and restore smoothness.Eggs are the richest source of protein.Here is an instant remedy to deal with split ends and smooth dry, frizzy hair.Squeeze a handful of conditioner into a bowl mix 2 egg yolks and 2 Tbsp of thick milk.After you have finished with your shampoo massage this conditioner and let it stay for 10 minutes.Later rinse with cool water.

                                                                                                                                                                                                                                                        Read MoreHomemade Conditioner


4.Hair Polishing Neem Pack

Build up dirt and pollutants on your scalp causes dryness and split ends.You hair needs to be thoroughly clean and polished to get rid of these bad stuffs.Blend a cup of fresh neem leaves using little water.Add 2 Tbsp of Multani mitti and 4 Tbsp of tea tree oil and mix well.Apply this hair pack onto your damp hair and leave for 20 minutes. Rinse with cool water followed by mild conditioner.This hair pack restore shine and volume, repair split ends, keeps your scalp clean and nourished.


5.Nutrient-Rich Almond Pack

almond nutrient rich mask
Image courtesy of tiverylucky at FreeDigitalPhotos.net

Almonds are extremely good for your hair as they are packed with vitamins, fats, protein and minerals that are essential for healthy hair growth.To prepare almond mask, soak 7 to 8 almonds in 1 cup of water overnight.Remove the skin in the morning and grind them with 1 cup of milk and 2 Tbsp of unsalted butter into a smooth paste.Apply this hair pack and leave for 30 minutes.Rinse with cool water.This hair mask nourishes your dry hair and damaged hair, restore your lost shine and lustre and makes hair less prone to breakage and split ends.


6.Deep Moisturizing Mayo-Banana Rich Hair Mask

Nothing can deep moisturize your hair better than a mayo-banana rich hair mask.To prepare this hair mask, blend 1 large ripe banana with 1/2 cup of mayonnaise into a smooth consistency.Wet your hair and apply this creamy hair mask.Cover your hair with a shower cap and leave for 30 minutes.Rinse with cold water followed by a conditioner.It repairs and seal every strand of your hair, bind split ends and imparts a lustrous shine and softness to your hair.

How to Make Hair Straightening Cream at Home

Silky, shiny and straight hair is nowadays every woman’s dream.Gone are those days when golden curly locks ruled the fashion industry.Welcome to the era of straight hair.Today many women are opting for straight hair over curly hair.There are a couple of good reasons why women wants to get their hair straightened, because straight hair is more manageable, smooth, frizz free, easy to maintain, gives you a perfectly neat, sleek look and looks good on any face type.

However, only few are blessed with naturally straight hair while others turn to chemical hair straightening methods, flat irons, and hair straightening creams to get rid of curly hair.These hair straightening services and products offered at salon, give you instant results which may last for over a 1 or 2 years, but later it may give rise to various hair problems that include hair loss, hair greying, scalp infection and other hair problems.

If you are looking for a natural way to straighten your hair at home without using heat and chemical hair straightening products, then try out this all natural homemade hair straightening cream.With this hair straightening treatment, you get smooth, sleek and straight hair in just 30 minutes.This straightening cream is safe for all hair types and helps your hair stay straight and smooth for over a week.

hair straightening cream


How to Make Hair Straightening Cream At Home

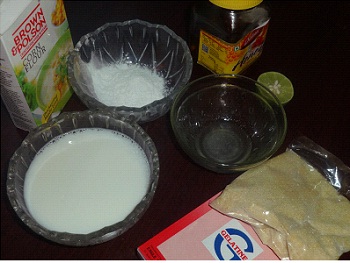
Ingredients

  • Coconut Milk
  • Pure Coconut oil
  • Honey
  • Cornflour
  • Lemon juice
  • Gelatin Powder

hair strightening ingr


Method to Prepare Hair Straightening Cream

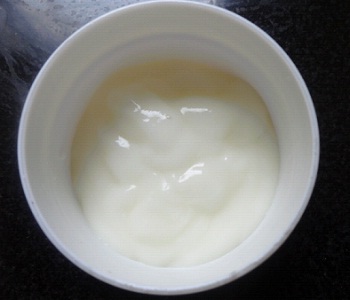
Pour 1 cup of coconut milk into the pan and place over a low heat.Add 2 Tbsp of coconut oil to the coconut milk and stir well.In a separate bowl, mix 2 Tbsp of gelatin powder and 2 Tbsp of corn flour powder.Pour the mixture into the coconut milk and stir until the coconut milk attains a semi-thick consistency.Remove the pan from the heat and allow the mixture to cool slightly.Once the mixture has cooled, mix 2 Tsp of lemon juice and 2 Tbsp of honey.

Direction on How to Apply

1.Before you apply this straightening cream, make sure your hair is clean and dry.

2.Properly comb your hair to remove any tangles or knots.

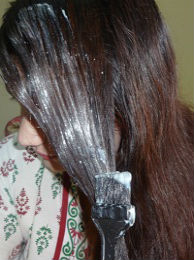
3.Now divide your hair into small sections and with the help of a brush apply this homemade hair straightening cream to each section.Start from the roots of your hair and then gradually work through to the ends of your hair.

how to straighten hair naturally

4.Using your fingers pull each section of your hair straight down.Refer to the below image.

straight hair

5.Leave for 30 minutes and then rinse with cold water.Do not shampoo your hair.Apply only conditioner.Let your hair hang straight down while applying the conditioner.Allow the conditioner to sit for 5 minutes and then rinse with cool water.

6.Do not blow dry or towel dry your hair.After you have complete with your hair bath, gently comb your hair straight down and leave to dry naturally.

Enjoy!! your irresistible silky, smooth and straight hair.

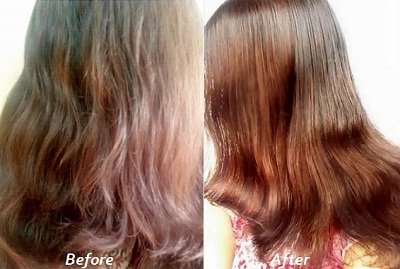
This is how my hair looks before and after applying the straightening cream.Believe it or not, I have not used any straightening iron or heating machines.

Hair straightening cream1

Read MoreHomemade Conditioners For Instant Shine

Few Imp Points

1.After applying hair straightening cream, do not wash your hair with shampoo for a week.

2.Avoid styling gels or cream for a week.

You can use this hair straightening cream two or three times in a week to get naturally straight, super shiny and smooth hair.It is 100% natural and also works as an effective homemade hair smoothing conditioner.

Have a Look at Few Other Hair Related Problems Asked by Other Members

How to Get Silky Hair  

How to Treat Split Ends

How to Stop Hair fall

How to Straighten Hair

10 Super-Easy Tips for Daily Face Glow

When you wake up in the morning and look into the mirror, you feel disheartened by the state of your skin.Even after spending heavily on cosmetic products and visiting expensive parlors, your skin looks the same.A monthly facial is not enough to get your skin glowing every day.A facial effect last only for 2 to 3 days later your skin recover it’s original state.Daily your skin is exposed to dirt, dust, cosmetics and other harsh substances that pull away your skin’s natural moisture, clogged pores and cause breakouts thus leaving the skin rough and lusterless.Your skin needs daily moisturization, nutrients, hydration, exfoliation and nourishment to keep your skin moist, supple and glowing.Here are 10 super-easy tips that will improve the texture and appearance of your skin and promote healthy glowing skin.


10 Homemade Tips for Daily Face Glow

1.Energize Your Face

skin glow water

Give your face an instant energizing boost.Fill a mug with cold water and 1/2 squeezed lime juice.Splash this water onto your face.It refreshes your skin, sweeps away skin dullness and reveals fair, glowing skin.


2.Hydrate your body

As soon, you wake up in the morning, the most important thing that must do is to replenish your body with water.Sit comfortably on a chair and drink at least 2 to 3 glasses of water.Your body needs to be filled up with that much amount of water that has been deprived for about 7 hours. Water hydrates and recharges your body, flush away harmful toxins, keeps your skin moist, healthy and glowing.


3.Forever Glow with Face Yoga

Face yoga enhances oxygen-rich blood circulation into your face, stimulates collagen production and leaves your facial skin naturally firm, radiant and glowing.Aim for at least 10 minutes of facial exercise every day.Start your yoga with puffy cheeks, smiling fish and tongue stretching facial exercises.Finally, finish off with a laughter yoga.It recharges your mind and body, relieves stress, reduces fine lines and boost facial radiance.


4.Detoxify Skin Pores

detoxify pores

Prepare an exfoliating scrub by mixing 1/4 th cup of lemon grass powder, 2 Tbsp of sugar and 4 Tbsp of honey.Store this semi-dry mixture into a plastic container.Place this scrub near to the wash basin, so that you can easily reach out in few seconds.Wet your face and then take a few amount of this mixture on your palms and softly scrub your face for 1 minute in a circular motion.Rinse with cool water.It cleans away impurities, dirt, whitehead and dead skin cells from the pores thus leaving your skin satin-smooth, soft and radiant.

                                                                        Also Read: Homemade Exfoliating Scrubs for Instant Glow 


5.Rejuvenate your Skin

Scoop out 1 Tbsp of ripe papaya pulp into a bowl.Gently mash this mixture with your fingers and massage onto the skin by applying firm, upwards strokes.While massaging you can wet your hands with cold milk for dry skin and for oily skin use rose water.Massage for 2 minutes and then leave for another 5 minutes.Rinse with cold water.Raw papaya pulp is rich in antioxidants, vitamins and enzymes that nourishes and revitalizes your skin and boost facial glow and resilience of the skin.


6.Give an Intense Moisturizing Soak

Every day your skin is exposed to dirt, pollution, makeup, and soaps that pull away essential oils from your facial skin thus leaving it dry, dull and wrinkled.Moisturizers keep your skin hydrated, healthy and glowing.A good moisturizer fills back the essential moisture and water loss from the stratum corneum.Moisturize your skin 3 times in a day.Dry skin stick to oil-based moisturizers and oily skin choose water-based moisturizers.


7.Add Extra Nourishment to your Face Foundation

foundation

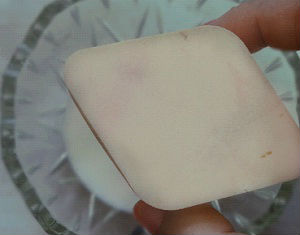
Foundation makes your skin look even, flawless and fair.But many of the ingredients contained in a foundation aren’t so pretty.They can dry out your skin.So here is a quick trick to prevent your skin from drying out with a foundation. If you have dry or sensitive skin, apply foundation using a soft makeup sponge soaked in little milk and then squeezed to remove the excess.The skin nourishing nutrients contained in milk leaves your skin feeling soft, moisturized and supple.It also imparts a natural glow and radiance to your skin.If you have oily skin apply foundation using a makeup sponge soaked in little rose water to keep your skin feel fresh, rejuvenated and keep acne at bay.


8.Glow your skin with a Face Mist

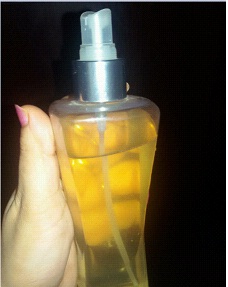
face mist

Face mist or face spray gives your skin instant moisture, refreshness and glow.Here is a natural homemade vitamin E enriched face mist that you can try at home.Steep a green tea bag in a cup of hot water.Remove the tea bag and allow the water to cool.Add 1/4th cup of rose water and 10 drops of vitamin E oil.Pour this mixture into a spray bottle and place in the refrigerator for few hours.Shake well before you spray on your face.Always carry this face mist in your purse while traveling.It’s a great way to refresh your makeup and keep your skin hydrated and glowing.


9.Soothe your skin with a glass of Aloe vera juice

Aloe vera is a nutrient-rich plant that is packed with over 200 nutritional compounds, 75 nutrients, 20 minerals, 18 amino acids and 12 vitamins which is extremely beneficial for the skin.Drinking a glass of aloe vera juice every day keeps your skin gorgeously smooth and glowing.To prepare aloe vera drink, fill a glass with cool water, add 4 Tbsp of aloe vera gel and 2 Tbsp of honey.Stir well and drink up.

                                                                                                                                                                                                                                                                      Also Read: Magical Weight Loss Drink


10.Other Important Tips for Daily Face Glow

1.Always wash your face with cold water and then rub an ice-cube on your face.It enhances blood circulation, tightens skin pores, fades away skin dullness and reveals radiant and glowing skin.

2.Munch on fruits that are high in Vitamin C such as oranges, strawberries blueberries, grapes, papaya and guava.These fruits keep your skin healthy and give a naturally glowing complexion.

3.Aim for up to 7 to 8 hours of sleep daily to reveal facial glow.

4.Use homemade herbal products more often such as homemade skin toner, face pack, facial cleansers and face scrubs.They are 100% pure and safe for your skin.

MUST READ

61 Tips For Dark Spots

0
Dark spots on the face can be annoying and embarrassing.Dark spots are extremely stubborn and doesn't fade away quickly.It causes uneven or irregular skin...