






Wednesday, August 5, 2026

12 Easy Nail Art Designs That you Must See

Nail art is a creative and fun way to paint nails.It’s an ultimate way to accessorize yourself.Even a simple nail art, adds a touch of glamor and class to your casual looks.

So what are you waiting for? get yours now!.Revamp those pale, dull nails with these gorgeous nail design and be the talk of the town.Here are the 12 easy nail art designs ideal for both short and long nails and nail art newbies.


Easy Nail Art Design #1
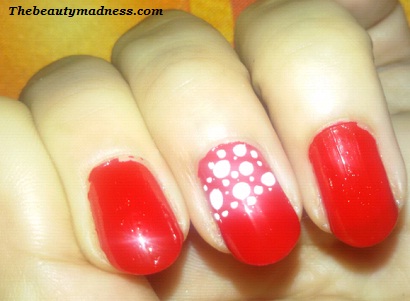
gorgeous nail design

This irresistibly red-hot nail is dedicated to all glamorous divas who want to be the talk of the town.You can pair it with almost any red and white outfit.Apply 2 thin coats of red nail polish.Using a toothpick and q-tip create a smaller and bigger white dots at the base of your nails.Finish it off with a high shine top coat.I really love this nail design.It looks like just you’ve stepped out of a nail salon.


Easy Nail Design #2
nail art design

This trendy nail art piece is a must-wear for beginners.To get this look, paint your nails pink and then using a silver polish make a flower design on one side.Finally, finish it off with a clear top coat.If you wish, you can fill the flower with tiny silver dots.


Easy Nail Design #3
simple nail design

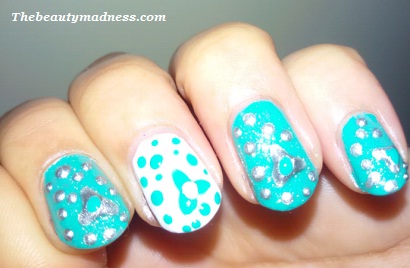
Floral nail art gives your nails a fresh and attractive look.This pretty nail design can be worn in spring/summer.Start off, by applying 2 layer of the white base coat.Let it dry completely and then using a toothpick create a few random dots and a small flower towards the tip of your nail.Sea green, aquamarine, ocean blue nail colors are ideal for this nail art. Later, apply a transparent top coat.


Easy Nail Art Design #4
cute_design

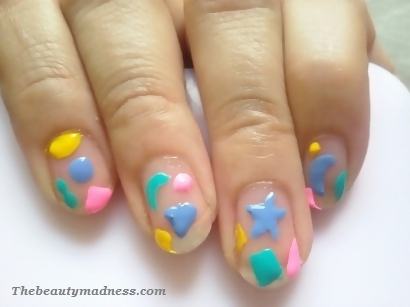
Add some color to your nails this summer.Try this super cute nail art.Pair with a pretty floral or white dress.Start by applying a clear top coat.Let it dry completely and then make some stars, moons and geometric shapes with soft or delicate shades of nail polishes.


Easy Nail Art Design #5
easy nail designs

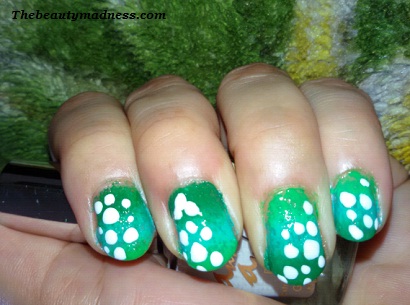
Refresh and refine your summer with this cool gradient nail design.To create the gradient effect, you can choose different shades of the same color or any 3 different bright colors that blend well together.Apply a thin white base coat.Leave to dry completely.Take a sponge, soak in water and then squeeze the excess water out.Paint 2 coats of each color over the wet sponge in the order, you would like them to be on the nail.Gently dab on your nails.Repeat for a better coverage.Dip a toothpick into white nail color and make small dots on one side of your nail.Finish it off with a clear glitter polish.


Easy Nail Design #6
nailsart (1)

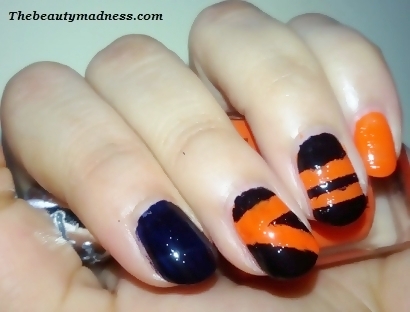
Ultra-chic and glossy piece of nail art for all those stunning beauties out there.It looks difficult but quite easy.To achieve this nail art, you need a sellotape, scissor and 2 different bright and dark shades of nail colors.Start by applying a bright color for the base.Let it dry completely.Now use the tape to give different shapes by placing the tape at various angles and then painting your nails with a dark nail color.Once it dries, carefully remove the tape and apply a clear top coat for shine.


Easy Nail Design #7
simple nail art design

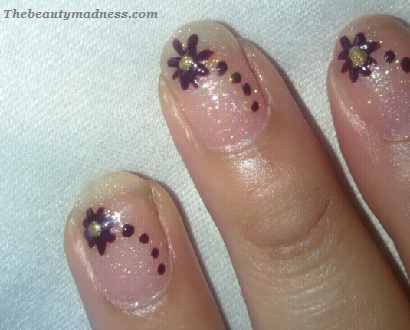
If you really like floral nails, then here’s one for you.A sparkling nail design for all nail art lovers.It is a gorgeous addition to any outfit.Apply a layer of transparent glitter nail polish.Let it dry completely.Using a toothpick make a tiny flower.Create a small dot in the center of the flower with the same glitter nail polish and 4 tiny dots to complete the stem.


Easy Nail Art Design #8
nail designs

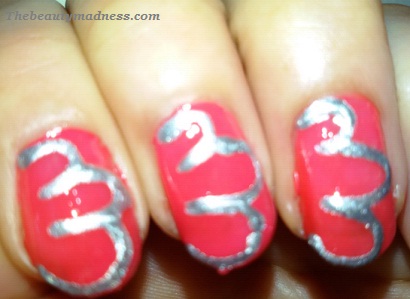
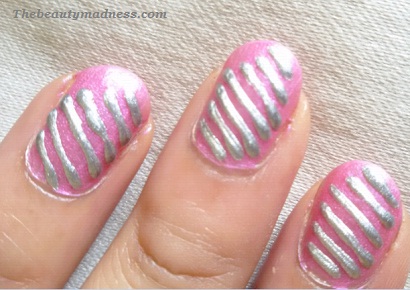
If you are a busy lady and you don’t have much time to spare, then this nail art piece is for you.I started with 2 coats of hot pink nail polish and left it to be dried and then I added 6 t0 7 diagonal strips using a silver color nail polish over the pink base.Finally, finish it off with a clear top coat.


Easy Nail Art Design #9
sparkling nails

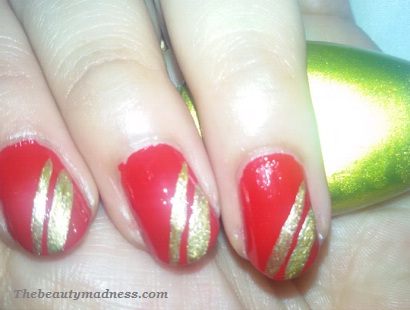
Paint the town red with this super sizzling hot red nail.Apply 2 thin coats of red nail polish.Let them dry completely. Grab your golden nail polish and draw two diagonal lines (thick and thin) across your nails.Apply a clear top coat for a high shine.Pair it with any red, black or golden party wear outfits.


Easy Nail Art Design # 10
cute nail art design

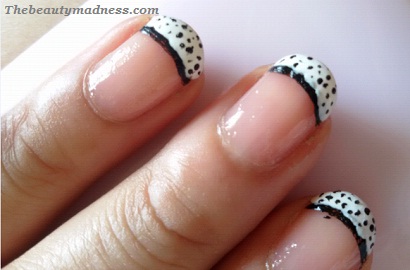
This black and white French manicure looks pretty classy and royal.Start off, by applying a transparent base coat. Allow it to dry completely.Line the tip with a black nail polish.You can use a piece of sellotape across the tip of your nails for a neat smooth line.Fill the tip with a white color nail polish and then using a toothpick create tiny black dots.Finish it off with a clear gloss.Looks great when paired with polka skirts, tops, shirts or short dresses.


Easy Nail Art Design #11

nail art designs

A cute and easy bee nail art design for kiddies.I started with 2 layers of warm, rich yellow for the base coat and then using a brown color polish I created 3 horizontal lines.For bee eyes, I added two small white dots and then circled it with the same brown polish and finally two dots in the middle of the white ones.For a more colorful and happy look paint all your nails with a contrasting colors.


Easy Nail Art Design #12
easy nail design

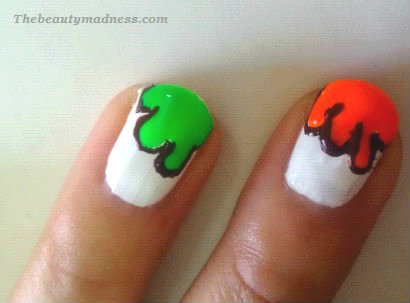
Fun, easy-to-do and colorful nail design for all college going girls out there.This design is all about a colored flower spread over a white base.Start by applying a layer of white polish as a base coat.Let it dry completely.Place 3 to 4 random dots half way down your nails.Extend across the tip of your nails and fill it for a neat finish.Use a dark shade for the border.Apply a layer of clear top coat for high gloss.

How to Do Organic Facial At Home For Glowing Skin

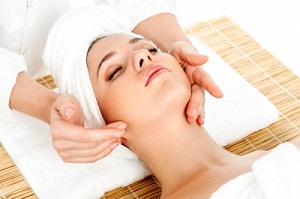
Organic facials are a natural way to beautify and brighten your skin.It is one of the safest way to care your skin at home.The basic steps to any professional facials are to cleanse, steam, exfoliate, massage, nourish and moisturize the skin.An organic facial also has the same facial procedures but here the products used aren’t made with synthetic ingredients, preservatives, and fragrances or produced by synthetic chemicals and artificial fertilizers.The word “Organic” describes “true to nature”; “produced by nature”; “not artificial”.

organic facials
Image courtesy by stockimages at FreeDigitalPhotos.net

The ingredients used in this organic facial is free from synthetic and delivers highly effective results with no cost.The natural antioxidants, nutrients, vitamins, enzymes and minerals present in these ingredients dramatically enhances the glow and color of your skin and restores smoothness, softness and resilience.Try this organic facial and make your skin go wow!!!.


Step 1: Organic Facial Cleansing 

Cleansing is the first quintessential step in any facial skin care routine.It removes surface impurities, makeup residues, dirt and thus reveal brighter and more refined complexion.If you want a vibrant youthful skin, you need to cleanse your skin with a homemade mild organic facial cleanser.

Organic Cleanser for Oily & Normal Skin – Take 1/4 th cup of cold water, add 2 tbsp of rose water and 1/2 squeezed lemon juice.Soak a cotton ball in this solution and wipe your face thoroughly.Repeat until the skin feels clean and fresh.Lemon lightens the skin and rose water adds a wonderful glow.


Organic Cleanser for Dry & Sensitive Skin – Take 1/4 th cup of cold coconut milk, add 2 tbsp of aloe vera gel and 1 Tbsp of honey.Soak a cotton ball in this solution and wipe your face thoroughly.Skin whitening nutrients and enzymes in coconut milk boost facial fairness, honey moisturizes the dry skin and aloe vera nourishes and soothes it.


Step 2: Organic Facial Steaming

Homemade organic facial steams rejuvenates and hydrates dull and damaged skin.It opens up the skin pores making it easy for exfoliation and for removal of stubborn blackheads, whiteheads, and pollutants.

Organic Steaming for Oily & Normal Skin – Fill a large bowl with water and bring it to a boil.Add lemon grass leaves and 2 tbsp of green tea powder.Let the ingredients infused in the hot water for 5 minutes on a low flame. Remove from heat.Drape a towel over your head and let the steam carry the herbal organic ingredients into your skin.Lemon grass brightens the skin and controls excess oil and green tea fights acne causing bacteria and makes skin healthy and youthful. 


Organic Steaming for Dry & Sensitive Skin – Fill a large bowl with water and bring it to a boil.Add fresh rose petals and mint leaves.Let it boil for 2 minutes and then remove from heat.Drape a towel over your head and steam your face for 2 minutes.Rose petals hydrate and restore moisture in the skin.Mint refreshes and calms the dry skin.


Step 3: Organic Facial Exfoliation

One of the most important steps to any facial is exfoliation.Homemade organic facial exfoliators is a marvelous way to pamper your face and to buff away deep-seated impurities, excess oil, blackheads, whiteheads inside the skin pores.


Organic Steaming for Oily & Normal Skin – Mix a tbsp of oats powder and a tsp of organic honey.Place a small amount of this mixture in your hands and rub it together.Massage into skin in a circular motion for 2 minutes.Target to the oily areas.Wash off with cool water.The polishing particles contained in this homemade organic facial scrub imparts a soft, smooth and glowing skin.


Organic Steaming for Dry & Sensitive Skin – Prepare a mild exfoliating scrub.Mix a tbsp of fine brown sugar and a tsp of organic honey.Place a small amount of this mixture in your hands and rub it together.Massage into skin in a circular motion for 2 minutes and then wash off with cool water.


Step 4: Organic Facial Massage

Facial massage boost blood circulation to your facial tissue, restore skin vitality and elasticity, resulting in a youthful glowing skin.This homemade organic massage cream delivers marvelous results compared to commercial massage cream.


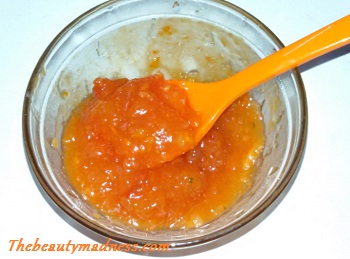
Organic Massage Cream for Oily & Normal Skin – Place few ripe papaya slices, a tsp of aloe vera gel and 2 tsp of honey into the blender and blend until smooth.Massage a small amount of this paste to the skin using circular upward strokes for 5 mins.Remove using a wet washcloth.Papaya healthy enzymes leave skin youthful and bright.Honey serves as an antibacterial to fight pimples and aloe vera moisturizes and soothes the skin.


Organic Massage Cream for Dry & Sensitive Skin – Place a half medium-sized ripe banana, a tsp of corn flour powder and a tsp of honey and blend until smooth.Massage this rich paste to the skin for 5 minutes using your fingertips.Apply light, small circular strokes in an upward direction.Remove using a wet washcloth.Banana deep moisturizes and revitalize dry skin.Honey moisturizes it and corn flour intensify facial fairness.
 

Step 5: Organic Facial Face Pack

Facial pack is the most important step of all.A good organic face pack rejuvenates your skin, balance skin tone, firms wrinkles, tightens skin pores, detoxifies skin and restores a healthy complexion.

Organic Facial Pack for Oily & Normal Skin – An excellent skin lightening and glowing face pack for oily skin. Blend fresh marigold flowers with little green tea water.Add 2 tbsp of chickpea flour (Besan).Meanwhile, place 2 cucumber slices over your closed eyes.Apply and let it sit for 20 minutes.Wash off with cold water and massage an ice cube.Marigold delivers a gorgeous golden glow and prevents aging.Besan tightens and brightens the complexion.


Organic Facial Pack for Dry & Sensitive Skin – A wonderful rejuvenating facial pack specifically designed for dry, rough skin.To prepare this pack combine a tsp of chickpea flour(besan) with 2 tbsp of coconut milk cream, 1 tsp of honey and 2 tsp of mint leaves paste.Apply a thick layer of this pack.Meanwhile, place 2 cotton balls soaked in rose water over your closed eyes and rinse off after 15 minutes.This pack leaves the skin silky smooth, fresh and radiant.


Step 6: Organic Facial Moisturization

The last step in your facial is moisturization.After a good facial treatment, it is absolutely necessary that you deep moisturize your skin to maintain the youthfulness of your skin and for a dazzling healthy glow.

Organic Facial Moisturizer for Oily & Normal Skin – Mix equal amount of olive oil and lemon juice and massage the moisturizer into your skin.It absorbs quickly into the skin, tones, firms and leaves the skin supple and glowing.


Organic Facial Moisturizer for Dry & Sensitive Skin – Mix 1 tbsp of sunflower oil or sweet almond oil, few drops of rosewater and aloe vera leaf gel and massage the solution into your skin.This nourishing formula leaves the skin unbelievably silky and smooth.

5 Skin Lightening Corn Flour Face Packs

Pollution, sun, stress and smoke steals away your flattering skin color.Your skin needs to be pampered and feed with natural skin lightening ingredients to bring out a natural white glow and brightness to your skin.Make your own cornflour facial packs in the comfort of your kitchen and get a much lighter and flawless complexion that you have always desired.

Before you move on to the skin lightening face packs, have a look at some of the amazing benefits of cornflour for your skin.

skin whitening face pack


8 Amazing Benefits of Corn Flour for Skin

1.Corn flour contains a reasonable amount of protein that help boost collagen and prevents the sign of skin aging.

2.The Vitamin A present in corn flour fade brown spots, sun spots and dark patches.
3.The minerals and amino acids keep the skin healthy, vibrant and smooth.
4.The super oil-absorbing properties of corn flour/cornstarch is great for oily skin and acne-prone skin.

5.The cleansing properties of corn flour remove surface dirt and impurities and imparts a clear, clean and a glowing complexion.

6.The presence of vitamin E in corn flour eases dryness, prevent skin from UV damage and reduces skin redness.

7.The water-soluble vitamins B1 and B2 protect the skin from aging, boost hydration and promotes a healthy skin.

8.The bleaching effect of cornflour is beneficial for lightening skin and eliminating uneven color.


Also, check out this simple skin lightening face pack to lighten skin naturally and to remove sun tan


5 Homemade Corn Flour Face Packs for Skin Lightening

1.Corn Flour Facial Fairness Bleach Pack

skin lightening facial bleach

This unique fairness bleach pack is made up of 4 natural skin lightening ingredients that lighten acne scars, dark spots, dark marks and freckles, boost facial radiance and glow.To prepare this pack you need a tbsp of cornflour, 2 tbsp of lemon juice, a tsp of turmeric, a tsp of baking soda and few drops of rose water.If you have dry skin then instead of lemon juice mix a tsp of honey.Cleanse your skin thoroughly and apply a fresh paste of this pack.Let it sit for 20 minutes and then wash off with cool water.Apply face moisturizer.


2.Corn Flour Skin Lightening Face Pack

corn flour face pack

In a small bowl, add 2 tbsp of a cornflour, 2 tbsp of rice powder, a tbsp of honey and 3 tbsp of milk.Combine the ingredients well to form a creamy paste.Wash your face thoroughly and then apply a thick layer.Leave until it dries completely and then wash off with cool water.This skin lightening face pack soothes sunburn skin, fades away discoloration and uneven skin tone.Milk and honey lightens and softens rough dull skin.Rice powder oil absorbing properties controls excess oil, exfoliates and smooth skin thus imparting a radiant and fairer complexion.


3.Corn Flour Skin Lightening Massage Cream

skin whitening cream massage

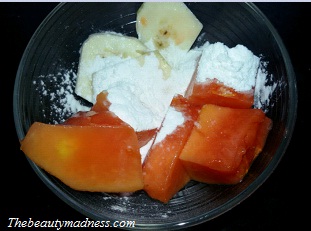
Blend few slices of ripe banana, papaya and 2 tbsp of corn flour/cornstarch powder together until smooth.If you have dry skin mix a few drops of rose water and for oily skin add a few drops of lemon juice.Place this massage cream in the refrigerator for 30 minutes.Wipe your face with lukewarm water and then massage this cold paste in a circular motion with your fingertips for 5 to 6 minutes and then remove the pack using a cotton ball soaked in cold water.The natural alpha hydroxy acids, vitamins and antioxidants in this massage cream miraculously whiten your skin and brings an amazing glow and smoothness.


4.Corn Flour Exfoliating & Skin Lightening Face Scrub

skin lightening scrub

Summer steals away your skin’s natural glow and color leaving it dull, lifeless and dehydrated.This homemade tan removing scrub is a blend of natural exfoliants to smooth and cleanse away dullness and delivers beautiful white glow.Simply mix a tbsp of cornstarch, a tsp of coffee powder, a tsp of oats powder and 3 tbsp of coconut oil.Rinse your face with warm water and exfoliate your skin for 2 minutes.Wash off with cold water.It leaves skin clear and radiant and lightens skin color.


5.Corn Flour Skin Whitening & Anti-Ageing Facial Mask

A multi-action facial mask for whitening skin, diminishing wrinkles and lines, eliminating pores and for flawless facial shine.In a small bowl, place a large egg white, add 2 tbsp of orange juice, 1 tbsp of honey and 2 tbsp of cornflour and whisk well.Wipe your face thoroughly and apply 2 to 3 layers of this pack.Let it dry completely and then remove the pack in an upward direction.Rinse off with cold water.It leaves your skin youthful and brings out a luminous glow on your face.

Also Read  Intense Skin Whitening Cream Mask


3 Natural Beauty Treatments for Fairer Underarms

Want to achieve amazingly smooth, gorgeously fairer underarms in 1 week?

Dark underarms can cause a lot of embarrassment and discomfort.It disrupts the appearance of the underarm skin and stops you from wearing sleeveless dress.Dark underarms are most visible on fair skin compare to dark skin.It is usually caused by sweating, accumulation of dead skin cells, shaving underarms hairs, improper cleaning and the use of certain deodorants and shaving creams.If left unattended, it can cause odor, itching and further discoloration of the underarm skin.

Treat your dark underarms with these 3 natural home remedies and reveal smooth and fairer underarms naturally. Follow these 3 steps (scrub-pack-cream) twice in a week for best results.


1.Exfoliating Rice Scrub

It’s a wonderful exfoliating scrub to control odor, sweating of your armpits and to lighten dark underarms instantly.

fairer and smooth underarms

Ingredients

Rice Powder
Lemon Juice
Honey
Baking Soda

Method & Direction To Use

In a small bowl, mix 2 Tbsp of rice powder, 1 Tbsp of lemon juice, 1 Tbsp of honey and 2 Tsp of baking soda.Combine all the ingredients well.Rinse your underarms with warm water to open clogged pores.Place a small amount of this underarm whitening scrub on a loofah and gently exfoliate your underarms in a circular motion for 3 to 4 minutes. Rinse with cool water.

Benefits – Rice powder is a great exfoliant and a natural skin lightening ingredient.It gently removes the accumulated dead skin cell and build-up of dirt.The oil-absorbing, moisturizing and anti-inflammatory properties helps lighten dark underarms and keeps odor at bay.Baking soda kills the bacteria trapped in the skin.Lemon bleaches and whitens the underarm skin and honey moisturizes it.


2.Underarms Brightening Gram Flour Pack

It is an effective pack to get immediate brighter and fairer armpits.It re-energize and tightens the underarm skin.

lighten dark underarms

Ingredients

Gram Flour
Cucumber
Yoghurt

Method & Direction To Use

Place peeled cucumber slices, 2 Tbsp of gram flour and a Tbsp of yogurt into the blender and blend until you get a smooth consistency.Clean your underarms with a damp cotton and then apply a thick layer of this paste.Once it dries completely, rinse off with cool water and then massage an ice cube for 1 minute.

Benefits – Gram flour’s powerful skin cleansing properties deep cleanses the underarm area, cucumber juice brightens it and yogurt protects the skin from bacterial infection and softens underarm skin.


3.Underarms Whitening Cream

This underarm whitening cream quickly absorbs into the skin and delivers super soft and smooth skin.

how to get fairer underarms

Ingredients

Milk Cream
Organic Coconut Oil
Olive Oil

Method & Direction To Use

Take a Tbsp of your favorite moisturizing cream and mix a tbsp of milk cream, a Tsp of olive oil and a Tsp of coconut oil.Massage well to the underarm area to reveal softer and fairer underarms.

Benefits – Milk cream is packed with vital enzymes, nutrients and lactic acid that removes dark underarm patches and softens the skin.Coconut oil and olive oil contains vitamin E that deep nourishes and promotes skin elasticity.

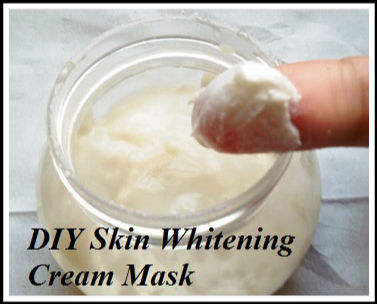
DIY Intense Skin Whitening Cream Mask

Get soft, radiant and fairer skin instantly with homemade skin whitening cream mask.This miraculous skin care recipe contains the extracts of skin lightening agents and natural ingredients that work together to whiten your skin complexion and lighten stubborn dark marks and spots.

This mask is specifically designed for those who have been suffering from rough, dull, dark and uneven skin tone.Try it twice in a week to see visible results.

skin whitening cream
Image courtesy by StockImages at FreeDigitalPhotos.net


8 Benefits of using this Homemade Skin Whitening Cream Mask

1.It lightens dark patches and even out skin complexion.

2.It controls the formation of pimples and acne.

3.It lightens stubborn dark spots and marks.

4.Tightens and firms loose sagging skin and prevent premature aging.

5.Leaves skin soft and smooth by eliminating dead skin cells on the surface.

6.Minimizes size of large pores.

7.It protects the skin from sun damage and prevents discoloration.

8.It reduces melanin production and makes skin lighter and brighter.


Ingredients you Need

skin whitening cream mask

Wheat Grass – Packed with skin benefiting minerals and vitamins A, C, and E, it cures acne and lightens dark marks.

Lemon Grass or Dry Lemon Peels – Antibacterial and antimicrobial properties help alleviate different skin problems and tightens skin pores.

Egg White – Proteins and vitamins smooth wrinkles and gives you a youthful glow.

Glycerin – Moisturize and softens the skin.

Corn Starch Powder – Oil-absorbing and skin whitening properties gives naturally fairer and flawless complexion.


Method to Prepare this Skin Whitening Cream Mask

skin whitening pack

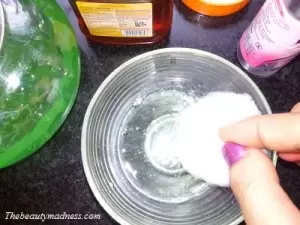
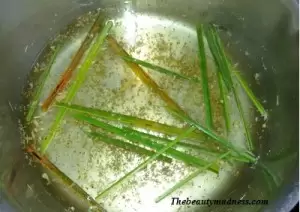
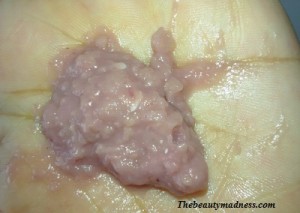
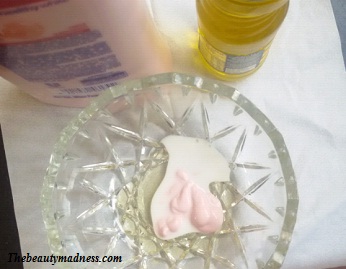
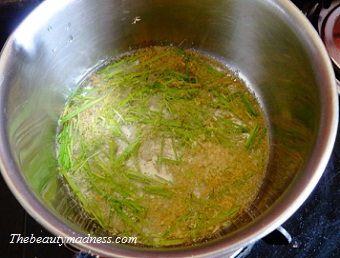
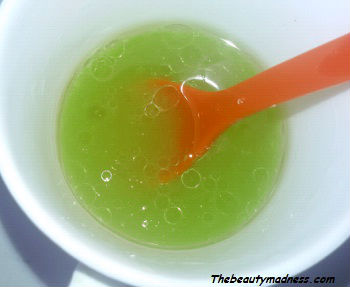
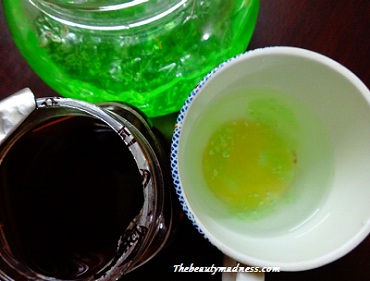
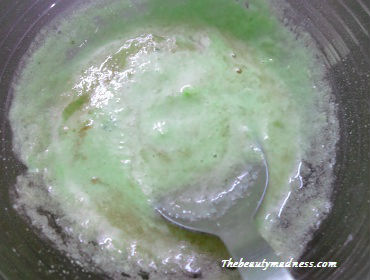
Bring half cup of filtered water to boil.Add 1/4 th cup of chopped lemon grass and wheat grass leaves.Let it simmer for 5 minutes on a low flame.Remove from heat and let the herbs infuse for 30 minutes.Filter the infused water into a bowl and mix 2 tbsp of cornstarch powder, 2 tbsp of glycerin and 1 large egg white.Blend until you obtain a creamy consistency.

Direction to Use 

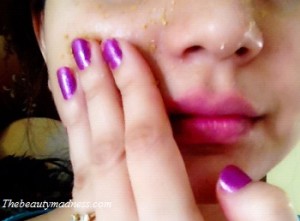
Rinse you face with lukewarm water and apply 2 layer of this creamy paste on face and neck.Let it dry completely and then remove the pack in an upward direction using a washcloth soaked in cold water and then massage an ice cube.

For best results use this skin whitening mask twice in a week.

Look 10 Years Younger With Natural Home Remedies

Aging is a natural phenomenon that everyone experiences in life.It is inevitable and irreversible.Aging comes in two different types, these are intrinsic and extrinsic.Intrinsic aging is age-related changes whereas extrinsic aging is caused due to environmental factors and unhealthy lifestyle.In both ways, the production of two vital proteins collagen and elastin in the skin slows down.The skin starts to show the different signs of aging.Especially, in extrinsic aging, the skin looks much older than the actual age.

reverse_skin_ageing Image courtesy of marcolm at FreeDigitalPhotos.net

But there are a number of treatments that can reverse the signs of skin aging and makes the skin look 10 years younger than the present age.These 8 natural skin care remedies are designed to boost collagen production, smooth fine lines, wrinkles, crows feet and tighten loose and sagging skin.Follow these remedies regularly for over 2 weeks to make your skin look 10 years younger naturally.


Rose Water and Glycerin Age Reversing Facial Lotion

A very important part of any anti-ageing skin care routine is moisturizing.Here is a weightless hydrating natural facial lotion to minimize the appearance of wrinkles and crows feet and to rejuvenate skin complexion.Rose water is a rich source of antioxidants that can help boost resiliency of the skin and revive skin tissue.The natural emollients found in rose petals trap moisture in the skin, making it look softer and younger.Glycerin is a humectant, means it has the ability to retain moisture in the skin thus giving it a glossy, smooth appearance.

Method & How to Use – Wipe your skin with a cotton soaked in rose water.Mix equal amount of glycerin and rose water and gently massage face and neck.Do this every morning after cleansing face.


Anti-Wrinkle Vitamin C Serum

vitamin c serum recipe

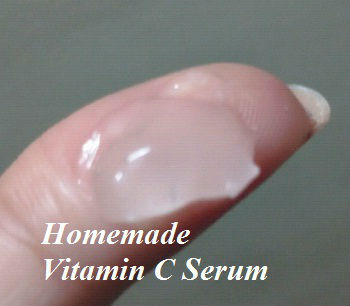
Homemade serums are great for mature, aging skin.Serums are light in texture and quickly absorbs into the skin. Here is an amazing anti wrinkle Vitamin C serum recipe that you must try at home.Vitamin C is a water-soluble antioxidant commonly found in citrus fruits.This antioxidant has the remarkable ability to improve the elasticity and flexibility of the skin and unveil a smoother, wrinkle-free and glowing complexion.

Method & How to Use

Vitamin C Serum Recipe

  • Pure vitamin C tablets – 2 Nos
  • Vitamin E  Oil – 2 Tbsp
  • Aloe Vera Gel – 1 Tbsp
  • Rose Water – 5 Tbsp

Dissolve vitamin C tablets in rose water.Mix aloe vera gel and vitamin E oil.Pour the contents into a small empty bottle.Store in a cool place.Make sure to use within 5 to 6 days.To use it simply mix a few drops of this serum to your regular moisturizing night cream or lotion.Using it regularly for over a period of time makes the skin look younger naturally.

Check Out this Quick Video on how to Make a Vitamin C Serum for Youthful Glow and Radiance


Revitalizing with Natural Green Tea & Lemon Facial Toner

toner facial

Facial toners make your skin radiant, healthy and youthful.Green tea based toner is incredible for aging skin.Green tea contains free radical-fighting antioxidants that repair dull, damaged skin, prevents blemishes, pimples and replenishes lost moisture.The vitamin C in lemon juice is a great antioxidant, vital for ageless skin.The acidic properties in lemon lighten the skin.

Method & How to Use

You can use it as a toner or as a facial mist for younger and glowing skin.Take half cup of green tea water and dissolve 2 tbsp of lemon juice.Soak a cotton ball and wipe thoroughly.Repeat for 2 times in a day.To use it as a facial mist, pour the solution into a spray bottle and place in the refrigerator for 1 hour.Spray on your face, whenever your skin feels dull and dehydrated.


Papaya and Honey Wrinkle Smoothing Natural Massage Cream

face pack for youthful skin

A Fast firming and smoothing homemade facial massage cream for diminishing the appearance of age spots and fine lines.Papaya is a powerhouse of vitamin C and antioxidants that help strengthen sagging skin and fights the signs of skin aging.Honey is a natural humectant, that help replenish skin with moisture.The essential enzymes, antioxidants, and flavonoids make it a great anti-ageing skin care ingredient.

Method & How to Use – Scoop out 2 Tbsp of ripe papaya pulp into a bowl, add 1 Tbsp of honey and mash using the back of a spoon.Cleanse your face thoroughly, take a small amount of this paste on your fingers and massage face and neck in a circular, upward motion for 5 minutes.Soak a cotton ball in cold water and remove the paste in an upward direction.Rub an ice cube and apply moisturizer.


Egg White and Orange Instant Firming Mask

youthful skin

Renew your youth with this amazing skin lifting and tightening mask.The proteins in egg white enhance collagen and elastin, promotes facial radiance and glow.It also minimizes enlarged pores and smooths away fine lines.The vitamins and antioxidants in orange juice revive your dull complexion and illuminates your skin tone.

Method & How to Use

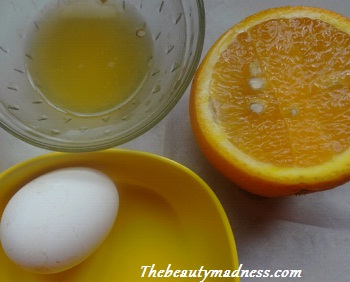
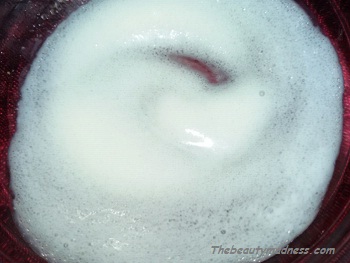
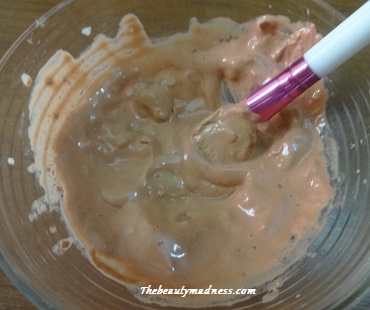
In a small bowl, combine the mixture of 1 egg white and 3 Tbsp of fresh orange juice.Rinse your face with lukewarm water and pat it dry.Using a brush, apply a layer and then after 5 mins apply another layer.Leave to dry completely. Remove the pack in an upward direction with a damp cotton pad.Using this on a weekly basis, makes your skin look 10 years younger.


Exfoliating & Cleansing with Raw Milk & Salt

younger looking skin

One of the most important skin care routine for an anti-ageing skin is exfoliation.Milk and salt are the most effective and natural cleanser and exfoliator.Raw milk is packed with vital nutrients, minerals and vitamins that are essential for a healthy youthful skin.It adds a natural glow to the skin and visibly tightens pores.Salt deep exfoliates skin and leaves it firm and smooth.

Method & How to Use

If you are really looking an easiest way to make your skin look younger naturally then here is a simple tip.Mix 1 tsp of salt to 1/4th cup of cold raw milk.Stir well.Soak cotton balls and gently dab on your face.Leave for 2 minutes and then rub in a circular motion.Rinse off with cool water.It removes the accumulated dead skin cells, dirt, and impurities and thus reveal smooth, glowing and vibrant skin.


Age-Defying Carrot, Milk and Turmeric Collagen Face Pack

look 10 years younger instantly

Carrots are truly great for your skin.The high level of beta-carotene, vitamin A and antioxidants slows down the aging process and makes the skin appear more plump and juvenile.Turmeric is a powerful antioxidant and anti-inflammatory compound that helps minimizes redness, protects the skin from sun damage and free radical that contributes to wrinkles and promotes healthier skin.

Method & How to Use

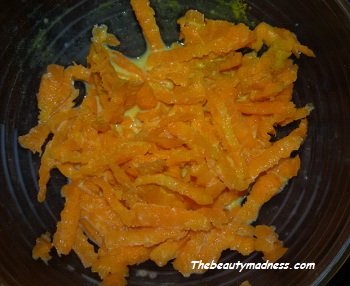
Soak 2 Tbsp of grated carrots in 4 Tbsp of warm milk for 10 minutes to soften it.Add a Tsp of turmeric and then blend it.Rinse your face with lukewarm water and apply the pack.Rinse off with cold water after 20 minutes.This is one of the top remedies for radiant and younger looking skin.


Rice Water Face Wash for Ageless Skin

Rice water is one of the top beauty secrets of Asian women.It is rich in beauty vitamins and minerals that work effectively to reverse the signs of aging.Washing your face daily with cold rice water tightens skin pores, energize skin, lighten skin tone and slows down the aging process.


Some Important Tips for youthful Skin

1.Try the anti-aging facial at home once in 15 days.

2.Always keep your skin well moisturized and hydrated.Dry skin is one of the main cause for the formation of wrinkles.

3.Drinking pomegranate or grape juice every day will prevent your skin from wrinkles and premature aging.

4.Regular exercise for about 30 minutes can reverse the skin aging process.

5.Always protect your skin from the damaging UV rays to prevent discoloration and premature skin aging.

6.Drink lots of water to keep your skin moist and hydrated from the inside out.

7.Daily have a glass of Aloe Vera juice to keep your skin youthful and glowing.Click here magical aloe vera juice recipe.

8.Include more anti-ageing foods in your diet to boost skin elasticity and for youthful skin.

9.Live a stress-free and happy life.

How to Remove Skin Rash Caused By Bleach – Instant Tips

Skin Bleaching is a popular method to lighten facial hair and to get instant fairer and glowing complexion.These skin-lightening products contains a high amount of chemical substance that inhibit melanin production and makes the skin appear lighter.However, these chemicals can have a negative reaction on the skin if it’s not used in the right way or without proper care and precautions.It can cause unpleasant burning sensation in the skin and can lead to skin rashes and scarring.

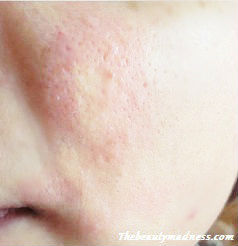
But don’t worry!! Hopefully, there are a few natural remedies that can help cure and remove skin rashes immediately.I have shared 6 simple home remedies and also important precautions and skin bleaching tips in order to prevent skin rashes.In the below picture, you can distinctly see the uneven red rashes on my face after a bleach reaction.

skin rashes


Here are 6 Amazing Home Remedies to Remove Skin Rash Caused by Bleach

Aloe Vera Honey Ice Water – The healing properties of aloe vera is astounding! It instantly soothes inflamed, red and itchy skin caused by the use of bleaching creams.Here is an effective tip to use aloe vera to get rid of skin rashes fast.Take half cup of ice-cold filtered water, dissolve 3 Tbsp of fresh aloe vera gel and 1 Tbsp of honey completely.Using a cotton ball apply on the affected area.Leave for 10 minutes and then rinse with cool water.

remove skin rashes


Cold Milk – An instant and fastest way to get rid of skin rashes is by the application of cold milk.Simply soak a cotton ball in ice-cold milk and directly dab onto the affected area.Hold it for 4 to 5 minutes and then wash off with cold water.Milk immediately neutralize acids that cause rashes and the healing properties of it reduce skin inflammation and discomfort.You can use this home remedy to get rid of sun rash and to get naturally fair skin.


Fresh Cucumber Pack – Cool it with cucumber!! Cucumber has an immediate cooling and soothing effect on the skin.Blend peeled cucumber slices into a smooth consistency.Refrigerate for 30 minutes and then apply this cold pack on the affected area.Let it sit for 10 minutes and then wash off.It heals itchy rash skin, soothes inflammation and also reduces the effects of tanning.

rashes caused by bleach


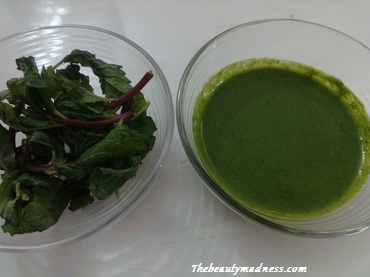
Mint and Rose Water Ice Cubes – Mint is wonderful in dealing with different types of skin rashes.Mint cools and refreshes irritated skin and helps relief skin rash quickly.Blend a handful of mint leaves using half cup of water. Filter the juice into a bowl and mix few drops of rose water.Pour the solution into an ice-cube tray and freeze.Take an ice cube and gently rub on the affected area for 4 to 5 minutes.It speeds up the healing process and thus cure skin rashes.

mint for rashes


Sandalwood Pack – Solve any problems related to skin rash immediately with this simple natural ancestral remedy.Mix sandalwood powder with rose water or cold milk and apply on your face.Leave for about 10 minutes and then rinse off with cool water.The anti-infectious, antibacterial and anti-inflammatory properties comfort burning or itching sensation in the skin.

remove sun rashes


Baking Soda Cold Rinse -Baking soda provides an instant relief to inflamed, red skin.Simply, fill a mug with cold water and dissolve 2 Tbsp of baking soda.Splash this water on your face.Repeat for 2 to 3 times and then apply a moisturizer.

Here are some special precautions that you must follow in order to prevent rashes caused by skin bleach

1.Never ever bleach your skin if it is too dry.The whitening or skin lightening compounds contained in bleaching creams, dry the skin further and results in skin redness and rashes.

2.Avoid bleaching your skin frequently.Just used once in every two weeks.

3.Avoid direct sun exposure for 8 hours after bleaching your face, it can develop rashes and makes the skin appear darker.

4.Never bleach your skin after a hot bath or after a facial steam.

5.Avoid using soap or face wash 4 hours before or after bleaching the skin.

6.Bleaching and application of other face packs shouldn’t be done on the same day.

7.Make sure to finish off with a well-hydrated soothing moisturizer after bleaching to prevent dryness and itching.

4 Nourishing Homemade Lip Balms for Soft Pink Lips Naturally

Soft Pink lips are often looked as a symbol of sensuality and attractiveness.It speaks a lot about your health.Pale, rough and dark lips can be a clear sign of poor health.Stress, bad habits, unhealthy lifestyle, sun exposure and use of cheap and old cosmetics ruin the natural beauty of the lips making it appear darker and discolored.Even constant licking of the lips and sipping on hot things causes gradual darkening of the lips.Your delicate lips need an additional care to retain softness and to enhance natural lip color.

Feed your lips with my intense moisturizing lip balm formula to keep it moist, visibly pink, intensely soft and smooth.The best thing about these homemade moisturizing lip balms, once prepared, you can store for up to 10 days at room temperature.

 4 Homemade Lip Balms to Lighten Dark Lips

1.Homemade Nourishing Carrot Lip Balm for Super Soft Pink Lips

lip balm for pink lips

Ingredients you Need to Prepare Natural Lip Balm

1/4 th cup of grated Carrot

4 Tbsp of Olive Oil

4 Tbsp of Sweet Almond Oil

2 Tbsp of Honey

Method & Direction to Use this Lip Balm to Lighten Dark Lips

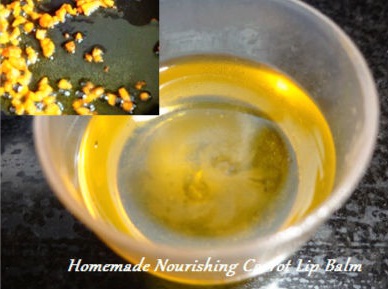
Heat olive oil and almond oil in a small pan on a low flame.Add the grated carrot to oil.Cover the pan with a lid and let it heat for about 15 minutes on a very low flame.Remove from heat and leave the carrot to infused in the oil for about 1 hour.When the oil is ready, strain it and mix honey.Pour this mixture into a clean lip balm jar.To use, clean your lips with a moist cotton and then take a small amount of the carrot balm and massage on your lips.Leave it overnight to reveal super soft pink lips naturally.

Benefits of Using Nourishing Carrot Lip Balm

Carrot is rich in healthy vitamins A, K and E, minerals, nutrients and beta-carotene that is required for smooth pink lips.The antioxidants present in carrot protects your lips from UV damage.Olive Oil contains a good amount of vitamin E, K, and antioxidants for moisturizing and conditioning lips.Sweet almond oil is packed with vital nutrients, oleic acid, and vitamin E that protects dry, chapped lips and leave lips smoother.Honey softens and adds shine to your lips. 


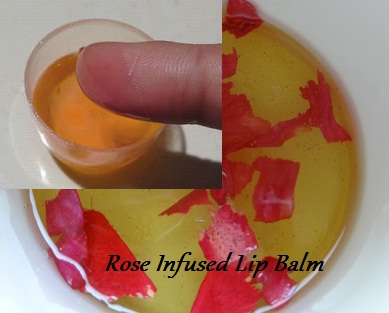
2.Rose Infused Lip Repairing Balm for Petal Smooth, Soft Pink Lips

lip balm for soft pink lips

Ingredients you Need to Prepare Homemade Lip Balm

Handful of Rose Petals

1/4 Th cup of Sunflower Oil

3 Tbsp of Vitamin E Oil

Method & Direction to Use this Lip Balm to Lighten Dark Lips

Place rose petals in a small heat-proof bowl and keep aside.In another bowl, pour sunflower oil and vitamin E oil and place on a medium flame.Once it starts to boil remove from heat and pretty carefully pour over the rose petals. Stir the mixture and cover with a lid.Allow the rose petals to infuse in the oil for about 2 days.Strain the mixture into a clean makeup jar.Daily massage this rose infused oil on your lips twice or thrice in a day to lighten dark lips fast.

Benefits of Using Rose Infused Lip Balm

The extracts of rose petals provide a natural pinkish tinge to your lips.It contains vitamin C, B, K and antioxidants that help smooth lip surface and gives a silky feel.Sunflower oil and vitamin E oil intensely nourishes dry, chapped lips, helps in maintaining the moisture level of lips and unveil pinkish lips.


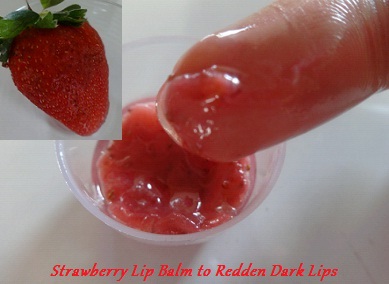
3.Juicy Strawberry Homemade Lip Balm to Redden Dark Lips

remedies for soft pink lips

Ingredients you Need to Prepare Strawberry Lip Balm

1 Fully Ripe Strawberry

3 Tbsp of Coconut Oil

2 Tbsp of Glycerin

Method & Direction to Use Strawberry Lip Balm to Lighten Dark Lips

Mash strawberry into a smooth paste.Add the coconut oil and glycerin.Mix well and transfer the contents to a clean lip balm jar. Daily massage this balm on your lips before going to bed to discover pink soft lips.

Benefits of Using Strawberry Lip Balm

A delicious lip balm to get irresistibly soft and pink lips naturally.Strawberries are packed with vitamin C and antioxidants that help improves lip texture, protects from the harmful UV rays and makes the lips appear healthier and smoother.Blended with soothing and natural emollients coconut oil and glycerin, it deep conditions lips and keeps it soft, supple and moist.


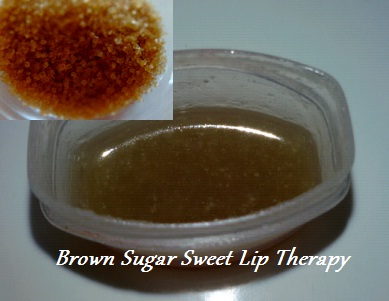
4.Brown Sugar Sweet Lip Therapy for Super Soft Pink Lips

sweet lip balm therapy pink lips

Ingredients you Need 

1 Tbsp of Brown Sugar

2 Tbsp of Sweet Almond Oil

2 Tbsp of Unsalted Melted Butter or Pure Ghee

Method & Direction to Use to Lighten Dark Lips

Dissolve brown sugar in slightly warm almond oil and butter.Transfer the contents to a clean lip balm jar.Daily massage this sweet sugar oil on your lips twice in a day for naturally soft pink lips.

Benefits of Using Brown Sugar Sweet Lip Balm

One of the best homemade remedy to get smooth, pink lips fast.Brown sugar is a super exfoliant.It scrubs away dark, dead skin cells from the surface of your lips and softens dry lips.The high concentration of vitamin B and E in sweet almond oil provides long-lasting moisture, whereas butter prevents darkening of lips, make your lips soft and hydrated and helps in getting back the original luster and color of your lips.

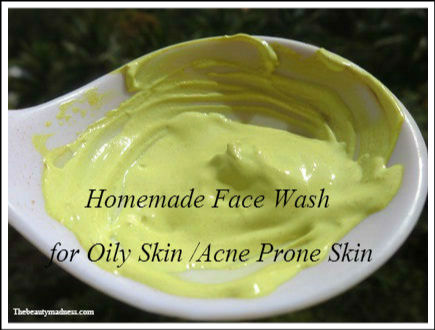
Homemade Face Wash For Oily Skin / Acne Prone Skin

Homemade face wash is gentle, safe and easy alternative to commercial facial cleanser for oily skin.It dissolves deep-seated impurities and surface dirt without causing breakouts.This all natural homemade face wash reduces oiliness without drying the skin, fights acne-causing bacteria, doesn’t clog pores and leaves the skin feel notably clean, supple and glowing.

homemade face wash for oily skin


Why Homemade Face Wash for Oily Skin?

Oily skin is more susceptible to pimples, acne, blackheads, whiteheads and large pores.These skin types need special care and attention.Commercial face washes contain certain chemicals, emulsifiers and fragrances that can worsen oily skin and cause breakouts.

On the other hand, homemade natural face wash, smoothly sweeps away impurities and excess oil from the skin surface and make your skin feel squeaky clean without making it feel tight and stretchy.The natural ingredients effectively fight bacteria causing pimples and acne thus giving the skin a pure oil-free glow.Homemade face wash is inexpensive and safest for these skin types.


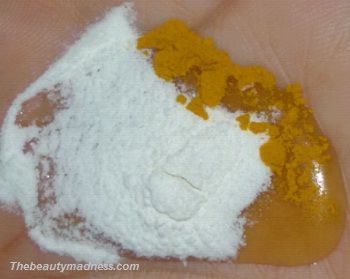
Ingredients you Need to Prepare Homemade Face Wash for Oily Skin

face wash for oily skin

Baking Soda – It contains antiseptic, anti-inflammatory, cleansing and neutralizing properties advantageous for acne-prone or oily skin.

Organic Honey – It soothes and softens the skin.The antibacterial and anti-inflammatory properties contained in honey fights bacteria causing pimples and prevents infection.

Turmeric (Optional) – Packed with powerful antioxidants, anti-inflammatory, anti-bacterial properties, it is helpful in the treatment of numerous skin problems and also imparts fairness.


How to Use this Face Wash on Oily Skin

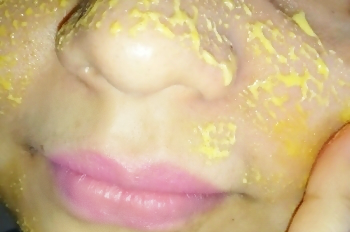
Wet your face with lukewarm water.Place a tsp of honey, a pinch of turmeric and 1/2 tsp of baking soda on your palms.Rub your hands together and gently massage into your skin in a circular motion for about 2 minutes. Concentrate more on the areas that are oily or greasy.Rinse your face with cool water and pat it dry with a soft towel.


homemade face wash natural


Amazing Skin Benefits 

This face wash contains natural ingredients that deeply cleanses and purifies your skin, removes build-up of dead skin cells on the surface and excess oil from the pores, baking soda and turmeric destroys acne/pimple causing bacteria and leaves skin clear and blemish free.Honey smoothens and softens skin texture.Using this regularly over a period of time leaves skin amazingly bright, youthful and pimple-free.

How to Lighten Skin with Raw Milk

Raw milk is an instant and fastest way to lighten your facial skin or any other parts of your body naturally.It is one of the most nutrient-rich foods in the world and is packed with proteins, enzymes, vitamins, minerals and lactic acid that works effectively for lightening the skin.Raw milk contains a high amount of saturated fats that relieves skin dryness and lactic acid in milk results in a lighter complexion.This ingredient works perfectly for whitening and softening skin.

Milk is one of my favorite ingredient and for more than 2 years, I have been using raw milk on my skin to treat various skin problems, to control melanin production and to achieve a lighter and flawless complexion.


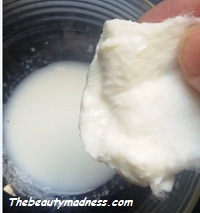
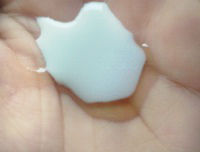
Pure Raw Milk – Take a cotton pad, soak it in raw cold milk and wipe your face thoroughly.Repeat this daily for about 2 times in a day for a fairer complexion.To lighten hands, legs and underarms dip a soft makeup brush in milk and apply.Let it sit for 5 minutes before you rinse with cool water.

raw milk


Homemade Milk Honey Face Wash – Commercial face wash can irritate dry and sensitive skin.Try this all natural, no foaming gentle face wash.Wet your face with lukewarm water.Place a tsp of organic honey and a tsp of raw milk on your palms.Rub your hands together and massage into your skin in a gentle circular motion for 2 minutes.Rinse with cool water.You skin looks deliciously soft and glowing.Use this regularly to lighten skin complexion.Honey and milk are natural moisturizers for dry skin.

milk and honey face wash


Milk and Cucumber – An effective way to lighten the complexion of your face and body is to apply a paste of cucumber juice and milk.Blend 3 peeled cucumber slices with a tbsp of thick milk and use it on the affected area to remove tan, rough and dark skin.It leaves the skin feeling refreshed, hydrated and brighter.If you have been suffering from dark patches and pigmentation then this is the perfect remedy for your skin.

cucumber juice for skin lightening


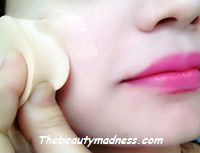
Perfect Smoothing Foundation – For a velvety smooth make-up finish and a naturally flawless complexion, mix a few drops of cold milk to your foundation and blend it into your skin.It imparts luminous shine and brightness to your skin, minimize fine lines and wrinkles naturally.Using regularly softens and smooths skin surface and lighten skin.

lighten skin tone


Whitening Milk Sugar Mask  – If you are a busy person and you don’t have much time to spare, try this quick powerful 5-minute milk-sugar whitening mask.Mix a tsp of sugar and aloe vera gel to 3 tbsp of raw milk.Stir until the sugar dissolves completely in milk.Apply 2 layers of this pack and then rinse your face with cool water after 5 minutes.Sugar cleans all kinds of skin impurities from the pores, aloe vera moisturizes and milk lighten the skin color.


Milk Turmeric Golden Facial Peel Off MaskGet a gorgeously fairer, firm and smooth complexion in 15 minutes with milk-turmeric peel off face mask.Dissolve a tbsp of gelatin powder in 2 Tbsp of warm milk.Add a pinch of turmeric and combine well.Wipe your skin with rose water and apply 3 layers of this mixture.Once it dries completely, peel the mask in an upward direction.It naturally lighten skin complexion and bestows a golden glow.

Note – Egg white can be used as a substitute for gelatin.

lighten skin milk


Whitening Body Pack – To lighten body complexion naturally try this ancient skin beauty secret.Make a fresh paste of besan powder, raw milk and lemon juice.Rinse with warm water and then apply a thick paste using a brush.Do this 5 minutes daily before taking bath to lighten dark skin cells and to boost fairness.It also prevents sun damage and keeps the skin soft and healthy.

milk besan lighten skin


Face & Body Fairness Mud PackGetting bright, smooth and glowing skin is now easy.Simply make a paste of raw milk mix with a tsp of sandalwood powder and a spoonful of mud.Apply a layer of this paste on any part of your body to lighten skin naturally.Let it sit for 10 minutes before you wash it off.Rich in minerals and nutrients this pack removes deep-seated impurities from the skin and leaves the skin with a healthy white glow.

fairness pack


Rejuvenating Milk Ice Cubes Instantly revitalize and refresh dark rough skin with milk ice cubes.Pour raw milk into ice cube trays and freeze.Daily massage ice cube in the morning to improve the skin tone and for a smooth soft texture.

ice pack 


Milk Moisturizing Fairness Body Lotion If you really want to get rid of dryness and boost radiance to your skin then try this simple beauty tip.Mix a tbsp of vaseline moisturizing lotion to a tbsp of raw milk and few drops of rose water and use it to reveal glowing and fairer skin.Massage regularly at night before going to bed.

MUST READ

5 Must-Have Kay Beauty Products That Will Transform Your Makeup Game!

0
Created by Katrina Kaif, Kay Beauty brings you five must-have products that blend luxury with performance. These essentials will take your makeup game to...